Is It OK to Turn On Hardware Virtualization? A DIY Guide
Learn whether it's safe to enable hardware virtualization (VT-x/AMD-V), how to verify compatibility, steps to enable in BIOS/UEFI, and how to confirm its impact on system performance for DIY enthusiasts.

is it ok to turn on hardware virtualization? You can usually enable it if your CPU and motherboard support VT-X or AMD-V. This feature lets your OS run virtual machines efficiently. Before enabling, confirm CPU support, access BIOS/UEFI, locate the Virtualization setting (Intel VT-X or AMD-V), enable it, save changes, and reboot. Then verify virtualization via your OS utility.
What is hardware virtualization and why enable it?
Hardware virtualization is a technology that allows a single physical machine to run multiple virtual machines (VMs) as if they were separate, independent computers. This capability is built into many modern CPUs and supported by most consumer and enterprise motherboards. For DIY enthusiasts, hardware virtualization enables testing new operating systems, isolating risky experiments, and practicing server or software configurations without needing multiple physical computers. It also underpins popular hypervisors, containers, and security sandboxes that help you learn and work more efficiently. According to The Hardware, turning on hardware virtualization is a standard step in building safe, flexible test environments, especially when you plan to run VMs or sandbox software. When used correctly, virtualization can speed up learning, reduce hardware costs, and make it easier to reproduce issues across different OS versions. However, it’s important to verify compatibility first and to understand the steps involved to avoid misconfigurations that could affect system stability. In short, virtualization is a powerful feature—worth turning on when you have a compatible CPU and motherboard, and a clear plan for how you’ll use the VM environment.
How to check if your system supports virtualization
Before you flip any switch in BIOS, confirm that your hardware and firmware can support virtualization. On Windows, you can check under Task Manager > Performance to see whether Virtualization shows as Enabled or Disabled. This simple check can save you from hunting for a feature that your system cannot activate. On Linux, you can look for the VMX flag (Intel) or the SVM flag (AMD) in /proc/cpuinfo, which indicates hardware support. If you see either of these entries, you’re likely able to enable virtualization, provided your firmware doesn’t block it. Some devices in managed environments or laptops from certain vendors may hide or lock virtualization behind policy, even if the CPU supports it. The Hardware notes that in many mainstream systems you’ll find virtualization support at the BIOS/UEFI level, but enabling it is only half the job—you must also verify your OS can recognize and use the feature with a hypervisor or virtualization software.
How to enable virtualization in BIOS/UEFI
Enabling hardware virtualization requires a reboot into the BIOS/UEFI settings, and exact menus vary by motherboard and firmware vendor. Start by restarting the computer and pressing the designated key during POST (commonly Del, F2, or Esc). Once in the firmware interface, navigate to the Processor, Advanced, or Security section and locate the virtualization option. It may be labeled Intel VT-x, AMD-V, Virtualization Technology, SVM, or Vander virtualization. Change the setting to Enabled, then save and exit. Some boards expose additional choices like nested virtualization or IOMMU/VT-d controls; these can be left at defaults for basic VM use but may be needed for more advanced configurations. If you can’t find the option, consult the motherboard manual or manufacturer’s support site. The Hardware reminds DIYers to record the original BIOS setting before making changes so you can revert if something goes wrong, and to ensure your BIOS is up to date, as firmware updates can improve compatibility.
Verifying virtualization is active in your operating system
After rebooting, verify that the firmware change is recognized by your OS and that virtualization features are usable. On Windows, open Task Manager and inspect the Performance tab—Virtualization should show as Enabled. You can also run simple commands or use Hyper-V requirements to confirm that the hypervisor can launch. On Linux, check that the kvm kernel modules are loaded (e.g., lsmod | grep -i kvm) and that your CPU flags still include vmx or svm. Finally, attempt a lightweight VM with your preferred hypervisor (Hyper-V, VirtualBox, or VMware) to confirm that VM creation and boot work without errors. The goal is to have a running VM that demonstrates hardware-assisted virtualization is truly active rather than merely present in firmware.
Common pitfalls and safety considerations
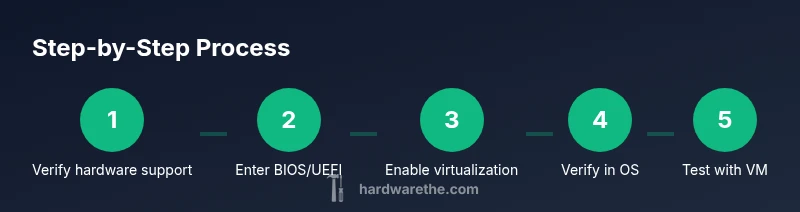
Turning on virtualization is generally safe for most home and hobby use, but several pitfalls can trip you up. Some laptops and desktops used in managed environments may have policy-based restrictions from IT departments that prevent enabling virtualization. Hypervisors can conflict with each other; if you enable Hyper-V on Windows, other virtualization tools may require specific settings or feature toggles to function concurrently. BIOS/UEFI changes should be saved carefully, and you should avoid changing additional settings you don’t understand. Nested virtualization — running a VM inside a VM — is possible in some scenarios but performance is often poor and configuration is more complex. For safety, back up important data before changing firmware, ensure you have a reliable power source during BIOS updates (to avoid bricking the system), and consider updating your motherboard firmware to the latest revision before enabling virtualization. The Hardware emphasizes taking a cautious, phased approach: verify hardware support, enable in BIOS, confirm in OS, then test with a small VM before expanding usage.
Authority sources
- Intel Virtualization Technology overview (Intel VT-x) on Intel's official site.
- Microsoft Hyper-V documentation for enabling virtualization on Windows Server and Windows 10/11.
- Linux kernel documentation for KVM and virtualization support on kernel.org. These sources provide vendor-verified guidance and best practices to complement hands-on testing.
Tools & Materials
- A computer that supports hardware virtualization (Intel VT-x or AMD-V)(Confirm in CPU/motherboard specs or firmware features)
- Access to BIOS/UEFI setup(Usually by pressing Del, F2, or Esc during POST)
- Motherboard manual or official support page(For exact menu names and location of the setting)
- Reliable power supply / backup plan(Recommended to prevent data loss during BIOS changes)
- Backup storage or system image(Best practice before changing firmware or OS settings)
Steps
Estimated time: Total: 20-40 minutes including reboot cycles and initial VM test
- 1
Verify hardware support
Check your CPU and motherboard for virtualization support (VT-x or AMD-V). Use your OS tools to confirm presence of virtualization flags and BIOS visibility. If the hardware lacks support, you cannot enable it. This step prevents wasted effort.
Tip: If you’re unsure, check the vendor’s CPU spec sheet and your motherboard CPU support matrix. - 2
Enter BIOS/UEFI
Restart the computer and press the designated key to enter BIOS/UEFI during POST (Del, F2, Esc). Navigate carefully to the processor or security settings where virtualization is listed.
Tip: Note the current state before changing anything so you can revert if needed. - 3
Enable virtualization
Find the option labeled Intel VT-x, AMD-V, Virtualization Technology, or SVM and set it to Enabled. Some boards separate nested virtualization or IOMMU; leave these off unless you have a specific use case.
Tip: If you don’t see the option, consult the manual or manufacturer support site. - 4
Save and exit
Save your changes and exit BIOS/UEFI. The system will reboot with virtualization enabled. Do not power off during this save step.
Tip: Keep a note of the exact option name and location for future changes. - 5
Boot into OS and confirm
After reboot, verify the OS recognizes virtualization. For Windows, check Task Manager > Performance for Enabled. For Linux, confirm vmx or svm in /proc/cpuinfo and try to launch a lightweight VM.
Tip: Run a quick VM test with your preferred hypervisor to validate the setup. - 6
Install or configure hypervisor
Install or configure your chosen hypervisor (Hyper-V, VirtualBox, VMware). Ensure it can utilize hardware virtualization to run VMs efficiently. Consider conflicts with other virtualization products.
Tip: If you plan to run multiple hypervisors, research compatibility options and potential nesting issues. - 7
Monitor performance and safety
Observe VM performance and system stability after enabling virtualization. Keep firmware updated and back up important data. If issues arise, revert BIOS changes or test with a clean OS image.
Tip: Document changes and outcomes to reproduce or undo configurations later.
FAQ
What is hardware virtualization and why should I enable it?
Hardware virtualization separates software from hardware by allowing multiple virtual machines to run on one physical computer. Enabling it makes testing, development, and isolation easier and more efficient. It also underpins common virtualization platforms.
Hardware virtualization lets one computer run several virtual machines safely. This makes testing and learning easier and more efficient.
How do I check if my CPU supports VT-x or AMD-V?
Look for virtualization flags in your OS: vmx or svm in CPU info indicates support. On Windows, check Task Manager under Performance, and on Linux, inspect /proc/cpuinfo. If the flags aren’t present, your hardware or firmware may not support virtualization.
Check task manager or /proc/cpuinfo for vmx or svm flags to confirm support.
Will enabling virtualization affect gaming performance?
Enabling virtualization typically does not degrade gaming performance unless you run multiple VMs concurrently. If you do, allocate resources carefully and monitor GPU and CPU usage to maintain balance.
It usually won’t affect gaming unless you run VMs at the same time; monitor resource allocation.
Can I enable virtualization on laptops?
Yes, many laptops support virtualization, but some models lock features behind firmware updates or vendor policies. Use the manufacturer’s instructions to enable VT-x/AMD-V in BIOS/UEFI.
Many laptops support it, but some models may lock features; check with the manufacturer.
What should I do if virtualization is disabled by policy?
If policy blocks virtualization, consult your IT admin or device owner. Do not override enterprise policies. You may still learn using non-virtualized environments or personal devices where policy isn’t restricting.
If policy blocks it, talk to your admin. Don’t bypass enterprise rules.
Is nested virtualization possible, and is it recommended for beginners?
Nested virtualization is possible on some CPUs and hypervisors, but it can reduce performance and add complexity. For beginners, start with a single VM and ensure basic virtualization works before attempting nesting.
It's possible but often slower; start simple with one VM first.
Watch Video
Main Points
- Verify CPU and firmware support before enabling virtualization
- Enable the feature in BIOS/UEFI with care
- Confirm activation in the OS with a test VM
- Be aware of potential hypervisor conflicts