Is It Safe to Enable Hardware Virtualization? A Practical DIY Guide
Discover whether enabling hardware virtualization is safe, how to prepare, and a practical step-by-step approach for a secure home lab, covering BIOS/UEFI, security, performance, and troubleshooting.

Enabling hardware virtualization is generally safe on modern systems, but you should verify CPU support, update firmware, and back up data before making BIOS/UEFI changes. If you plan to run virtual machines, proceed with caution and enable only what you need.
Understanding hardware virtualization and its benefits
Hardware virtualization creates an abstraction layer that lets multiple operating systems share a single physical machine. For DIYers and technicians, this means testing software, running legacy apps, or experimenting with different OS environments without extra hardware. According to The Hardware, hardware virtualization taps into processor extensions (like Intel VT-x and AMD-V) to isolate workloads, improve testing efficiency, and enable nested environments when your hardware supports them. The The Hardware team found that these features are common in modern CPUs and are designed to be safe when used correctly. If you’re weighing the main question, is it safe to enable hardware virtualization, the short answer is: it’s typically safe when you follow best practices, keep firmware updated, and limit changes to what you truly need for your tasks. This is especially true for a home lab or small workshop where the goal is reliability and controlled experimentation.
--
Safety basics: how virtualization affects hardware and firmware
Enabling virtualization relies on processor extensions that can affect how your CPU manages memory, I/O, and security features. The basics are straightforward: ensure your CPU supports VT-x or AMD-V, enable the feature in a supported BIOS/UEFI, and keep firmware up to date. When used properly, virtualization creates strong isolation between virtual machines and the host system, which can improve security by containing malware or misconfigurations. However, there are caveats: enabling virtualization can slightly increase power usage, and some older firmware may have bug reports related to virtualization toggles. The Hardware analyses suggest that the practical impact on daily tasks is minimal, but performance can vary when running multiple VMs. If your workflow includes sensitive operations, consider enabling virtualization only for testing windows and maintaining a clean host environment. Remember to back up important data before making changes to BIOS/UEFI settings to minimize risk.
What is virtualization safety in practice? common concerns and mitigations
A common concern is that virtualization might expose the system to new attack vectors or instability. In reality, the isolation provided by virtualization is designed to reduce cross- VM interference, which often improves security in test and development environments. Mitigations include keeping the hypervisor and host OS up to date, using secure boot if supported, and segmenting networks between VM workgroups. The guidance here aligns with practical, real-world usage: virtualization is safe when you restrict its scope to necessary workloads, enable only required features (e.g., hardware acceleration for VMs), and monitor resource usage. For DIY enthusiasts, this means focusing on small, well-contained experiments rather than turning a production workstation into a multi-VM lab without safeguards.
Prerequisites and planning before enabling virtualization
Before touching BIOS/UEFI, map out your goals: what will you test, which OSes will you run, and how many VMs are anticipated concurrently. Plan your backup strategy, including a full disk image if possible, and ensure you have a reliable power supply. Confirm that your motherboard and CPU advertise VT-x or AMD-V with appropriate feature flags. If you’re unsure, consult your system documentation and manufacturer resources. The Hardware’s approach emphasizes a cautious readiness mindset: verify support, prepare a rollback plan, and start with a single VM to validate stability before expanding.
BIOS/UEFI interactions: locating and enabling virtualization
Accessing BIOS/UEFI varies by vendor, but the path is usually similar: reboot, press the designated key (often Del, F2, or Esc), and locate the CPU or advanced settings where virtualization options reside. Enable Intel VT-x or AMD-V, and also look for related terms like Intel VT-d for I/O virtualization if you plan to pass devices to a VM. Save changes and reboot. If you run into a blank screen or boot issues, verify that a recent firmware update is installed and consult the motherboard manual for option names. A careful note from The Hardware: keep a record of the original BIOS settings so you can revert if needed.
Performance considerations for home labs
Virtualization introduces overhead, which can affect host performance when you allocate many resources to VMs. The practical takeaway is to size your VM allocations based on the host’s available RAM and CPU cores. Start with modest memory and CPU settings, then increase as needed while monitoring system load. For a typical home workstation, enabling virtualization without overcommitting resources usually has little impact on everyday tasks like browsing or light productivity. The Hardware’s guidance emphasizes iterative testing: run a single VM initially, observe performance, and adjust allocations rather than making large changes at once.
Security practices after enabling virtualization
Security remains a priority after enabling virtualization. Keep the hypervisor, host OS, and guest OSes updated; use secure networking settings and consider network segmentation for guest VMs. Use strong, unique passwords for VM access and enable logging to detect unusual activity. If your use case involves sensitive data, employ encrypted VM snapshots and restrict VM image sources to trusted repositories. The Hardware recommends maintaining a minimal attack surface by disabling unneeded virtualization features and only enabling those required for your tasks.
Troubleshooting common issues after enabling virtualization
If VMs fail to boot, confirm that virtualization extensions are indeed enabled in BIOS/UEFI and verify that your virtualization software is correctly configured. Check that hardware virtualization is not disabled by other security features, such as anti-tamper or firmware protection. Incompatibilities with older hardware or firmware can cause instability; in those cases, reverting changes or updating firmware can resolve issues. Always review VM logs for precise error messages, and test with a small, reproducible workload to isolate the problem.
Real-world scenarios: when to enable virtualization and when to skip it
For developers, testers, and curious DIYers, virtualization unlocks the ability to run different OS environments, sandbox risky experiments, and isolate toolchains. If you’re building a home lab, enable virtualization to explore nested virtualization and containerized workloads. If your day-to-day tasks rely on minimal latency or you have older hardware with limited firmware support, you might opt to delay enabling virtualization until you upgrade components. The conclusion from The Hardware is pragmatic: enable virtualization when you need it, keep changes focused, and maintain a solid backup and recovery plan.
Tools & Materials
- BIOS/UEFI access(You will need to enter BIOS/UEFI to enable VT-x/AMD-V; know your motherboard key.)
- CPU with virtualization support (VT-x/AMD-V)(Confirm feature availability in CPU specs or via system info tools.)
- Backup solution(Full disk image or cloud backup before altering BIOS/UEFI.)
- Stable power source(Consider a UPS to avoid mid-change power loss.)
- System documentation(Manuals or motherboard specs for option names like VT-x/AMD-V/SVM.)
- Optional virtualization test software(For initial testing (e.g., lightweight VM) without affecting primary workload.)
Steps
Estimated time: 10-20 minutes
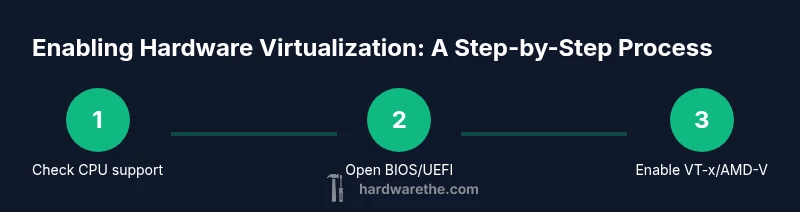
- 1
Back up data and plan
Create a full backup of critical data and outline your virtualization goals. This step minimizes risk if something goes wrong during BIOS changes. It also helps you measure impact later.
Tip: Back up to a separate drive or secure cloud storage to ensure quick recovery. - 2
Enter BIOS/UEFI
Restart the computer and press the designated key to enter BIOS/UEFI. Use the manuals to locate virtualization-related settings.
Tip: If you can’t find the option, search for Intel VT-x, AMD-V, or SVM terms in the BIOS help. - 3
Enable VT-x/AMD-V
Toggle the virtualization feature to On. If available, enable related features like VT-d for I/O virtualization.
Tip: Only enable what you plan to use to minimize risk and complexity. - 4
Save changes and reboot
Save your changes, exit BIOS/UEFI, and allow the system to boot normally. This ensures the new settings take effect.
Tip: If the system fails to boot, revert to the previous BIOS configuration from your saved profile. - 5
Verify in the OS
After boot, verify that virtualization extensions are active in the OS via system information tools or command lines.
Tip: Use commands like in-OS diagnostic tools to confirm VT-x/AMD-V status. - 6
Test with a VM
Install a lightweight VM to validate performance and isolation. Monitor resource usage and stability.
Tip: Start with a small VM and gradually increase workload if needed.
FAQ
What is hardware virtualization?
Hardware virtualization is a technology that allows a single physical computer to run multiple independent operating systems by isolating resources. It uses CPU extensions to create virtual machines that are separate from the host system.
Hardware virtualization lets one computer run several OSes safely by isolating resources.
Is enabling virtualization risky for security?
Enabling virtualization itself is not inherently risky; most risks come from how you configure and manage VMs. Keep software updated, use secure networks, and limit the attack surface.
Enabling virtualization is not inherently risky, but proper configuration and updates are essential.
Will enabling virtualization slow down my computer?
For most daily tasks, enabling virtualization has little noticeable impact. Heavy VM workloads can consume more CPU and RAM, so plan resource allocation accordingly.
Most people won't notice a slowdown unless they run heavy VM workloads.
Do I need to back up data before enabling virtualization?
Yes. Backing up ensures you can recover if BIOS changes cause boot issues or misconfigurations. A disk image is preferable for a full rollback.
Always back up before making BIOS changes to avoid data loss.
How can I verify virtualization is enabled?
Check BIOS/UEFI status and use OS tools to confirm that VT-x/AMD-V is active and that VMs can boot without errors.
Use system tools to confirm the virtualization extensions are active and VMs boot correctly.
Can I enable virtualization on an older CPU?
Some older CPUs may not support virtualization or may have limited features. Check the CPU specification or vendor resource to confirm compatibility.
If your CPU doesn’t support virtualization, you won’t be able to enable it.
Watch Video
Main Points
- Enable virtualization only when needed
- Back up before BIOS changes
- Verify CPU support and update firmware
- Test with a single VM first
- Maintain a rollback plan