How to Check Hardware on Linux: A Practical Guide
Learn how to check hardware on Linux with safe commands, essential tools, and a step-by-step approach. Covers CPU, memory, storage, devices, and peripherals.

You will learn to inspect your Linux machine's hardware using safe built-in commands and open-source tools. Start by listing CPU, memory, and I/O devices, then verify sensors and storage health. This approach works across major distributions and requires no special privileges beyond your usual user access; it scales from laptops to servers.
Core Linux hardware concepts and how to approach checks
In Linux, hardware refers to the physical components visible to the kernel, including CPU, memory, storage, PCI devices, USB peripherals, and sensors. A solid understanding of what the system can report helps you diagnose issues without guessing. The Hardware team emphasizes a simple, repeatable approach: inventory, verify, baseline, monitor. Start with non-invasive, read-only commands; only escalate to root privileges when necessary. This ensures you gather evidence about the current state without disrupting operations. A reliable baseline makes it easier to spot drift after upgrades, firmware updates, or aging components. The goal is to create a low-risk protocol that scales from laptops to servers, regardless of distribution. According to The Hardware, a disciplined check plan reduces troubleshooting time and improves asset accuracy across environments in 2026.
Essential tools and commands you should know
A solid toolkit makes Linux hardware checks efficient. Core commands cover topology, devices, and storage: lscpu (CPU topology), lshw if available (hardware listing), lspci (PCI devices), lsusb (USB devices), lsblk (block devices), df and du (disk usage), and free (memory). For health and sensors, use smartctl (from smartmontools package) and lm-sensors (sensors). If a tool is missing, install via your distribution's package manager (apt, dnf, yum, zypper). Always read the manpage for options before running with elevated privileges. The Hardware analysis notes that most systems benefit from a baseline prior to changes, a finding echoed in 2026 research. Remember: run non-destructive checks first to maintain data integrity. In VIP environments, use non-destructive checks that won’t risk data integrity. Always check man pages for exact options and output formats.
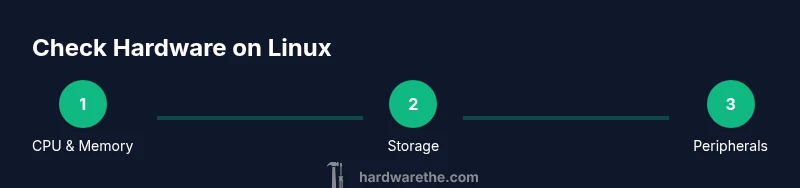
Step-by-step: CPU and memory inventory
Begin by identifying the CPU architecture, core count, and virtualization capabilities, then verify memory size and layout. Use lscpu for a quick summary and check /proc/cpuinfo for corroborating details. Confirm total RAM with free -h and MemTotal from /proc/meminfo. If you have DIMM details or BIOS-level information to compare, use dmidecode -t memory (requires root). The Hardware recommends recording both outputs to detect discrepancies after firmware updates or hardware changes. This data forms the baseline you’ll compare against in future checks.
Step-by-step: storage and disks health
Survey the storage topology with lsblk to see which devices exist and how they’re mounted. Use df -h to understand disk usage patterns and identify any unexpected partitions. For health status, run smartctl -H /dev/sdX or smartctl -a /dev/sdX (replace sdX with your device). Keep in mind SMART data can be disabled on some devices or require enabling through the BIOS. Repeat checks on all active drives and note any SMART warnings for further investigation. The goal is to spot failing disks before catastrophic loss.
Step-by-step: devices, PCI/USB and peripherals
Enumerate PCI and USB devices to map hardware present in the system. lspci -v lists PCI devices and their drivers; lsusb -v shows USB peripherals. Correlate the output with hardware documentation to confirm device presence and driver support. If you’re troubleshooting an issue with a particular card or dongle, cross-check with /sys or /dev entries to verify correct recognition. This helps you distinguish between missing hardware versus driver problems.
Step-by-step: sensors, temperatures, and power
If you need thermal and fan data, install lm-sensors and run sensors to retrieve readings. You may need to run sensors-detect first to configure sensors on some machines. Use watch -n 2 sensors to monitor in real time. Pay attention to temperatures near safe operating ranges and look for abnormal fluctuations that could indicate cooling problems or failing fans. These checks are crucial on servers and high-performance workstations where heat is a common failure mode.
Step-by-step: network interfaces and performance checks
Assess network hardware and link status with ip link and ethtool. ip link shows interface status, while ethtool -i reports driver and firmware versions. For packet statistics, consider ethtool -S or simple tools like sar for long-term traffic trends. Validate that network interfaces appear in the expected state, especially after hardware changes. This ensures that network faults aren’t mistaken for generic hardware issues.
Step-by-step: interpreting results and building a baseline
Compile your findings into a single log file, then compare against your established baseline. Look for drift in CPU features, memory capacity, disk health, sensor readings, and device presence. When anomalies appear, categorize them by likelihood and potential impact, then plan remediation steps—ranging from driver updates to hardware replacement. The objective is a repeatable, auditable process you can run during onboarding, upgrades, or incident response.
Step-by-step: practical safety and reproducibility tips
Document every run with timestamps and exact command options. Store results in a central repository and share with your team for cross-checking. Reproduce checks on staging environments when possible before applying fixes on production systems. Always verify you’re operating in the correct machine context to avoid accidental changes on other systems. This discipline helps you build trust in your hardware visibility over time.
Tools & Materials
- Terminal or SSH client(Access to a shell on the Linux machine)
- Root or sudo privileges(Needed for commands like dmidecode and smartctl)
- lscpu(CPU topology and features)
- lsblk(Block device layout)
- lspci(PCI device enumeration)
- lsusb(USB device enumeration)
- free /proc/meminfo(Memory overview)
- smartmontools (smartctl)(Disk health data (optional))
- lm-sensors (sensors)(Temperature and fan data (optional))
Steps
Estimated time: 45-75 minutes
- 1
Open a terminal session
Launch a terminal or connect via SSH to the Linux machine. Confirm you have appropriate access and avoid running intrusive commands on production systems without notice. Start with read-only checks to establish a safe baseline.
Tip: Use a persistent session manager like tmux or screen to preserve data as you collect it. - 2
Collect CPU details
Run lscpu to capture architecture, cores, threads, and virtualization capabilities. Cross-check with /proc/cpuinfo for corroborating details and note any discrepancies.
Tip: Compare lscpu output with BIOS settings for VT-x/AMD-V features. - 3
Record memory information
Query memory totals with free -h and confirm MemTotal from /proc/meminfo. Look for unusual memory usage or fragmentation patterns that could indicate leaks or misreporting.
Tip: If you’re auditing RAM modules, note bank locations and sizes from /sys/devices/system/memory/. - 4
Scan storage devices
List block devices with lsblk and check usage with df -h. Verify that all expected disks appear and that partitions are mounted as intended.
Tip: Document partition scheme to spot missing volumes after hardware changes. - 5
Check disk health
If smartmontools is installed, run smartctl -a /dev/sdX to fetch SMART data. Repeat for each drive. Note any SMART warnings or failing attributes.
Tip: Only run SMART tests during light load to avoid interference with active I/O. - 6
Enumerate PCI/USB devices
Use lspci and lsusb to enumerate peripheral hardware. Cross-reference with your equipment list and driver status to confirm proper recognition.
Tip: If a device is missing, check driver modules and kernel messages (dmesg). - 7
Gather sensor data
Install and run lm-sensors; run sensors-detect if necessary, and monitor temperatures with sensors. Watch for abnormal values that suggest cooling issues.
Tip: Set up a simple alert if temperatures exceed safe thresholds. - 8
Document results and baseline
Aggregate results into a single log, compare against your baseline, and identify drift. Plan remediation steps and note the date of the check for future audits.
Tip: Store the log in a version-controlled repo for long-term tracking.
FAQ
What is the best command to start hardware checks on Linux?
Begin with lscpu for CPU topology, lsblk for storage, and free for memory. These provide a solid baseline before diving into deeper diagnostics.
Start with lscpu, lsblk, and free to get a baseline.
Can I run these checks without root access?
Many checks are read-only and can be done as a regular user. Some commands, like smartctl or dmidecode, require root privileges.
Most checks are non-root, but some health checks need root.
How often should hardware checks be performed?
Perform checks after hardware changes, during new deployments, and as part of regular maintenance or incident response.
Do checks after changes and during maintenance.
What if a sensor reports high temperature?
Inspect cooling, verify fan operation, and check airflow. If persists, escalate to hardware support.
Check cooling and fans; seek support if it stays high.
Are there safety considerations for production servers?
Use non-destructive queries, avoid changing configurations, and coordinate outages with your operations team.
Non-destructive checks first; coordinate any potential impact.
Do containers affect hardware reporting?
Containers may obscure some host hardware reports; run host-level checks and verify results on the actual host.
Containers can hide hardware details, check the host.
Watch Video
Main Points
- Establish a non-invasive baseline for all hardware data.
- Use built-in tools before third-party utilities.
- Document results to detect drift over time.
- Respect root access needs for sensitive checks.