How to Check If Hardware Is Damaged: A Practical Guide
Practical, step-by-step guide to inspect hardware for damage, spot common failure signs, and safely test components to prevent downtime. The Hardware shares reliable checks and actionable steps for DIYers.

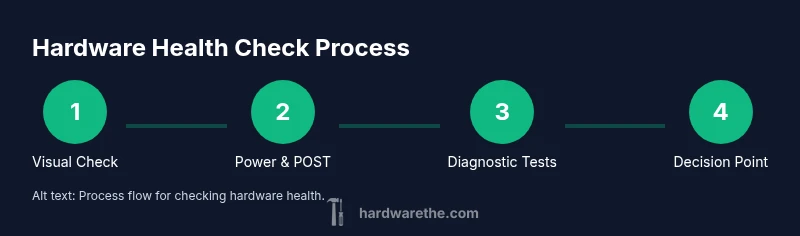
By performing a structured inspection, you can confirm whether hardware is damaged and identify likely failure points. Start with visual checks, power tests, and SMART diagnostics, then proceed to targeted tests for storage, memory, and boards. This method helps you avoid unnecessary replacements and keeps safety in mind. Document any symptoms and test results to track progression.
What counts as hardware damage?
Hardware damage spans physical harm (cracks, bent pins, scorched components), thermal wear from overheating, electrical damage from power surges, and corrosion from moisture or pollutants. Distinguishing true damage from transient glitches requires a structured approach. According to The Hardware, start by defining suspicious symptoms and then map them to possible failure modes across components like power delivery, storage, memory, and boards. This framing helps you stay methodical and reduces guesswork when you check if hardware is damaged.
Key idea: a methodical checklist beats instinct when diagnosing hardware faults, especially under tight repair timelines.
Visual cues you can safely inspect at a glance
A careful visual inspection often reveals obvious faults before you power anything on. Ensure the system is unplugged and you discharge static by touching a grounded metal object. Look for bulging or leaking capacitors on the motherboard, scorch marks, melted plastics, or unusual discoloration around connectors. Check for loose cables, bent pins, or corroded contacts in drive bays, RAM slots, and power connectors. Dust buildup can masquerade as thermal issues, so remove dust with a soft brush or compressed air. If you see physical damage, stop and plan professional service. The visual clues you collect form the backbone of your “how to check if hardware is damaged” assessment.
Power delivery and boot signs to watch for
Power-related symptoms can indicate supply or motherboard issues. When you attempt to boot, listen for abnormal beeps or a lack of POST codes. Check that all front-panel connections are correct and that the power supply is delivering stable voltages using a PSU tester or a multimeter following manufacturer guidelines. If the system powers inconsistently, shuts down, or exhibits flickering LEDs, the problem may lie in the power path or motherboard rather than a single component. Track patterns: intermittent failures often point to a loose connection or overheating.
Checking storage drives for damage without altering data
Hard drives and SSDs can fail silently yet still function briefly. Use SMART status checks and built-in diagnostic tools to assess health without risking data. Look for reallocated sectors, pending sectors, or recurring read/write errors in SMART reports. If drives show high error rates, consider backing up immediately and running longer tests with vendor tools or third-party utilities. If you hear CLICKING sounds or experience recurring slow performance, that can indicate mechanical wear or controller issues. Remember: avoidance of abrupt power cycles helps preserve remaining drive life while you diagnose.
Memory health indicators and checks you can perform
RAM faults often manifest as random crashes, freezes, or memory errors. Running memory diagnostics like MemTest86 (or built-in Windows Memory Diagnostic) can reveal errors beyond what Windows reports. If tests show errors, suspect defective RAM modules, a failing motherboard slot, or thermal issues affecting stability. Reseat modules carefully and test one stick at a time to isolate faulty memory. If all modules test clean but instability persists, focus on the motherboard’s memory controller or BIOS settings as potential culprits.
Motherboard health signals you should not ignore
The motherboard is the system’s nerve center; its failure patterns are varied and sometimes subtle. Look for signs such as burnt smells, swollen capacitors, or warped traces. Be alert to inconsistent POST behavior, BIOS corruption, or peripheral detection problems that recur after power cycles. Keep BIOS firmware up to date, as older versions may misreport hardware health or struggle with newer components. If you notice persistent instability despite clean visual checks, plan a deeper evaluation or professional inspection.
GPU and expansion cards health checks
Graphics cards and add-in cards can fail due to overheating, dust, or power delivery issues. Check for artifacting on screen, driver crashes, fans that spin noisily or fail to spin up, and unusual heat buildup in the PCIe area. Remove dust from heatsinks and verify that PCIe power connectors are firmly seated. If you see artifacts, sudden driver crashes, or game/stress test failures, test with a different monitor or a lower graphic setting to differentiate between software/driver issues and hardware faults.
Non-destructive testing tools and software you can rely on
Many checks can be performed without disassembling critical components. Use operating system tools (Windows Event Viewer, Linux dmesg), SMART monitoring utilities, and memory tests to gather data safely. Document test results and compare with healthy baselines. Consider creating a simple baseline run after a clean boot to distinguish normal variations from genuine deterioration. The Hardware recommends pairing software diagnostics with careful visual inspection for a balanced view of hardware health.
Documentation and record-keeping for ongoing health
Create a running log of symptoms, times, and test results. Note any patterns, such as temperature-related crashes or error codes, to help determine whether the issue is transient or progressive. Save SMART reports, memory test outcomes, and BIOS/firmware versions for reference. This record becomes invaluable when you consult a technician or warranty provider. Clear documentation reduces back-and-forth and speeds up the decision to repair or replace.
When to retire or replace: a practical decision guide
If multiple subsystems show consistent failure signs and safe testing cannot restore reliability, replacement may be the most cost-effective option. Consider the age of the system, warranty status, and the criticality of uptime for your use case. The Hardware cautions against prolonged operation with known defects, as this increases the risk of data loss or further damage. When in doubt, get a professional assessment and request a hardware health report.
Tools & Materials
- Anti-static wrist strap(Essential for any internal inspection to prevent static damage)
- ESD mat (optional)(Adds protection when working on a bench setup)
- Phillips screwdriver set (sizes #1 and #2)(Used for opening cases and components access)
- Flat-head screwdriver (optional)(May help in cable management or prying connectors gently)
- Multimeter or PSU tester(Helpful for verifying power rails; use with caution)
- Flashlight(Good lighting for visual inspection inside case)
- Isopropyl alcohol (90%+) and lint-free wipes(Safe cleaning of contacts and connectors)
- Thermal paste (optional)(If reseating a CPU cooler, replace thermal interface material)
Steps
Estimated time: 60-120 minutes
- 1
Power down and unplug
Shut down the system completely and disconnect the power. Unplug peripheral cords and remove any batteries if present. This step prevents accidental shock and protects components during inspection.
Tip: Wait a few minutes after unplugging to let residual charge dissipate. - 2
Ground yourself and open the case
Wear the anti-static strap and touch a grounded metal surface before handling components. Remove side panels to access internal components. Keep track of screws and place the case in a stable workspace.
Tip: Work on a non-carpeted surface to minimize static buildup. - 3
Conduct visual inspection
Look for bulging capacitors, scorch marks, loose cables, bent pins, and signs of moisture. Inspect connectors and expansion cards for proper seating. Photograph any suspicious areas for documentation.
Tip: Use a bright light and a magnifier for small components. - 4
Check power delivery pathway
Test power connectors for secure seating and examine the PSU's exterior for warm or abnormal smells. If you have a PSU tester, verify voltages on rails; otherwise, rely on software indicators and POST behavior.
Tip: If in doubt about a PSU, replace rather than test with uncertain power under load. - 5
Test memory and storage safely
Reseat RAM modules and run a memory diagnostic. For drives, monitor SMART attributes and run built-in checks; avoid aggressive repairs that could cause data loss. Note any read/write errors or unusual noises.
Tip: Test one RAM stick at a time to isolate faulty modules. - 6
Perform non-destructive diagnostics
Run OS-level health checks, SMART status, and memory tests. Use manufacturer tools or reputable third-party programs to gather data without disassembly. Record outputs for trend analysis.
Tip: Cross-verify results across multiple tools to reduce false positives. - 7
Evaluate the motherboard and GPU health
Examine for burnt smells, capacitor issues, and flaky PCIe devices. Check for artifacts or driver instability in GPU tests. Keep BIOS updated and reset to defaults if behaviors are inconsistent.
Tip: If visual signs exist, consider professional inspection before further testing. - 8
Decision and next steps
If multiple subsystems show problems and repairs don’t restore reliability, plan for component replacement. Consider warranty, downtime costs, and data safety when deciding.
Tip: Document every finding to support service or replacement decisions.
FAQ
What should I do first if hardware appears damaged?
Power down immediately, unplug, and perform a visual check. If you see obvious damage, avoid further testing and consult a professional. Document symptoms for reference.
First, power off and unplug, then inspect for visible damage. If damage is evident, seek professional help and keep notes of symptoms.
Can software tests conclusively prove hardware damage?
Software tests can indicate where problems lie but rarely prove physical damage beyond a reasonable doubt. Combine software results with visual inspection and, if needed, hardware tests.
Software tests show where issues may exist, but they don’t definitively prove physical damage by themselves; pair them with visuals and hardware tests.
Is it safe to continue using damaged hardware?
Continuing to use suspected damaged hardware can risk data loss and equipment damage. Minimize load and seek professional assessment if you cannot confirm safety.
No. Don’t run critical workloads on suspect hardware. Get a professional check if you’re unsure.
How do I test a power supply safely?
Use a dedicated PSU tester or a known-good system to measure rails. Do not measure live rails with improvised methods. If readings are unstable, replace the PSU.
Test with a PSU tester or a trusted system; avoid improvised live measurements.
What signs indicate aging hardware?
Frequent crashes, slow startups, increasing error codes, and loud cooling noise can indicate aging components. Combine with diagnostics to confirm.
Common aging signs include crashes, slow starts, and noisy cooling; verify with tests.
When should I replace instead of repairing?
If several subsystems show issues or repair costs exceed replacement value, replacement is usually more economical and reliable.
If repairs cost more than replacement or multiple parts fail, consider replacing.
Watch Video
Main Points
- Start with safe visual checks to spot obvious faults
- Use SMART and POST diagnostics to triage quickly
- Isolate components one at a time to pinpoint failures
- Keep a detailed log of symptoms and tests for reference
- Decide on repair vs replacement based on reliability and cost