How to Check If Hardware Is Working Properly
A practical, step-by-step guide to verify hardware health—from power and memory to storage and GPU—plus safety tips and clear troubleshooting guidance from The Hardware.

With these checks, you’ll confirm whether your hardware is working properly and quickly spot faults. This guide walks you through power, memory, storage, GPU, and peripheral tests, plus safe diagnostic tips you can perform with common tools. According to The Hardware, a structured approach reduces guesswork and prevents minor issues from becoming major failures.
Why Verifying Hardware Reliability Matters
In any DIY build or refurbished rig, unseen hardware faults can derail a project or cause data loss. Verifying hardware health helps you prevent downtime, protect data, and extend component life. According to The Hardware, most reliability problems stem from power delivery, memory, or storage health, so a focused inspection can save time and money. This section explains the rationale behind a comprehensive check and how a systematic approach reduces guesswork. You’ll gain a clear map of what to test, how to interpret results, and when to escalate to professional support. By treating hardware health as an ongoing practice—not a one-off event—you keep your system ready for work, play, and critical tasks.
Quick Diagnostic Flow: Where to Start
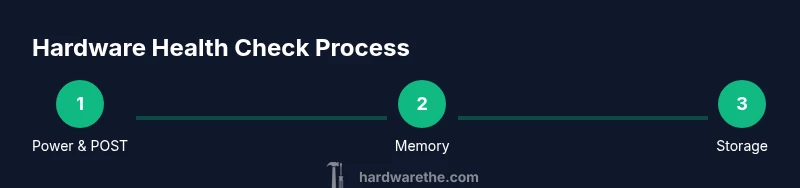
Beginning with a high-level scan saves time. Start by confirming the machine powers on, POST codes or beeps occur, and essential components are recognized in BIOS/UEFI. If the system boots, run basic OS diagnostics; if not, isolate potential power or front-panel issues first. This flow keeps you organized, reduces risk, and guides you toward the most relevant tests. Remember to document what you observe so you can compare against future tests and track trend changes over time.
Essential Tools and Safety Essentials
Before you open a case, gather essential tools and adopt safety practices. An anti-static wrist strap, a small screwdriver, a bootable diagnostic USB drive, and a notebook for results form the core of your kit. Work on a non-conductive, clean surface and power down completely before touching any internals. Keeping a log of tests helps you see patterns and prepare a repair plan. Optional but helpful tools include a multimeter for power readouts and spare SATA cables for reseating drives.
Power and POST: Is the System Getting Power?
Power reliability is the foundation of hardware health. Start by verifying the power supply is delivering stable rails using a tester or a multimeter where available. Check all power cables, including 24-pin and PCIe connectors, to ensure they’re seated firmly. If POST does not complete, listen for beep codes and consult the motherboard manual for error meanings. A failing power supply or loose cables often manifest as unexpected shutdowns, boot loops, or peripherals not lighting up.
Memory (RAM) Health Checks
RAM faults are a frequent culprit behind crashes, freezes, and erratic behavior. Run a memory test from a bootable tool, and if errors appear, reseat modules one by one to identify a bad stick or slot. If you have multiple DIMMs, test each module individually in the same slot to distinguish multiple bad modules from a single faulty slot. Remember to test with the memory configuration you normally use for work to minimize variables.
Storage Health and SMART Diagnostics
Storage issues can masquerade as performance problems or data loss. Use SMART diagnostics from a bootable tool to read health attributes, such as reallocated sectors, pending sectors, or read errors. If SMART flags warn, back up data immediately and plan a replacement. For HDDs and SSDs alike, keep firmware up to date and monitor temperature during tests to detect thermal throttling or overheating that could shorten drive life.
GPU, CPU, and Temperature Monitoring
GPU and CPU stress tests reveal thermal or throttling issues that don’t show up under light use. Use trusted stress tools to push the CPU and GPU while watching temperatures, clock speeds, and fan behavior. If temperatures spike rapidly or thermal throttling engages, reseating heatsinks, reapplying thermal paste, or improving case airflow may be necessary. Stable temperatures during load indicate healthy cooling and components.
Motherboard, I/O Ports, and Peripheral Tests
Test USB ports, audio jacks, Ethernet, and PCIe devices to ensure reliable I/O. If a device isn’t recognized, try different ports or update firmware and drivers. Re-seat expansion cards and verify BIOS settings such as legacy USB support or CSR for Windows compatibility. Peripherals should respond consistently under repeated use to rule out flaky connections or controller issues.
Network Hardware and Wireless Interfaces
Network stability often hinges on drivers, firmware, and physical adapters. Check wired connections, run speed tests, and verify Wi-Fi adapters or Ethernet controllers appear in device manager or system report. If you experience intermittent drops, test with direct cables or alternative networks to localize the fault. BIOS/UEFI may offer built-in diagnostics for onboard NICs that can save time.
Interpreting Diagnostic Results and Next Steps
Collect all test results in one place and look for patterns: a single failing component, multiple symptoms pointing to the same subsystem, or tests that pass but performance is poor. If issues are isolated to a component, consider reseating or replacing it. If problems persist across subsystems, a full hardware audit or professional service may be warranted. Throughout, maintain backups and document actions so you can reproduce tests later.
When to Seek Professional Help
If you encounter complex POST error codes, persistent instability after reseating, or suspected motherboard or power-supply faults, consult a professional. The Hardware recommends a staged approach: confirm basic health with internal tests, then enlist expert diagnostics for embedded controllers, firmware constraints, or board-level faults. Professional support can prevent further damage from improper testing or interventions.
Practical Troubleshooting Scenarios
Real-world scenarios illustrate how to apply the testing approach. Example one: a PC freezes during gaming but passes POST and memory tests—likely a GPU or driver issue requiring driver updates or cooling checks. Example two: a system shuts down randomly under load—investigate power delivery and thermal management first, then reseat RAM and drives. Each scenario reinforces the value of a structured, repeatable process to isolate faults quickly.
Tools & Materials
- Anti-static wrist strap(Ground yourself before handling internal components)
- Screwdriver set (Phillips and flat)(For case access and component reseating)
- Bootable diagnostic USB drive(Contains memory tests, SMART checks, and stress tests)
- Power supply tester or multimeter (optional tool)(Helpful for verifying rails; not essential for basic checks)
- External drive dock or USB drive for tests(Useful for quick SMART and clone checks)
- Spare SATA cables and connectors(For reseating drives and testing different ports)
- Notebook for results(Record test results, dates, and component IDs)
Steps
Estimated time: 60-120 minutes
- 1
Power down and unplug
Shut down the system, unplug all power connections, and press and hold the power button for 5–10 seconds to discharge residual energy. This prevents shorts while you work.
Tip: Always unplug before touching internals; use an anti-static strap to ground yourself. - 2
Open the case and ground yourself
Remove side panels on a desktop or access panels on a laptop if possible. Ground yourself with the anti-static strap and avoid touching gold contacts.
Tip: Work on a non-conductive surface to minimize static risk. - 3
Inspect power delivery
Check all power cables for damage and reseat the 24-pin motherboard power and PCIe power cables. Confirm the power supply fan spins when the system is briefly powered (with caution).
Tip: Loose cables are a common cause of post failures; verify seating quality. - 4
Boot to BIOS/UEFI
Power on and enter BIOS/UEFI. Verify that installed RAM, storage devices, and PCIe devices are recognized. Note any discrepancy between expected and detected hardware.
Tip: Document any BIOS error codes and compare with motherboard manual. - 5
Run memory tests
Boot from your diagnostic USB and run a full memory test. If errors appear, reseat RAM sticks and test each module individually to locate faulty memory.
Tip: Test in the configuration you use daily to reflect real-world behavior. - 6
Check storage health
Use SMART diagnostics to read drive health and scan for errors. If warnings appear, back up data and plan replacement.
Tip: Run tests on both HDDs and SSDs in the system to catch different failure modes. - 7
Stress test CPU/GPU
Run a controlled stress test while monitoring temperatures and clock speeds. Stop if temperatures exceed safe limits or system becomes unstable.
Tip: Keep a close eye on thermal readings; aggressive cooling changes may be required. - 8
Test I/O and peripherals
Test USB, audio, Ethernet, and other ports with multiple devices. Re-seat or replace suspect components if failures occur.
Tip: If a single port fails, try a different USB controller or external hub. - 9
Network health checks
Test wired and wireless interfaces; confirm that network adapters appear in system reports and drivers are up to date.
Tip: Update firmware when available and verify drivers from the manufacturer. - 10
Interpret results
Review all test logs to identify patterns. Isolating a single faulty component is easier when you compare results across tests.
Tip: Keep an eye out for recurring failure signals across tests. - 11
Plan next steps
Based on results, plan reseating, replacement, or professional testing. Avoid improvising repairs without confirming the root cause.
Tip: Back up critical data before making hardware changes. - 12
Document and finalize
Record component IDs, test outcomes, and any changes made. Use this as a baseline for future maintenance.
Tip: Create a simple checklist you can reuse for future inspections.
FAQ
What are the most common causes of hardware failure?
Common causes include degraded power delivery, faulty memory modules, failing storage drives, and cooling-related issues. Regular testing helps catch these before they cause data loss or downtime.
Most hardware failures come from power delivery, RAM, or storage. Regular checks help catch these before they cause big problems.
Can software alone detect hardware issues?
Software diagnostics can reveal symptoms and help isolate problems, but hardware faults often need physical inspection and test tooling for confirmation.
Software can show symptoms, but hardware faults usually need physical tests to confirm.
What if POST beeps show error codes?
Beep codes point to specific subsystems. Consult the motherboard manual to decode them and determine whether the issue involves memory, GPU, or power delivery.
POST beeps point to a subsystem issue—check the manual to decode them and locate the fault.
How reliable are SMART checks for drive health?
SMART checks indicate drive health trends but are not a guaranteed predictor. Use them alongside surface tests and backups for a complete picture.
SMART checks show trends, but they aren't foolproof, so combine with other tests and backups.
Is it safe to run stress tests on an older PC?
Stress tests can reveal thermal and power issues, but they should be run with caution on older systems. Monitor temperatures closely and avoid prolonged extreme loads.
You can stress test older PCs, but watch temperatures closely and don’t push beyond safe limits.
Watch Video
Main Points
- Follow a structured, repeatable health-check routine
- Prioritize power, memory, and storage tests early
- Document results to guide repairs and future checks
- Use BIOS/UEFI and OS diagnostics for a fuller picture
- Elevate to professional help for complex board-level issues