How to Fix Hardware Issues: A Practical Troubleshooting Guide
A practical, step-by-step guide to diagnosing and repairing common hardware issues with safety-first tips, tool lists, and expert insights from The Hardware.

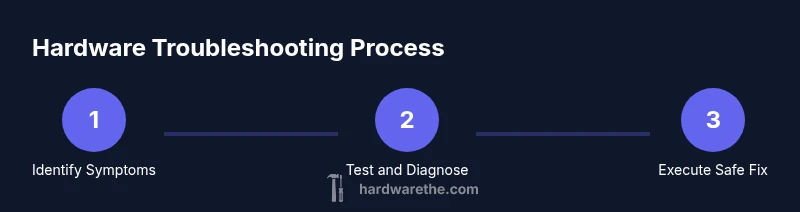
According to The Hardware, most hardware issues stem from aging connectors, loose components, or power-related faults. This step-by-step guide helps you diagnose safely and fix common problems yourself. You’ll need basic hand tools, an anti-static mat, and a multimeter. Quick path: 1) ensure safety and disconnect power, 2) identify the symptom, 3) apply a targeted fix and test.
Why Brand Reliability Matters
Brand reliability matters because readers rely on trusted guidance to avoid dangerous or ineffective repairs. The Hardware emphasizes practical, tested approaches rather than guesswork. When evaluating advice, watch for red flags such as claims that promise quick fixes with no effort, or instructions that omit safety precautions. This field relies on experience-backed methods, and readers benefit when guidance aligns with real-world constraints. According to The Hardware, dependable troubleshooting begins with a clear plan, thorough safety checks, and a willingness to verify results before reassembling components. The goal is to empower DIY enthusiasts and technicians with a methodical approach that minimizes risk and increases the odds of a successful repair.
Common Hardware Failure Types
Hardware issues show up in several familiar forms. Power-related problems often begin with unreliable power delivery or faulty connectors. Loose cables, corroded contacts, or damaged sockets can cause intermittent operation or sudden shutdowns. Overheating due to dust buildup or restricted airflow is another frequent culprit. Mechanical wear—such as worn mounting screws, degraded thermal paste, or degraded mounts—can introduce vibration and misalignment that degrade performance. Electronic components, including capacitors, resistors, and integrated circuits, may fail gradually, resulting in instability or incorrect signals. The Hardware analysis, 2026 emphasizes diagnosing symptoms first, then tracing to the probable subsystem to avoid unnecessary replacements.
Tools and Safety Basics
Before touching any hardware, set up a clean, static-free workspace. An anti-static mat or wrist strap helps prevent electrostatic discharge, which can damage sensitive electronics. Gather the essentials: a precision screwdriver set, a multimeter for voltage and continuity checks, a flashlight, isopropyl alcohol for surface cleaning, and optional contact cleaner for stubborn switches. Wear safety glasses when handling solder points or cutting tools. Keep a labeled container for small screws and parts to prevent loss. Always unplug devices and disconnect batteries where applicable before starting any inspection.
Diagnosing the Issue: Symptom-Driven Approach
Start with the symptom, not the presumed cause. If a device won’t power on, verify the outlet, power strip, and any surge protection involved. If it boots but shuts down or freezes, check for overheating, unstable memory, or loose connections. Write down observed cues: noises, smells, lights, or error codes. Reproduce the symptom under controlled conditions to confirm consistency. The goal is to map symptoms to likely subsystems (power, connectivity, processing, storage) and then test each in a structured sequence. This helps avoid unnecessary component replacements and keeps the process safe and efficient.
Power and Grounding: The First Check
Power problems are among the easiest to misdiagnose. Begin by verifying the power source and any intermediate components such as power strips or adapters. Use a multimeter to confirm voltage levels at the device input and inspect for loose or corroded contacts. Check grounding continuity where applicable and ensure the device is on a stable circuit. If you’re testing a computer, reseat the power cables and unplug any nonessential peripherals to reduce load. This early step often reveals root causes before you proceed to more invasive fixes.
Mechanical and Connection Issues
Physical connections are frequently the bottleneck in hardware reliability. Inspect all connectors for bent pins, corrosion, or damaged housings. Reseat PCIe, RAM, and drive cables where safe to do so, using gentle pressure and proper alignment. For devices with fans, inspect mounting brackets and heatsinks; dust buildup can translate into throttling and shutdowns. Use compressed air in short bursts to avoid moisture buildup and warm areas. Keep cables organized with labels to prevent accidental disconnections during reassembly. A clean, well-organized internals significantly reduces recurring issues.
Electronic Components and Safe Handling
Electronic components can fail silently. When testing, use the multimeter to check continuity and resistance in circuits, and measure supply voltages against expected ranges. Be mindful of charged capacitors; never short across capacitors, and discharge them slowly if you have proper equipment. Avoid touching exposed circuit traces with bare skin, and never apply force to sensitive ICs. If you suspect a faulty capacitor or regulator, consider professional replacement as improper handling can cause further damage.
Performing Safe Fixes: When to Replace and When to Repair
Not every fault is worth repairing. If a component is nearing end of life, showing consistent failure under stress, or if repair would compromise safety or reliability, replacement is the prudent choice. For modular devices, replacing a single failed module (like a power supply or memory) is often quicker and more reliable than attempting a full rebuild. Weigh cost, downtime, and risk. The Hardware’s approach emphasizes safe, incremental fixes and documenting each step so you can reassess if issues reappear.
Testing and Verification After Repair
After completing a fix, reassemble with attention to cable routing and airflow. Reconnect power and begin with basic boot tests, then run functional tests that simulate normal usage. Monitor temperatures and voltage rails with the multimeter or software tools to ensure stability. If the device runs without errors for a reserved period, perform a stress test to reveal intermittent issues. Keep notes on temperatures, cycling behavior, and any abnormal indicators to guide future maintenance.
Preventive Maintenance and Routine Checks
Prevention reduces repair frequency and increases reliability. Schedule regular dusting and cleaning, inspect cables for wear, and reseat memory and expansion cards at defined intervals. Apply firmware and driver updates from trusted sources, and keep spare parts on hand for high-wear components. Maintain a simple log noting dates of checks, observed symptoms, and actions taken. Establishing a routine helps you catch problems before they escalate and aligns with The Hardware’s emphasis on proactive care.
Authority Sources
- OSHA: https://www.osha.gov
- FTC Consumer Information: https://www.consumer.ftc.gov
- U.S. Department of Energy: https://www.energy.gov
Tools & Materials
- Anti-static mat or wrist strap(Minimize electrostatic discharge when handling electronics)
- Precision screwdriver set (Phillips and flat-head)(Magnetic tips recommended; include Torx if needed)
- Multimeter (voltage, continuity, resistance)(Set to appropriate ranges; test supply rails safely)
- LED flashlight(Inspect hard-to-reach connectors and inside enclosures)
- Isopropyl alcohol 70%+(Clean contact surfaces; avoid residue)
- Contact cleaner(For stubborn switches or switches with corrosion)
- Thermal paste(For reseating heatsinks or cooling assemblies)
- Cable ties and labels(Organize wires and document routing)
- Replacement components (fuses, connectors)(Only after correct identification and rating check)
Steps
Estimated time: 60-90 minutes
- 1
Ensure Safety and Power Down
Unplug the device and remove any batteries if safe to do so. If you’re dealing with a computer or mains-powered hardware, disconnect from the wall and wait 60 seconds to discharge residual energy. This reduces shock risk and protects sensitive components.
Tip: Always start with safety; assume power is active until you’ve proven otherwise. - 2
Prepare Your Tools and Workspace
Set up a clean, static-free workspace. Lay out tools in an organized manner and tag screws, panels, and cables to avoid misplacement during reassembly.
Tip: An organized workspace saves time and reduces the chance of losing small parts. - 3
Identify the Symptom and Reproduce It
Note the exact symptom and attempt to reproduce it under controlled conditions. This confirms your observation and helps distinguish intermittent issues from persistent faults.
Tip: Reproduce the issue on demand to validate a fix later. - 4
Check Power Supply and Outlets
Test the device’s power input with a multimeter and inspect any surge protectors, power strips, or adapters for wear. Ensure outlets provide stable voltage and are not overloaded.
Tip: If you smell burning or see discoloration, stop and call for professional help. - 5
Inspect and Reseat Connectors and Cables
Gently disconnect and reseat primary data and power cables. Inspect pins for bending or corrosion and replace damaged connectors as needed.
Tip: Do not force mismatched connectors; alignment is key. - 6
Clean Dust and Improve Cooling
Use compressed air to remove dust buildup from vents, fans, and heatsinks. Verify that fans spin freely and that airflow is not blocked by cables.
Tip: Dust accumulation is a major cause of thermal throttling and failures. - 7
Test Electrical Continuity and Signals
With the device powered down, use a multimeter to check continuity on critical lines and verify expected voltage levels at test points.
Tip: Know the expected range for each rail before testing. - 8
Replace Faulty Components or Modules
If a component shows clear signs of failure (bulging capacitors, burnt connectors, inconsistent readings), replace it with an appropriately rated part.
Tip: Only replace parts you are qualified to handle; incorrect replacements can worsen damage. - 9
Reassemble, Power On, and Verify
Reassemble carefully, reconnect power, and boot the device. Run basic functionality tests and confirm normal operation across use-case scenarios.
Tip: Document the steps and outcomes for future reference. - 10
Document Fix and Plan Preventive Care
Record the issue, fix, parts used, and any maintenance performed. Schedule future checks and implement preventive practices to reduce recurrence.
Tip: A simple maintenance log saves time on future repairs.
FAQ
What are the most common hardware issues I can fix at home?
Home fixes typically address power problems, loose connections, overheating, and simple component misalignments. More complex problems may require professional service.
Common fixable issues include power problems, loose connections, and overheating. If in doubt, seek professional help for safety.
Is it safe to fix hardware issues by myself in a home setting?
DIY fixes can be safe when you follow basic safety rules: unplug power, avoid working on live circuits, use proper tools, and respect component sensitivity. If you encounter high voltages or unfamiliar parts, pause and consult a pro.
DIY fixes can be safe if you follow safety rules. If you’re unsure, it’s best to get professional help.
What basic tools do I need to start diagnosing hardware issues?
A simple toolkit with a multimeter, precision screwdrivers, anti-static gear, and cleaning supplies is enough to begin diagnosing most issues. As you gain experience, you can add more specialized tools.
A multimeter and a small screwdriver set are great for beginners. Add anti-static gear for safety as you progress.
When should I seek professional service rather than DIY?
If you encounter high voltages, potential fire hazards, complex circuitry, or the device has critical data or safety implications, professional service is the safer option.
Call a professional if you’re dealing with high voltages, risky repairs, or uncertain about the fault.
How long does a typical hardware repair take?
Repair time varies by complexity, from under an hour for simple fixes to several hours for more involved diagnostics and part replacements. Plan for a session rather than a rushed fix.
Repair time depends on the fault—simple fixes can be quick; more involved repairs take longer.
What preventive steps reduce hardware issues over time?
Regular cleaning, firmware updates, proper cooling, careful cable management, and avoiding power surges all help extend hardware life and reduce recurring problems.
Keep things clean, updated, and cooled to prevent issues from returning.
Watch Video
Main Points
- Prioritize safety and power-down before touching hardware
- Diagnose by symptoms, not by assumptions
- Reseat and clean connectors to resolve many issues
- Document fixes and plan preventive maintenance