What Causes Hardware Malfunctions: A Comprehensive Troubleshooting Guide
Discover the common causes behind hardware malfunctions and follow a practical, step-by-step troubleshooting approach to diagnose and fix issues safely. This guide from The Hardware covers power, connections, overheating, firmware, and when to call a professional.

The most common causes of hardware malfunctions are wear and misalignment from repeated use, voltage fluctuations, or loose connections. Start with the simplest fixes: reseat cables, clean dust, and test with a known-good power source. If issues persist, inspect for overheating, firmware issues, or damaged components. These quick checks can often restore function without expensive service.
Why hardware malfunctions happen
What causes hardware malfunctions can seem mysterious, but patterns emerge when you trace failures to the fundamentals: power quality, physical wear, environmental stress, and software interactions. According to The Hardware, many malfunctions start with simple issues that escalate if left unchecked. Start by asking: did this device recently experience a power surge, heat buildup, or a loose connection? Are there dusty vents or aging fans? By mapping symptoms to root causes, you can avoid unnecessary repairs and protect valuable equipment.
Most devices rely on a chain of systems: electrical supply, connectors, cooling, control firmware, and software drivers. A fault in any link can ripple through the device, causing intermittent errors, freezes, or reboot loops. You’ll often hear terms like "random reboot" or "no power at startup"; these are signals to inspect the basics first. The goal is to stabilize the environment (clean, ventilated, properly powered) and verify that each link in the chain behaves as expected.
Common culprits by category
- Power and power quality: Unstable voltage, bad outlets, or faulty surge protectors can make hardware behave erratically.
- Connectors and cables: Loose, corroded, or damaged cables cause intermittent connectivity and corrupted signals.
- Cooling and environment: Dust buildup, blocked vents, or degraded fans raise temperatures and trigger protective shutdowns.
- Firmware and drivers: Outdated or incompatible software can misreport sensor data or clash with hardware components.
- Physical wear: Aging components, worn bearings, or degraded solder joints increase failure likelihood over time.
Understanding these categories helps you prioritize checks. For each category, test with a known-good component or controlled replacement to confirm whether the fault lies there. Always begin with safe, low-risk tests and proceed to more invasive checks only if needed.
Safe at-home diagnosis checklist
- Power: Confirm the device is plugged into a known-good outlet; try a different outlet or power strip.
- Connections: Reseat external cables and tighten any loose connectors.
- Cleaning: Power down, unplug, and carefully remove dust from vents, fans, and heat sinks.
- Temperature: Monitor temperatures during use; ensure adequate airflow and cooling.
- Software: Check for driver or firmware updates; review recent changes that could affect hardware behavior.
- Documentation: Note exact symptoms, time of occurrence, and any recent changes to build a troubleshooting flow you can follow.
Following this checklist in order reduces guesswork and helps you reproduce the issue consistently.
Diagnostic mindset: symptom → diagnosis → fix
Treat each symptom as a clue. Start with the simplest explanation and test your hypothesis with a quick fix before moving to replacements. For example, a reboot loop is often caused by power or firmware issues rather than a failed motherboard. If a fix resolves the symptom, test again to ensure the problem is fully cleared. If not, continue down the diagnostic path.
Fixing the most frequent problem first
In many cases, the top culprit is a loose connection or dust buildup. Reseat power cables, PCIe/RAM connectors, and data cables while the device is powered off and unplugged. Clean vents and recheck fan operation. After each adjustment, run a quick test to see if the fault recurs. If the device stabilizes, document what you did and which symptom disappeared. If instability returns, move to the next suspected cause and escalate only when required.
When to escalate and safety notes
If you are uncertain about handling internal components, stop and contact a qualified technician. Never probe live circuits with tools or metal conductors. Use proper anti-static precautions and work on a non-conductive surface. If a diagnosis suggests a failing component that may be unsafe to replace, replace with a known-good part in a controlled environment. Seek professional help sooner rather than later if power problems persist after basic checks.
Prevention: extend hardware life and avoid future malfunctions
- Schedule regular cleanings to prevent dust buildup and overheating.
- Use quality power sources and surge protection; avoid cheap adapters for critical devices.
- Keep firmware and drivers up to date, but verify compatibility before upgrades.
- Store and operate equipment within recommended environmental ranges (temperature, humidity).
- Maintain a simple, repeatable troubleshooting flow so you can react quickly to new symptoms.
By building habits around these practices, you reduce the frequency and impact of malfunctions and keep devices running longer.
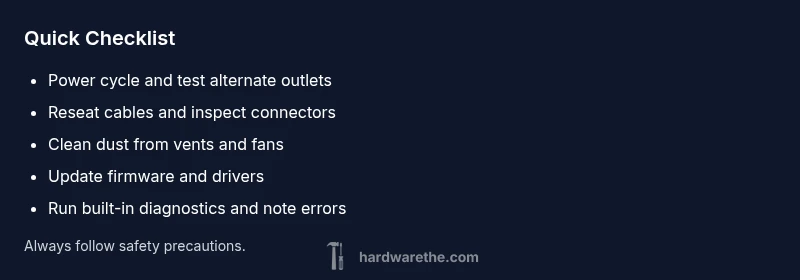
Steps
Estimated time: 45-60 minutes
- 1
Power cycle and basics check
Begin by performing a full power cycle: shut down, unplug, wait 30 seconds, and plug back in. Then test the device on a known-good outlet or power strip. This step rules out simple power delivery issues that masquerade as complex faults.
Tip: Keep a note of the exact time you perform the cycle and any errors observed. - 2
Inspect external connections and ports
With the device powered off, reseat all external cables and connectors. Check for bent pins, corrosion, or loose USB, HDMI, or data cables. After reseating, power on and observe whether the symptom persists.
Tip: Use a flashlight to inspect ports for hidden debris or damage. - 3
Check cooling and ventilation
Ensure vents are unobstructed and fans are spinning normally. Clean dust from heat sinks, fans, and filters. Improve airflow by relocating the device away from walls or heat sources if needed.
Tip: Do not run devices on soft surfaces like beds that can block ventilation. - 4
Run built-in diagnostics
Use manufacturer-provided diagnostic tools (or reputable bootable utilities) to run memory, GPU, and storage tests. Record any error codes for deeper research or professional staff.
Tip: If possible, test components individually by swapping in known-good parts. - 5
Update firmware and drivers
Check for the latest firmware/BIOS and driver updates from the vendor. Apply updates in a controlled manner and reboot to verify whether the issue resolves.
Tip: Back up important data before applying firmware updates. - 6
Plan for repair or replacement
If symptoms persist after all safe at-home steps, decide whether a repair or replacement is appropriate based on component criticality and cost. Document findings to share with a technician.
Tip: Keep a record of all tests and results to aid diagnosis.
Diagnosis: Device randomly reboots or stalls during use, with intermittent startup failures.
Possible Causes
- highPower quality issues (outlets, surges, or unstable voltage)
- highLoose or damaged cables and connectors
- mediumOverheating due to dust, blocked vents, or degraded cooling components
- lowFirmware or driver conflicts
Fixes
- easyTest with a known-good power outlet and surge protector; measure supply voltage if possible
- easyReseat all internal and external cables and secure connectors
- easyClean dust from vents and improve airflow; re-seat cooling components if comfortable
- mediumUpdate firmware/BIOS and drivers; rollback if issues started after update
- hardReplace faulty component (PSU, RAM, GPU) if symptoms persist
FAQ
What is the most common cause of hardware malfunctions?
Power quality issues and loose connections are among the most common culprits. Environmental factors like dust and heat frequently contribute as well. Starting with these basics helps you triage quickly.
Power issues and loose cables are the top culprits. Start by checking connections and cleanliness to begin troubleshooting.
How can I safely test power supply and cables?
Use a known-good outlet and a tested surge protector. Reseat all accessible cables and verify connectors are secure. If you’re not trained to measure voltages, avoid using a multimeter on live equipment.
Try a different outlet and reseat cables; don’t probe live components with tools.
Is overheating always the cause of random resets?
Overheating is a frequent factor but not the sole cause. Check dust buildup, ventilation, and cooling components to determine if heat is the culprit.
Overheating is common but not always the reason; investigate airflow and cooling.
When should firmware updates be avoided?
Update firmware to fix issues when updates are official and compatible. If updates cause problems, consider rollback and verify stability before reattempting.
Update carefully and rollback if issues appear after a firmware change.
Can software alone cause hardware malfunctions?
Software issues can mimic hardware symptoms, but true hardware faults persist after software fixes. Isolate hardware with controlled tests to confirm.
Software can look like hardware trouble, but true hardware faults stay after software fixes.
When is professional repair necessary?
If you’re uncomfortable handling internal components or tests indicate a failing part, contact a qualified technician for safe, reliable repair.
If in doubt, or if tests point to a bad part, seek professional help.
Watch Video
Main Points
- Inspect power and connections first
- Follow a logical diagnostic flow
- Prioritize simple fixes before replacements
- Know when to seek professional help