How to Check Hardware on PC: A Practical DIY Guide
Learn step-by-step how to check hardware on PC, from temperatures and RAM health to disk SMART status, with safe, practical methods for DIY enthusiasts. Build confidence to diagnose issues and improve reliability.

In this guide, you will learn how to check your PC's hardware health and configuration, from temps and voltages to RAM integrity and disk SMART status. You'll need a few basic tools and software utilities to perform safe checks. According to The Hardware, regular checks help prevent failures and optimize performance.
How to check hardware on pc: A practical guide
Keeping your computer healthy starts with a clear plan for checking hardware. Whether you’re diagnosing a sudden slowdown, unexpected reboots, or fan noise, knowing what to look for helps you act quickly. This guide covers common hardware indicators, why they matter, and a safe approach you can repeat on any Windows or Linux PC. It combines BIOS observations, OS-level diagnostics, and careful observation of physical components. According to The Hardware, regular checks save time and reduce repair costs by catching issues early. This article uses plain language, avoids jargon, and provides steps you can perform with basic tools and minimal risk. By following the steps here, you’ll build a repeatable routine that keeps your system reliable for years to come.
What you’ll need before you start
Before you touch any internal components, assemble a small, safe toolkit and a plan to record what you find. Essentials include a screwdriver suitable for PC cases, an antistatic wrist strap, a clean work surface, and a backup strategy in case you need to move or replace parts. A USB drive or notebook helps capture timestamps, serial numbers, and observed behavior. If you plan to test RAM or storage, include a bootable diagnostic USB and an external backup drive. Optional items like a multimeter can help verify voltages, but they are not required for a basic check. With these tools, you can perform a thorough hardware health check without risking data loss or damage.
Core components to inspect and why
Start with the core components that influence performance and stability. The CPU and its cooling determine whether the system remains responsive under load. The GPU matters for graphics and compute tasks. RAM health can cause intermittent freezes and crashes, while storage health affects boot times and file access. The motherboard and PSU provide the backbone and power; a failing PSU can damage other components. Finally, check cables and connectors for looseness which can cause intermittent devices to disappear or misbehave. Understanding how each part should behave helps you interpret diagnostics later rather than chasing symptoms.
Temperature, power, and fan behavior
Temperature readings are a primary signal of a healthy system, but they must be interpreted carefully. Use BIOS/UEFI readings or a trusted OS monitoring tool to observe CPU, GPU, and motherboard temps during idle and under load. Look for consistent fan speeds and smooth ramping as load increases; sudden spikes or stutters can indicate cooling issues or obstructions. Voltages should remain within the expected range for your hardware; large deviations may point to a failing power supply or a motherboard fault. Remember, some systems have protective designs that throttle performance before temperatures become dangerous; this is normal, but persistent throttling deserves attention.
Storage health and memory integrity checks
Disk health can be assessed with SMART data and surface checks; if the drive reports reallocated sectors or pending sectors, back up immediately and plan replacement. For memory, run a memory integrity test from a bootable diagnostic tool to check all modules and slots. If the test flags errors, test modules individually and reseat them to confirm if a single stick or a slot is the cause. User data should be backed up before running intensive tests, as some memory tests can exercise write operations. If you see consistent results across tests, you can proceed with confidence but plan replacement if issues persist.
Checking motherboard, PSU, and peripherals
Inspect the motherboard area for bulging capacitors, scorch marks, or corrosion. Check all power and data cables for secure connections; reseat graphics cards and expansion cards if present. For the PSU, ensure the unit is not overheating and that cables are not kinked; use a trusted method to verify rail voltages, but avoid opening a powered PSU. Peripherals like drives, keyboards, and USB hubs can also introduce problems; disconnect non-essential devices to isolate the fault. Document any unusual sounds, smells, or behavior and correlate them with tests you perform.
Safe testing practices and data backup
Always back up important data before performing non-routine hardware tests. Work on a grounded, non-static surface and wear an antistatic strap. If you must power down to reseat components, unplug the power cord and press the power button to discharge residual energy. Use bootable diagnostics to avoid risking your installed OS; keep logs of results and timestamps for future comparison. If you feel unsure about any step—especially anything involving voltage checks—pause and seek guidance.
Interpreting results and planning next steps
Combine your observations into a clear plan. If temperatures are within expected ranges and no errors appear, you’ve validated the current setup. If a test flags a fault in RAM or storage, replace or reseat the component and re-run tests to confirm. Driver updates or BIOS updates can mitigate some issues, but apply them carefully with a backup in place. When components fail or show persistent fault patterns, prioritize replacement and consider professional service for power or motherboard concerns. The goal is a stable baseline you can rely on, not a rushed fix.
Tools & Materials
- Screwdriver set (PH2 and flat-head)(For opening PC case and motherboard screws)
- Antistatic wrist strap(Ground yourself before handling components)
- Small parts tray(Keeps screws and connectors organized)
- Bootable diagnostic USB drive(Contains RAM test and OS diagnostics)
- Notebook and pen(Record observations and timestamps)
- External backup drive(Back up data before testing hardware)
- Digital multimeter (optional)(Useful for verifying voltages if you’re comfortable)
Steps
Estimated time: 1.5-2 hours
- 1
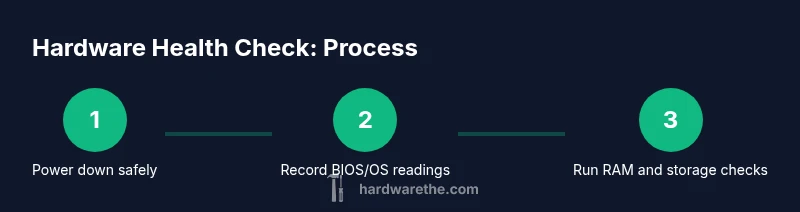
Power down and ground yourself
Shut down the PC completely, unplug the power cord, and press the power button for several seconds to discharge residual energy. Put on the antistatic wrist strap and work on a non-conductive surface to minimize ESD risk. Collect and prepare the components you’ll handle so you don’t misplace anything.
Tip: Keep screws organized in a tray and label cables to simplify reassembly. - 2
Open the case and establish a safe workspace
Remove the side panel to access internal components. Take photos of cable routing and connector positions before touching anything, so you have a reference during reassembly. Ensure the area is clean, dry, and well-lit.
Tip: Work slowly and avoid touching metal connectors with bare hands. - 3
Enter BIOS/UEFI and record readings
Power on and press the appropriate key to enter BIOS/UEFI. Note CPU temperatures, fan speeds, and voltage readings. If your BIOS supports it, export a screenshot for comparison with OS-based tools later.
Tip: If readings look off, check cooling system for dust or blocked fans. - 4
Run OS hardware checks
Boot into your operating system and run a hardware monitoring tool for temperatures and fan behavior. Use built-in diagnostic features to scan for drive health and peripheral status. Log any anomalies with timestamps.
Tip: Avoid heavy tasks while monitoring to prevent skewed readings. - 5
Test RAM for faults
Boot from a memory testing tool or bootable disk and run at least one full pass across all modules and slots. If errors appear, test modules individually and swap slots to identify the faulty component.
Tip: Test one module at a time if you have multiple sticks. - 6
Check storage health
Review SMART data and run a longer health check if available. Look for reallocated or pending sectors and back up data immediately if any are reported.
Tip: Back up important files before conducting long SMART tests. - 7
Inspect connections and peripherals
Physically reseat RAM, GPU, and data cables. Check for loose connections and ensure the PSU cables are properly seated. Disconnect non-essential peripherals to isolate issues.
Tip: Power off before reseating any components. - 8
Review results and plan actions
Summarize findings, decide on replacements, reseating, or driver/BIOS updates. Create a short action plan with priorities and a backup plan in case tests reveal cascading issues.
Tip: Document findings with date and observed behavior.
FAQ
What is the first sign that hardware might be failing?
Common early signs include unexpected crashes, freezes, system slowdowns, and fans running loudly. These symptoms often precede component failure, so documenting when they occur helps identify the culprit.
Common signs are crashes and slowdowns, often with loud fans. Note when they happen to diagnose the cause.
Can I check hardware without disassembling my PC?
Yes. Begin with BIOS readings and OS-based diagnostics to check temperatures, voltages, and storage health. These non-destructive checks can flag issues before any disassembly is needed.
You can start with BIOS and OS checks before opening the case.
Is it safe to test RAM with memory tools?
RAM tests are generally safe when run from a bootable diagnostic environment. Always back up important data first, and use a reputable test designed for memory integrity.
RAM tests are safe if you boot from a diagnostic tool and back up your data first.
What should I do if SMART reports bad sectors?
Back up immediately and plan for drive replacement. Run a longer SMART test to confirm persistence of the issue before reusing or reinstalling data.
Back up now and plan to replace the drive if bad sectors persist.
Do I need professional help for PSU tests?
Power supplies can pose shock risks. If you’re unsure about voltage checks or rail stability, seek professional help rather than attempting risky measurements.
PSU testing can be risky—consider a pro if you’re unsure about voltages.
How often should I check PC hardware?
For typical use, perform a full hardware health check every 3–6 months, and more often if you notice performance issues or changes in temperatures.
Do a full check every 3–6 months, or sooner if you notice problems.
Watch Video
Main Points
- Start with non-invasive checks for safety
- Document baseline readings for future comparisons
- Back up data before performing tests
- Isolate issues through careful, stepwise testing
- Act on findings with a repair or upgrade plan