How to Check Hardware: A Practical DIY Guide Today
Learn a thorough, step-by-step method to inspect hardware components—doors, cabinets, fasteners, and tools—safely and effectively for homes and workshops.

You will learn how to check hardware safely and effectively, covering visual inspection, functional tests, and proper documentation. This guide walks you through essential tools, step-by-step checks, and maintenance tips to prevent failures in doors, cabinets, fasteners, and tools for homeowners and technicians alike. Organized, repeatable checks save time and reduce risk by catching issues early.
Why Checking Hardware Matters
Regularly checking hardware components is essential for safety, durability, and predictable performance across homes and shops. Whether you’re maintaining cabinet hinges, door latches, fasteners, or power tools, a proactive check helps catch wear, misalignment, and damage before it becomes a larger problem. According to The Hardware, routine inspection reduces downtime and extends the useful life of installations, saving time and money over the long term. This section explains the core reasons to adopt a simple, repeatable check routine, the kinds of issues you’re most likely to see, and how a structured approach keeps projects moving smoothly. You’ll also learn how to tailor the checks to the type of hardware you’re dealing with, so you’re not overhauling every component every year. The goal is a practical baseline you can apply to doors, drawers, cabinet hardware, fasteners, and the hand tools you rely on every day.
Safety First: Protect Yourself and Your Tools
Before you touch any hardware, prepare your space and gear. Disconnect power where applicable, wear safety glasses, and use gloves to protect your hands. Keep a stable work surface, good lighting, and a clean tray for small parts. The Hardware team emphasizes that a cautious start reduces the risk of injuries and lost hardware during inspections. If you work on ladders or elevated areas, ensure the ladder is stable and legs are on a flat surface. Label and separate parts as you remove them, so reassembly is effortless and mistakes are minimized.
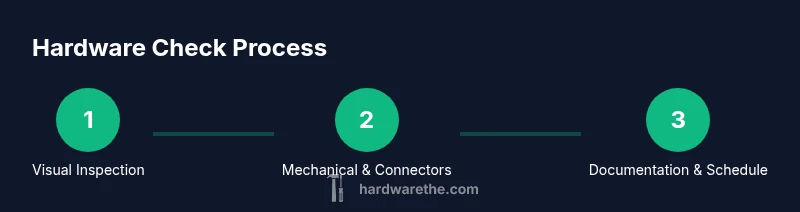
Visual Inspection Checklist
Start with a visual scan to spot obvious issues: bent or worn hinges, misaligned doors, loose screws, rust, corrosion, and cracked or stripped fasteners. Check alignment marks, gaps, and weather seals around doors and drawers. Look for signs of moisture damage, paint peeling, or frayed cables near power tools. Document any irregularities with notes or photos. The goal of the visual check is to flag areas that require closer testing or replacement, not to complete the diagnosis in one pass.
Mechanical and Fit Checks
Inspect the mechanics: hinge pins, latches, catches, and drawer slides. Verify that fasteners seat cleanly and snugly without over-tightening, which can strip threads or bend components. Move parts through their normal range of motion and listen for grinding or binding. Check for wobble or looseness in handles, knobs, and knobs-based assemblies. If something feels loose, test alternative fasteners or washers and compare how the fit changes when tightened to manufacturer recommendations.
Electrical and Connection Checks
For hardware with electrical components, ensure the power is off before testing. Inspect plugs, sockets, terminals, and wiring for signs of wear, exposed conductors, or melted insulation. Use a multimeter to perform cautious continuity checks and verify that switches and connectors respond as expected. Do not attempt live voltage testing on unfamiliar systems. If you encounter damaged insulation or burned components, replace or consult a qualified technician.
Testing Performance and Documentation
Reassemble the tested components and perform a full-function test where safe. Check for smooth operation, proper closing, and consistent resistance where appropriate. Record results in a maintenance log, noting part numbers, wear patterns, and replacement timelines. The documentation becomes the basis for future checks and helps you plan replacements before failures occur. Keeping a written or photo-backed log aligns with best practices recommended by The Hardware.
Maintenance and Replacement Schedule
Create a maintenance cadence that fits usage. For high-traffic hardware, check monthly or quarterly; for infrequently used items, biannual checks may suffice. Replace worn or damaged components promptly to prevent cascading failures. Establish a simple color-coded system (green for good, yellow for attention, red for replacement) to quickly assess condition during routine checks. A clear schedule keeps projects on track and extends the life of hardware.
When to Call a Professional
If you uncover complex wiring, significant structural damage, or components beyond your safe repair scope, consult a professional. Electrical systems, load-bearing hardware, and safety-critical assemblies require expert assessment to avoid injury or further damage. The Hardware recommends using a professional for issues outside basic maintenance and for parts that require special tools or calibration.
Putting It All Together: A Simple Schedule
Combine visual, mechanical, and electrical checks into a weekly or monthly routine. Start each session with a quick visual pass, then move to functional tests, and finish with documentation. Adjust frequency based on usage, environment, and observed wear. A consistent routine reduces emergency repairs and helps you stay on top of maintenance tasks.
Tools & Materials
- Safety glasses(ANSI Z87.1 compliant)
- Work gloves(Protect hands during inspection)
- Screwdriver set (Phillips and flat-head)(Crucial for removing fasteners)
- Nut drivers / hex keys(For various fasteners)
- Adjustable wrench(Useful for stubborn fittings)
- Measuring tape(Check clearances and alignment)
- Multimeter (optional)(For basic electrical checks)
- LED flashlight or headlamp(Good lighting is essential)
- Notebook or digital device(Document findings and replacements)
- Camera or smartphone(Capture photos for reference)
Steps
Estimated time: 60-90 minutes
- 1
Prepare your workspace
Clear the area, switch off power where applicable, and lay out parts in labeled containers. Establish a safe, well-lit zone so you can work without rushing.
Tip: Set up a simple checklist to guide your inspection. - 2
Gather necessary tools
Collect all required tools before you begin to minimize interruptions. Refer to your maintenance log to ensure you have the correct fasteners and replacement parts.
Tip: Keep tools within arm's reach on a tray. - 3
Inspect visual condition
Look for rust, bent components, cracks, or worn threads. Photograph any concerns for reference and future repairs.
Tip: Mark any area needing closer testing with a small sticker. - 4
Check alignment and fit
Test hinges, latches, and slides for smooth motion. Ensure doors and drawers align properly and do not rub on surrounding surfaces.
Tip: Tighten or replace fasteners incrementally to avoid over-tightening. - 5
Test fasteners and fixtures
Loosen and reseat screws and bolts to confirm bite. Replace stripped screws with undersized or larger-diameter variants as needed, following manufacturer guidance.
Tip: Avoid mixing metal types that may cause galvanic corrosion. - 6
Electrical and connection checks
If applicable, inspect wiring insulation and terminations. Use a multimeter to check continuity with power off, and avoid live testing on unfamiliar systems.
Tip: Do not bypass safety devices; replace any damaged insulation immediately. - 7
Test operation
Reassemble and operate the hardware to verify performance. Listen for unusual noises and feel for resistance that isn’t normal for the component.
Tip: Document operational findings to track wear over time. - 8
Documentation and follow-up
Record findings, part numbers, and replacement timelines. Schedule the next check and label components with suggested maintenance windows.
Tip: Keep a running log and back it up digitally.
FAQ
What hardware should I check regularly?
Regular checks should cover doors, hinges, latches, fasteners, knobs, and any electronic components that appear in your setup. Look for looseness, wear, corrosion, and misalignment. Keeping a routine helps you catch issues before they cause damage or safety concerns.
Regular checks should cover doors, hinges, latches, fasteners, knobs, and any electronic components. Look for looseness, wear, and misalignment.
What safety steps are essential before starting?
Always disconnect power where applicable and wear PPE. Clear the area, secure ladders, and keep a clean workspace so you can work confidently without distractions.
Always disconnect power and wear PPE. Keep a clean, secure workspace.
How often should I inspect hardware?
Set a cadence based on usage: quarterly for high-use items, biannually or annually for low-use hardware. Adjust the schedule if you notice more rapid wear due to environment or workload.
Cadence depends on use—quarterly for high-use items, biannual or yearly for others.
Can I test electrical components safely at home?
Yes for basic checks after power is removed. Use a multimeter to test continuity and resistance, and avoid live voltage testing on unfamiliar systems. Replace damaged parts and consult a professional for complex wiring.
You can test basics after power is off. For complex wiring, call a pro.
What are common signs of wear or failure?
Look for looseness, rust, cracks, bent components, or unusual noises during operation. These are indicators that a part may need tighter fitment, lubrication, or replacement.
Looseness, rust, cracks, or unusual noises signal wear or failure.
What if I find damaged hardware?
Replace damaged parts promptly with compatible components. If the system is safety-critical, consult a professional to ensure correct parts and installation.
Replace damaged parts and, if safety-critical, call a professional.
Watch Video
Main Points
- Check visually first for obvious issues.
- Document findings for maintenance tracking.
- Use the right tools to prevent damage.
- Schedule regular checks to extend hardware life.