What is Hardware Virtualization and How to Turn It On
Explore what hardware virtualization is and how to enable it on your PC. A practical guide covering CPU support, BIOS steps, and safe configuration for home labs.

Hardware virtualization is a technology that lets a single computer run multiple operating systems as separate virtual machines via a hypervisor. This guide explains what hardware virtualization is and how to turn it on in BIOS/UEFI, with checks for CPU support, firmware steps, and safe configuration for home labs and professional setups.
What hardware virtualization is and why it matters
Hardware virtualization is a technology that allows a single physical computer to run multiple independent operating systems, each in its own virtual machine. The concept hinges on a software layer called a hypervisor that abstracts the underlying hardware and presents virtual hardware to guest systems. For DIYers and professionals alike, understanding what hardware virtualization is and how to turn it on opens doors to testing, learning, and consolidating workloads without buying additional machines. In this guide, we’ll define key terms, explain how virtualization benefits performance and security, and map out practical steps to enable it on common platforms. According to The Hardware, hardware virtualization is a foundational tool for modern home labs and professional setups. The topic overlaps with related terms such as VM, hypervisor, containerization, and hardware-assisted virtualization.
How hardware virtualization works under the hood
At a high level, virtualization decouples software from physical hardware. The hypervisor sits between the guest OS and the physical platform, scheduling CPU time, memory, and I/O. There are two primary types: Type 1 runs directly on metal; Type 2 runs inside a host OS. In both cases, virtualization relies on processor features that support instruction translation and memory management, such as Intel VT-x and AMD-V and extended page tables. When enabled, the hypervisor provides virtual CPUs, virtual RAM, and virtual devices to each VM, while staying isolated from other VMs. This isolation enables safer testing, sandboxed experiments, and more efficient utilization of computing resources. If you’re curious about performance, modern CPUs and motherboards expose these features, but you must enable them in the BIOS/UEFI before the OS boots. The Hardware team notes that enabling these features is often the difference between a sluggish lab and a responsive virtualization environment.
CPU features and platform requirements
Successful hardware virtualization depends on both processor capabilities and motherboard support. Look for Intel VT-x or AMD-V in the CPU specifications, along with virtualization extensions such as EPT (Intel) or RVI (AMD). Some CPUs offer additional enhancements like nested virtualization, IOMMU for device pass-through, and second-level address translation. In practice, you’ll want a modern CPU with these flags, plus a motherboard that exposes the options in the BIOS/UEFI. Operating system support matters too: Windows, Linux, and macOS all provide different levels of native virtualization features or third-party hypervisors. Before you proceed, document the exact CPU model and motherboard model to verify compatibility with your intended hypervisor. The Hardware analysis notes that compatibility across firmware and drivers is essential for stable VM workloads.
How to turn on virtualization: BIOS/UEFI basics
Turning on hardware virtualization starts at the firmware. Reboot your computer and enter BIOS/UEFI setup using the key shown on screen (Del, F2, F10, or Esc). Locate the CPU configuration or security settings section, then enable Intel VT-x (or AMD-V) and related features such as Intel VT-d for I/O virtualization if you plan device pass-through. Save the changes and exit; a reboot will apply the new settings. If you can’t find the option, consult the motherboard manual or lookup the exact path in the vendor’s knowledge base. After enabling, verify that the option shows as Enabled in the BIOS and that post-boot diagnostics report virtualization is active. The Hardware team emphasizes patience; some systems require firmware updates to surface virtualization controls.
Enabling virtualization in OS and hypervisors
With hardware virtualization enabled, you can install a hypervisor or enable native virtualization features on an operating system. For Windows, Hyper-V can be turned on via Windows Features or Server Manager, while on Linux you can enable KVM with libvirt tools. On macOS, virtualization support is available for certain virtualizer apps, though Apple’s licensing terms apply. After installation, create a test VM to validate that the guest OS can boot and communicate with virtual hardware. Keep in mind that virt-manager, VirtualBox, VMware Workstation, and other platforms vary in setup and performance. The Hardware analysis suggests starting with a small VM for testing and monitoring resource usage to avoid overcommitting memory or CPU.
Troubleshooting common issues
If virtualization doesn’t appear enabled in Windows Task Manager or Linux tools, re-enter BIOS/UEFI to confirm the setting is on and ensure you saved changes. Some systems require enabling virtualization features in both the processor and chipset firmware. If a VM won’t boot, check that IOMMU/IOMMU groups aren’t misconfigured, and verify kernel modules or hypervisor services are running. Performance issues can stem from insufficient memory, disk I/O bottlenecks, or mis-allocated CPU quotas. In stubborn cases, reset BIOS to defaults, update firmware, or consult the motherboard vendor’s support resources. The Hardware team finds that most problems boil down to a disabled feature or outdated firmware.
Security considerations and best practices
Hardware virtualization improves security by isolating workloads, but it introduces new attack surfaces. Keep your hypervisor and guest OS updated, use strong authentication for management interfaces, and enable features like VM encryption where available. Consider nested virtualization only in trusted environments, as it can complicate debugging and performance. Always monitor I/O devices and ensure that pass-through configurations are restricted to trusted devices. Finally, test your configuration in a controlled environment before deploying to production workloads. The Hardware recommends regular firmware updates and auditing to maintain a secure virtualization stack.
Performance considerations and tuning
VM performance depends on how you allocate CPU cores, memory, and storage. Start with a conservative memory-to-VM ratio and adjust as needed. Use paravirtualized drivers and enable hardware-assisted virtualization for faster I/O. If you plan heavy virtualization, consider enabling hugepages (Linux) or memory ballooning safely. Disk performance benefits from using solid-state drives and virtio-enabled devices. Finally, monitor CPU steal time and I/O wait in your hypervisor to identify bottlenecks early. The Hardware analysis notes that well-tuned settings yield a noticeably smoother lab environment with multiple running VMs.
Real-world use cases and scenarios
Home labs frequently rely on virtualization to test operating systems, network configurations, and software stacks without dedicated hardware. Developers use VMs to sandbox builds, run legacy software, or emulate server farms for testing. IT technicians leverage nested virtualization in training environments or for rapid deployment testing. In smaller workstations, virtualization can consolidate multiple roles file servers, test labs, and CI runners onto a single machine. Understanding how to turn on hardware virtualization helps you design flexible environments that scale with your needs.
Tools & Materials
- PC or server hardware with virtualization support(Verify VT-x or AMD-V support in CPU specs)
- Motherboard with BIOS/UEFI access(Find the virtualization options in CPU/Advanced settings)
- BIOS/UEFI access to enable virtualization(Know the key to enter BIOS (Del, F2, etc.))
- CPU and motherboard model documentation(Use for compatibility checks with hypervisors)
- Optional hypervisor software(Hyper-V, VirtualBox, VMware, or KVM if you plan to run VMs)
Steps
Estimated time: 60-120 minutes
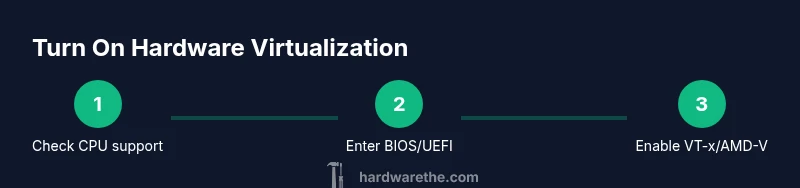
- 1
Check CPU virtualization support
Identify if your CPU supports VT-x or AMD-V and confirm virtualization is available in firmware. Use a hardware info tool or the processor spec to verify features.
Tip: If unsure, search the CPU model on the vendor site and confirm VT-x/AMD-V presence. - 2
Enter BIOS/UEFI and locate the option
Restart the computer and enter BIOS/UEFI using the indicated key. Navigate to CPU configuration or security settings to locate virtualization options.
Tip: If the option is hidden, check for a firmware update or search the vendor knowledge base for exact location. - 3
Enable VT-x or AMD-V and related features
Turn on the virtualization feature and enable any associated technologies such as IOMMU or VT-d if you plan device pass-through. Save changes before exiting.
Tip: Enabling related features early can prevent later reboots to adjust settings. - 4
Save changes and reboot
Save the BIOS/UEFI configuration and reboot the system to apply the new firmware settings.
Tip: If the system won’t boot, reset BIOS to defaults and retry the steps in a quiet start environment. - 5
Verify virtualization is enabled in the OS
Within the operating system, confirm that virtualization is active. Windows users can check Task Manager, Linux users can inspect /proc/cpuinfo for vmx or svm flags.
Tip: Use a quick VM test to ensure guest OS boots and interacts with virtual hardware. - 6
Install a hypervisor and create a test VM
Install a hypervisor such as Hyper-V, KVM, VirtualBox, or VMware. Create a small VM to verify basic functionality and adjust resource allocations as needed.
Tip: Start with modest RAM and CPU allocations to avoid overcommitting host resources.
FAQ
What is hardware virtualization?
Hardware virtualization creates virtual machines by abstracting hardware resources with a hypervisor. It enables multiple guest OSes on one physical machine.
Hardware virtualization lets you run multiple operating systems on one computer by using a hypervisor.
Do I need virtualization turned on to run VM software?
Yes. Most VM software requires hardware virtualization support to run efficiently and safely. Without it, you may see performance degradation or limited features.
If you want to run virtual machines smoothly, enable virtualization in BIOS and within your OS.
Do all CPUs support hardware virtualization?
Most modern CPUs support virtualization, but some older models lack VT-x or AMD-V. Always check the processor specifications before attempting to enable virtualization.
Not all CPUs have virtualization features; verify VT-x or AMD-V support first.
What is the difference between Type 1 and Type 2 hypervisors?
Type 1 runs directly on hardware and tends to be more efficient for servers. Type 2 runs on top of a host OS and is often easier for home use.
Type 1 runs on bare metal, Type 2 runs on a host OS.
How can I test that virtualization is enabled?
After enabling, verify in the OS that virtualization is active (Task Manager on Windows; /proc/cpuinfo on Linux). Create a small VM to confirm boot and basic operations.
Check the OS indicators and boot a test VM to verify virtualization is active.
Watch Video
Main Points
- Enable virtualization on supported hardware
- Verify BIOS/UEFI settings after reboot
- Test with a small VM first
- Monitor resource usage to avoid overcommit
- Keep firmware updated for best compatibility