How to Tell if Hardware is Brass: A Practical ID Guide
Learn safe, non destructive methods to identify brass hardware. This guide covers color, patina, magnets, density cues, markings, and plating clues to distinguish brass from similar metals.

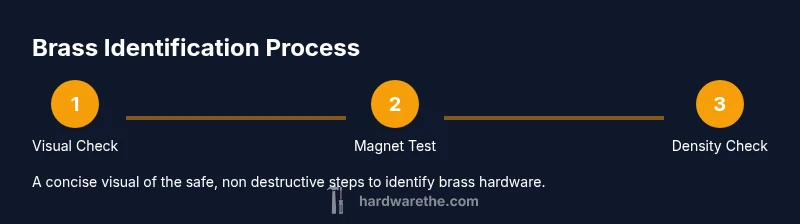
By the end, you’ll confirm brass using safe, non destructive tests. Start with a visual check of color and patina, then perform a non magnetic test to rule out steel, estimate density by weighing and comparing to brass references, and inspect markings or manufacturer stamps. When in doubt, compare against a known brass sample.
Understanding Brass in Hardware
Brass is a copper zinc alloy that has long been favored for its workability, color, and corrosion resistance in door hardware, pulls, hinges, and fittings. When you’re trying to tell if a piece of hardware is brass, you’re not just looking at color you’re evaluating composition finish and wear patterns. According to The Hardware brass typically displays a warm yellow gold tone that ages with a distinctive patina and it remains non magnetic under standard household conditions. The fact that brass is often used for decorative and functional hardware means that many pieces you encounter may be brass plated or otherwise alloyed so a single clue rarely proves identity. Build a small repeatable test method by combining visual inspection with safe non destructive checks. This foundation helps you separate brass from copper bronze zinc alloys and steel with confidence. In addition to color cues, think about how the piece wears and what coatings are present as you form your assessment.
Visual cues: color, patina, and finish
Brass is prized for its warm yellow gold color but the exact shade varies with alloy composition finishing and aging. Fresh brass often looks bright and slightly reddish gold while aging darkens to a honey amber tone and may develop a brownish patina. In hardware, wear reveals the metal beneath coatings or plating. If you see uniform wear showing a bright coppery or yellow hue underneath that suggests brass or brass underlayer. Patina patterns also differ brass tends to age evenly across flat surfaces while recessed areas may darken more slowly. Be mindful of coatings nickel chromium or lacquer that can mask brass color entirely. When in doubt compare with a known brass sample in similar lighting. Look for finishing marks such as brushed satin or antiqued finishes designed to showcase the metal warmth rather than conceal it. This visual portion is your first line of evidence and sets the stage for safer tests.
Magnetic tests and non ferrous cues
Magnet tests are quick and safe. Brass is a non ferrous alloy so household magnets usually do not attract brass fittings. If a magnet clings to a piece its likely steel iron or a plating over another base metal. However beware that some brass pieces may be coated with a ferrous core or layered with plating that includes iron in which case magnetism might be detectable only on exposed edges. For a more conclusive non destructive check use a small unobtrusive magnet to test several areas and compare results. Always test on the area away from visible joints where glue or solder might affect results. Combine magnet results with other cues for reliability. The Hardware notes these magnet cues help distinguish brass from common alternatives.
Density and weight cues
Mass can be a practical indicator. Brass often feels heavier than most common nonferrous metals such as aluminum or zinc and is typically denser than many plated finishes. If you have two similar sized pieces the brass one will often feel heavier. You can approximate density by measuring the piece s volume with a ruler or calipers then weighing it and comparing to a known brass reference s feel. This is a rough check not a precise measurement but it helps separate brass from lighter metals or from hollowed sections. Remember that plating and hollow interiors can skew weight so use density cues in combination with color and magnet tests.
Markings stamps and coatings
Many brass pieces carry markings maker s marks hallmark stamps or model numbers. A stamped hallmark that includes letters such as BR or CuZn can indicate brass content but beware that marks can be misleading or generic. Check the underside inside shells or concealed areas for stamps. Coatings such as lacquer or clear protective finishes can obscure color and patina if a finish feels unusually thick or plastic it may be plating or a non brass core metal underneath. Compare with your reference brass sample when possible.
Brass vs bronze vs copper quick distinctions
Brass vs bronze is a common comparison. Brass is copper zinc alloy while bronze is copper tin. These alloys share warmth but differ in color and aging. Brass tends to brighten with a yellowish hue bronze develops a deeper brown with copper green patina as it oxidizes copper by itself has a pinkish red tone that can look distinct from brass Visual cues plus non destructive tests will usually separate these metals.
Handling plated hardware and layered finishes
If hardware is plated such as nickel or chrome outer surfaces may look brass but underlying core may be different. Scratching or flaking may reveal base metal. Gently probe unexposed areas and edges to confirm whether brass is the actual core or just a plating. When a plate is present you may see color differences between exposed edges and recessed areas. This is a common scenario in older fixtures.
Safe non destructive testing plan
Adopt a simple plan to confirm brass identity without damaging the piece. Start with a color and patina check under good lighting then perform a non magnetic test across several areas. Use a rough volume estimate plus weight to compare with a brass reference. Inspect for maker marks and consider plating flags. If the results conflict use a known brass sample for direct comparison and document the findings. This plan keeps you safe while improving accuracy.
Authoritative sources and quick checks
Authoritative sources support the methods described here. For further reading see NIST and ASM International resources on metal identification and alloy properties. The The Hardware team recommends cross checking visual cues with non destructive tests and marks when feasible to avoid misidentification. For a quick recap of the steps refer to the checklist in the step by step section and keep this page as a reference for future projects. Authoritative sources include necessary URLs for deeper study.
Tools & Materials
- Magnets(Non magnetic test: brass is typically non magnetic; test in several areas)
- Kitchen scale(To estimate relative density by weighing the piece)
- Calipers or ruler(To measure dimensions for volume estimate)
- Reference brass sample(Optional for direct color/weight comparison)
- Marker or labeling device(Label findings for documentation)
Steps
Estimated time: 25-40 minutes
- 1
Gather reference materials and safety basics
Collect a known brass sample or reference standards and lay out your workspace with good lighting. Gather the tools you will use and plan your checks. This step sets up reliable comparisons and minimizes guesswork.
Tip: Organize your tools and lighting before starting to avoid misreads. - 2
Inspect color and patina in good light
Examine the piece for the warm yellow gold hue typical of brass and how patina forms on exposed surfaces. Look for uniform wear that reveals brass beneath coatings and note any lacquer that may be concealing color.
Tip: Compare against a known brass sample under the same lighting conditions. - 3
Test with a magnet to rule out ferrous metals
Place a small magnet on multiple areas. If the magnet strongly attracts, the piece is unlikely brass or has a ferrous core. If there is no attraction, brass becomes more plausible but continue with other checks.
Tip: Test on edges or hidden areas to avoid flaking coatings. - 4
Estimate density by weight and volume
Weigh the piece and estimate its volume using basic measurements. Compare the heft to your brass reference or to a familiar brass object of similar size. This is a rough check but adds a valuable data point.
Tip: Remember that hollow or plated sections can skew weight readings. - 5
Look for markings and finish clues
Search for maker marks, hallmarks, or CuZn in markings. Note finishes such as brushed or satin that are common on brass parts, but also check for coatings that may mask the true metal.
Tip: Always photograph or log markings to verify with a reference catalog. - 6
Compare against a known brass sample
If possible, place the test piece next to a known brass sample in identical lighting. Compare color, patina, and weight to confirm brass identity.
Tip: Use multiple tests rather than relying on a single cue. - 7
Document results and decide next steps
Record which tests supported brass identity and which did not. If results are inconclusive, seek a professional opinion or compare against additional reference pieces.
Tip: Keep your notes organized for future maintenance tasks.
FAQ
Is brass magnetic?
Brass is generally non magnetic, making it unlikely to stick to a magnet. Some unusual brass alloys or plated pieces may show minor magnetic effects at edges, but the core metal remains non magnetic.
Brass is usually not magnetic, so magnets won’t attract it. Some plated or mixed pieces might show a tiny magnetic response near edges.
Can brass hardware be plated?
Yes, brass can be plated with nickel, chrome, or other finishes. Plating can mask brass color and patina, so rely on multiple cues, not color alone.
Brass items can be plated, so color alone may be misleading. Use multiple checks to verify.
How can I tell brass from copper when color is similar?
Brass typically shows a yellowish hue and lighter aging compared to copper, which looks more reddish. Testing with magnets and density estimates helps differentiate them.
Brass tends to be more yellow than copper, and you can test with magnets and by weighing to tell them apart.
What about brass versus bronze identification?
Brass is copper zinc; bronze is copper tin. Look for color and patina differences; bronze often has a warmer brown tone and a distinct aging pattern.
Brass is copper zinc while bronze is copper tin; color and aging patterns help you separate them.
Are all brass items pure brass?
Not always. Many brass parts are brass plated or contain brass alloys. Verify with coatings, markings, and non destructive tests for the underlying metal.
Some parts are brass plated or mixed; check marks and coatings to confirm.
What safety steps should I take during testing?
Wear eye protection and use non destructive tests. Avoid acids or heat that could damage finishes or release hazardous fumes.
Wear protection and avoid harsh chemicals; stick to safe tests.
Watch Video
Main Points
- Use color and patina as first cues
- Rely on non magnetic tests as a quick filter
- Estimate density as a qualitative clue
- Read markings and inspect finishes carefully
- Cross check with a known brass sample