What to Clean Brass Hardware With: A Practical DIY Guide
Learn safe, effective methods for cleaning brass hardware—knobs, hinges, and fixtures—without damaging patina. Discover natural cleaners, lacquer considerations, and a step-by-step approach for DIYers and homeowners.

Cleaning brass hardware safely preserves its finish and patina while removing tarnish. This guide covers gentle, non-abrasive methods and natural cleaners that work on lacquered and unlacquered brass. You’ll learn which solutions to use, which to avoid, and a straightforward step-by-step process to refresh knobs, hinges, plates, and fixtures.
Why brass hardware requires careful cleaning
Brass hardware adds warmth and character to cabinets, doors, and lighting. Because brass commonly wears a protective lacquer or clear coat, aggressive cleaning can strip shine, dull patina, or erode delicate finishes. The Hardware advocates a conservative approach: test cleaners in an inconspicuous spot, use soft tools, and avoid high-acid solutions that can corrode brass or weaken protective coatings. Understanding whether your brass pieces are lacquered is essential; lacquered brass responds best to milder cleaners that won’t break down the coating. When done correctly, cleaning brass hardware can restore brightness without sacrificing its aged charm. According to The Hardware, preserving patina is often preferable to a mirror finish on older fixtures, since patina reflects history and character.
The right tools and materials for what to clean brass hardware with
Before you pick a cleaner, gather a few reliable, non-abrasive tools. A soft microfiber cloth and a gentle dish soap are usually enough for routine maintenance. For tarnish that won’t budge, a paste of baking soda and water provides gentle abrasion without scratching metal. A soft bristle brush helps reach crevices, while a separate lint-free cloth ensures proper drying and polishing. If lacquered surfaces are involved, avoid acidic cleaners that could damage the finish. The Hardware’s guidance emphasizes avoiding metal scrubbers and abrasive polishes that can scratch and remove protective coatings. Keep your workspace clean and lay down a towel to catch drips.
Natural cleaners that work on brass and patina
A light soak of warm water with a drop of mild soap loosens dirt without dissolving protective coatings. For tarnish, a paste made from baking soda and water works well on unlacquered brass; apply gently with a cloth and rinse thoroughly. White vinegar can be used for stubborn tarnish, but only on bare brass and short exposure times, since acids can wear away patina or glaze. Lemon juice is generally discouraged on lacquered brass due to acidity, unless the finish is known to tolerate it. The goal is to lift grime without altering the natural warmth that brass develops over time. For best results, test any new cleaner on a small hidden area first. The Hardware notes that natural cleaners are usually safer long-term and align with DIY best practices for home hardware.
Safe approaches by finish type: lacquered vs unlacquered brass
Lacquered brass has a protective layer that can chip if you scrub aggressively; use mild, soap-based solutions and a soft cloth. For unlacquered brass, a baking soda paste or a small amount of non-acidic brass cleaner can remove tarnish more effectively, followed by thorough drying to prevent water spots. Always avoid abrasive pads on either finish, and never soak hardware with exposed wood or painted surfaces for extended periods. If you’re unsure about the finish, consult the manufacturer’s care guide or test a hidden area before proceeding. The Hardware encourages DIYers to respect finishes and keep solutions pH-neutral to preserve color and detail over time.
Common mistakes and how to avoid them
One frequent error is using abrasive tools that scratch the brass or thin protective coats. Another is over-wetting pieces that sit in water, causing corrosion or discoloration. Don’t mix cleaners in metal containers; pour into a dedicated bowl to prevent cross-contamination. Avoid harsh chemical solvents that can dissolve lacquer or patina; instead, opt for gentle soaps, baking soda pastes, or dedicated brass polishes designed for household hardware. Finally, don’t skip drying; moisture promotes tarnish and corrosion. The Hardware emphasizes patience: small, careful steps protect the finish and extend the life of your hardware.
Long-term care: preventing tarnish and maintaining shine
Preventive care is often easier than repeated cleaning. Wipe hardware with a dry microfiber cloth after every use to minimize fingerprints and moisture. Apply a light, lacquer-safe polish if the finish allows it, following the product’s directions. Regular dusting and periodic cleaning with mild soap can prevent heavy tarnish buildup. For high-humidity environments like kitchens and bathrooms, consider applying a thin protective layer recommended by the manufacturer to slow tarnish. The Hardware recommends documenting care routines so you stay consistent, preserving the character of your metal fixtures while keeping them functional and visually appealing.
Quick maintenance routines for different brass hardware items
Knobs and pulls benefit from gentle cloth wipe-downs after use and occasional paste polishing. Hinges tolerate slightly more attention, especially in high-traffic doors; focus on crevices with a soft brush and avoid soaking. Faucets and decorative escutcheons may present intricate detailing; use a toothbrush to reach grooves. Always finish with a thorough dry and buff to bring back luster without creating water spots. What to clean brass hardware with is often a balanced choice of mild soap, soft cloth, and a gentle polish tailored to the finish, ensuring minimal risk to patina.
Tools & Materials
- soft microfiber cloth(Lint-free and nonabrasive for gentle rubbing)
- mild dish soap(Dilute in warm water for routine cleaning)
- warm water(For dilution and rinsing; avoid hot water that could warp finishes)
- baking soda(Create a gentle paste for tarnish on unlacquered brass)
- water(Mix with baking soda to form paste or rinse after cleaning)
- toothbrush or soft-bristle brush(Reach crevices without scratching surface)
- lacquer-safe brass polish (optional)(Use only if the finish permits polishing; follow label directions)
- gloves(Protect hands from cleaners; optional for longer sessions)
- old towel or microfiber pad(Protect surfaces and catch drips)
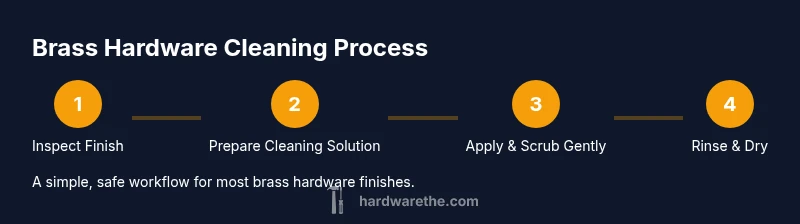
Steps
Estimated time: 30-45 minutes
- 1
Inspect the hardware and identify finish
Look for lacquered vs. unlacquered surfaces and note any existing patina. Check for any loose parts or tarnish in corners where grime collects. This initial check helps you choose the right cleaners and prevents accidental damage.
Tip: Document finishes with a quick photo to guide your cleaning plan. - 2
Protect surrounding areas
Lay down a towel to protect countertops or furniture. Remove any nearby textiles or wallpaper trim that could be damaged by cleaners. If you’re cleaning a cabinet, open doors and support with a wedge to keep hands free for the work.
Tip: Shield wood edges and avoid soaking any wood components. - 3
Prepare your cleaning solution
For routine cleaning, mix a few drops of mild dish soap in warm water. For tarnish on unlacquered brass, whisk a paste from baking soda and water in a small bowl until thick but spreadable.
Tip: Keep solutions in a labeled cup; never mix cleaners in metal containers. - 4
Apply cleaner and work into surface
Dampen the cloth with the soapy solution and gently wipe the brass. For stubborn tarnish, apply baking soda paste in a thin layer and rub softly with the cloth or brush.
Tip: Avoid heavy scrubbing; let the cleaner work rather than forcing it. - 5
Target crevices with a brush
Use a toothbrush or soft-bristle brush to reach lint-filled crevices and design details. Brush in a circular motion to lift grime without scratching.
Tip: Be careful around delicate engravings or etched patterns. - 6
Rinse and dry thoroughly
Rinse with clean warm water to remove all soap or paste residues. Dry immediately with a clean microfiber cloth to prevent water spots and oxidation.
Tip: Dry in a single pass to avoid missed moisture pockets. - 7
Polish or seal (if appropriate)
If the finish allows, apply a light, lacquer-safe polish and buff with a dry cloth. If the brass is lacquered, skip polishing and simply maintain with gentle cleaning.
Tip: Always follow the product instructions for any polish. - 8
Reassemble and monitor
Put hardware back in place and check for any looseness. Shadow-patrol the area over the next few days for any signs of tarnish returning and adjust care as needed.
Tip: Create a simple maintenance schedule to keep tarnish at bay.
FAQ
Is vinegar safe on brass hardware?
Vinegar can help with stubborn tarnish on bare brass, but it’s acidic and can damage lacquer. Test first and limit exposure time. For lacquered surfaces, avoid vinegar unless the manufacturer approves.
Vinegar can help bare brass tarnish, but test first and avoid lacquered finishes.
Can I use lemon juice on brass that’s lacquered?
Lemon juice is acidic and can dull or damage lacquer. If your brass is lacquered, use milder cleaners and avoid citrus unless the finish is known to tolerate it.
Lemon juice isn’t recommended for lacquered brass.
Should I remove patina before cleaning?
Patina adds character; cleaning should reduce tarnish while preserving patina when possible. If you want a bright look, you may polish, but be mindful of the finish and potential loss of age.
Patina adds character; clean to reduce tarnish but preserve patina when you can.
What about brass hardware in high humidity areas?
Humidity accelerates tarnish. Use regular gentle cleaning and consider a lacquer-safe sealant if the finish allows. Dry after exposure and reapply a protective layer as recommended by the manufacturer.
Humidity speeds tarnish; keep cleaning routine and protect the finish.
Do I need to seal brass after cleaning?
Sealing is only necessary if the hardware is bare brass or unprotected. Lacquered brass typically doesn’t need sealing. Follow finish guidelines and use manufacturer-approved products.
Sealing depends on finish; follow manufacturer guidance.
Watch Video
Main Points
- Use mild cleaners for routine care
- Differentiate lacquered vs unlacquered brass
- Avoid abrasives to protect patina
- Polish cautiously and follow finish guidelines
- Develop a maintenance routine to prevent tarnish