How to Hardware Reset a PC: A Practical Guide
Learn how to safely perform a hardware reset on your PC, including CMOS/BIOS resets, power cycling, and BIOS reconfiguration. This step-by-step guide covers tools, safety, and troubleshooting to restore a stable baseline without risking data loss.

Learn how to hardware reset PC safely, covering CMOS/BIOS defaults, power cycling, and reseating components. This guide walks you through essential tools, safety steps, and a clear, step-by-step process to restore hardware settings with minimal risk.
What is a hardware reset and why it's used
A hardware reset on a PC is a low-level operation that clears microcontroller and BIOS/CMOS memory settings, restoring the motherboard to a known state. For many users, this is the first step when facing boot problems, POST errors, or unstable performance caused by misconfigured settings. In this guide, how to hardware reset pc is addressed with practical steps and careful precautions. According to The Hardware, a properly executed reset can resolve stubborn hardware initialization issues without wiping your personal data on the drive. The goal is to bring the system back to a baseline configuration so you can re-enter settings safely and verify hardware function. Understanding what reset does at the hardware level helps you decide when a CMOS clear is warranted versus software-level fixes, and it frames the rest of this procedure.
Safety first: preparing to reset hardware
Before you touch internal components, power down the PC completely and unplug the power cord. Ground yourself by touching a metal surface or wearing an anti-static wrist strap connected to a grounded surface. Work on a static-free surface, keep metal jewelry away, and organize screws and parts so nothing is misplaced. This section emphasizes the why: resetting hardware carries a small risk of component misalignment or accidental shorting if you rush. A methodical approach reduces risk and preserves the machine for a successful CMOS/BIOS reset.
Tools and materials you'll need
Having the right tools makes CMOS/BIOS resets safer and faster. Gather these essentials before you begin:
- Anti-static wrist strap (required) – grounds you and reduces static discharge.
- Phillips-head screwdriver (#2) – for case and motherboard screws.
- CMOS battery (CR2032) – provides fresh power for CMOS after a reset.
- Small flat-head screwdriver (optional) – assists with tiny connectors.
- Plastic spudger or non-marring tool (optional) – helps lift components without damage.
- Motherboard manual or schematic (optional but helpful) – locate jumpers and battery orientation.
- Clean workspace mat or tray – keeps fasteners organized and visible.
The Hardware recommends keeping a labeled parts tray to avoid mismatched screws during reassembly.
CMOS reset methods explained
Most resets clear CMOS memory by either removing the CMOS battery or using the motherboard jumper. Removing the battery for a minute allows residual charge to dissipate, while a jumper short across the reset pins creates a temporary bypass that clears stored settings. The choice depends on your motherboard's design; consult the manual if you aren't sure which method your board supports. After the reset, reinstall components and reassemble the case, then proceed to boot with defaults. The hardware involves working with the motherboard, so handle connectors gently and avoid forcing pins.
Power cycle and BIOS defaults overview
Power cycling the system after CMOS clearance ensures memory caches reset and hardware signals reinitialize. When you power on for the first time, BIOS/UEFI will typically load default settings. You should expect to see a POST screen that may indicate the defaults were loaded. If your motherboard provides a "Load Defaults" option, you can use it to guarantee a clean baseline. This reduces instability caused by lingering profiles or overclocks.
After reset: BIOS setup, testing, and validation
Once the system boots to the OS, re-enter the BIOS/UEFI to confirm that all essential hardware is detected (CPU, RAM, drives, GPU). Set the correct date and time, verify boot order, and apply any necessary firmware updates if your motherboard recommends them. Save the defaults again if you changed nothing, then exit and test boot stability with a few exploratory runs of your regular software workflow. This is the point to verify that the reset achieved a reliable baseline.
Troubleshooting and common mistakes
- Do not rush the CMOS reset. A hurried reset can lead to missed connectors or battery insertion errors.
- If the PC won’t post after a CMOS reset, double-check power connections, reseat RAM modules and GPU, and inspect for bent pins.
- Laptop resets differ from desktops; for laptops, consult the manual before attempting a CMOS battery removal.
- If any electrical smell or smoke occurs, power off immediately and disconnect power; do not continue.
Tools & Materials
- Anti-static wrist strap(Grounds you and reduces static discharge.)
- Phillips-head screwdriver (#2)(For case and motherboard screws.)
- CMOS battery (CR2032)(Fresh battery; needed to reset CMOS.)
- Small flat-head screwdriver(Optional for tiny connectors.)
- Plastic spudger(Non-marring tool for lifting components.)
- Motherboard manual(Helps locate jumpers and battery orientation.)
- Clean workspace mat(Keeps screws organized and reduces misplacements.)
Steps
Estimated time: 45-75 minutes
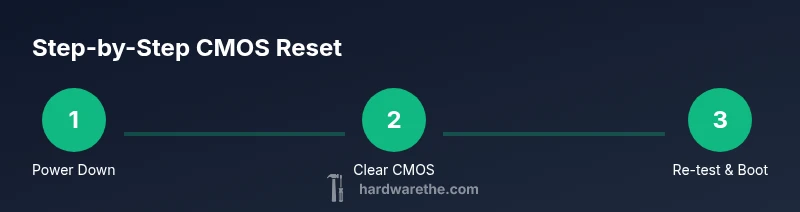
- 1
Power down and unplug
Shut down the PC completely and unplug the power cord from the outlet. This ensures there is no risk of electrical shock or shorting during internal handling.
Tip: Always ground yourself first and work on a non-conductive surface. - 2
Open the case and expose the motherboard
Remove the side panel and locate the CMOS battery and the reset jumper area. Take note of the battery orientation before removal.
Tip: Use the correct screwdriver size to avoid stripping screws. - 3
Clear CMOS either by battery or jumper
If using the battery method, gently remove the coin cell for about sixty seconds to discharge residual charge. If using a jumper, place it across the clear pins for a few seconds, then return to normal.
Tip: If you’re unsure which method your board supports, consult the manual. - 4
Reinstall or reposition CMOS components
Reinsert the CMOS battery with the correct orientation or reposition the jumper to its standard position. Ensure there are no loose connectors.
Tip: Double-check battery polarity before reinstallation. - 5
Reconnect power and boot into BIOS
Reconnect power and press the BIOS/UEFI entry key during POST to enter the setup. Load default/optimized defaults to establish a clean baseline.
Tip: Look for the option labeled 'Load Defaults' or similar. - 6
Apply safe BIOS changes and save
If you need to customize boot order or timing, make minimal changes and save before exiting. Reboot to confirm the defaults are in effect.
Tip: Only adjust settings you understand; unnecessary changes can cause instability. - 7
Test system stability
Allow the OS to boot fully and run basic tests to verify hardware and drivers are functioning properly.
Tip: Run a quick memory and disk check if issues persist.
FAQ
Is hardware reset the same as a BIOS reset?
A hardware reset typically targets the BIOS/CMOS memory and related hardware states. It is used when boot issues originate from BIOS settings or initialization problems. The OS and user data are not changed by a CMOS reset.
A hardware reset targets BIOS settings and the motherboard state, not your files. It’s used for boot problems. The OS data stays intact.
Will resetting CMOS erase my data?
Resetting CMOS does not erase files on your hard drive or SSD. It only clears BIOS/CMOS memory so the motherboard can boot with default settings.
CMOS reset doesn’t touch your files; it just clears BIOS settings.
Can I perform a CMOS reset on a laptop?
Laptops may have different procedures and may require access to the battery or special keys. Always refer to the manufacturer’s manual before attempting a CMOS reset on a laptop.
Laptops vary; check the manual before resetting CMOS.
What should I do if the PC won’t boot after a reset?
Power cycle again, check all power and data cables, reseat RAM and GPUs, and verify that no pins are bent. If POST still fails, revert to defaults and consult the motherboard manual.
If it won’t boot, recheck connections and reseat components, then try again.
Do I need to replace the CMOS battery after a reset?
If the system loses BIOS settings frequently, the CMOS battery may be failing and needs replacement. Otherwise, a reset alone does not require replacement.
Only replace the battery if you notice BIOS settings drifting or losing power.
Watch Video
Main Points
- Back up critical data before hardware resets.
- Follow safety steps to avoid static damage or shocks.
- Know CMOS vs. OS resets; CMOS affects BIOS settings only.
- Load BIOS defaults first to restore stability.
- Test thoroughly after reset to confirm hardware health.