Hardware to Hang Pictures: A Practical Guide
Learn how to choose and install the right hardware to hang pictures safely, with weight-based guidance, wall-type considerations, and step-by-step instructions for drywall and masonry.

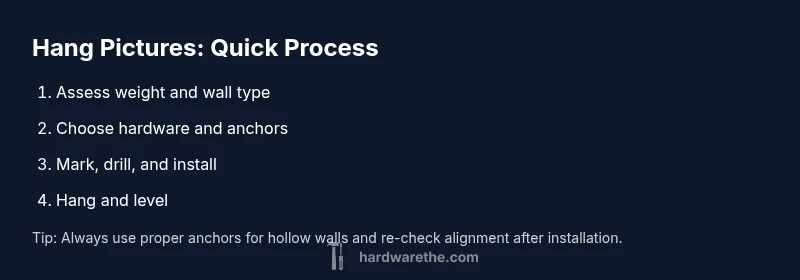
With the right hardware, hanging pictures is quick, clean, and secure. Start by estimating weight, wall type, and choosing appropriate fasteners: light frames use nails or hooks; medium frames use plastic anchors; heavy frames require screws into studs or masonry anchors. Locate studs, level the layout, and use a drill or hammer as needed to avoid wall damage.
Understanding picture-hanging hardware basics
Choosing hardware for picture hanging starts with two facts: weight and wall type. According to The Hardware, the safest option is to match hardware strength to weight and to the wall surface. The hardware you select ranges from small nails and picture hooks to screws with wall anchors, toggles, and masonry anchors. For most indoor frames, a simple, lightweight hook will do; for medium frames, you’ll want a sturdy hook with a small wall anchor; for heavier pieces, go directly into a stud or use a heavy-duty anchor. In this guide, we’ll cover every scenario and provide practical comparisons so you can hang pictures confidently. The goal is to minimize wall damage while maximizing security and alignment.
Assessing wall type and weight
Before drilling or hammering, measure the total weight of the piece and identify wall type. Drywall is the most common substrate in homes, but plaster, brick, and concrete require different fasteners. Heavier frames demand stronger anchors or screws; lighter frames can rely on hooks or nails. A simple weight-based rule helps: frames up to 2 pounds can hang with a small nail or picture hook; 2–10 pounds benefit from a plastic anchor with a screw; over 10 pounds typically needs a stud or masonry anchor. Always account for the frame plus mounting hardware (wire, D-rings, or saw-tooth hangers).
Hanging options for drywall
Drywall accepts nails, hooks, and anchors well when used correctly. For lightweight pictures, use a small picture hook or finish nail to minimize wall damage. For mid-weight pieces, select a plastic wall anchor or a spring toggle and drive a screw into the anchor. Avoid hollow-wall screws that can pull out; instead, use proper anchors rated for the load. If a stud is behind the wall, you can fix directly with screws for maximum security. This approach reduces the risk of sag and tilt over time.
Anchors, screws, and toggles: when to use each
Anchors convert a hollow wall into a strong anchor point. Plastic anchors distribute load, while metal sleeves provide extra grip. For heavier loads, use plastic expansion anchors with longer screws or metal toggles that pass through the drywall and expand behind it. Screws into studs deliver the strongest hold; if no stud is available, toggles or sleeve anchors are your best option. Remember to select anchors that match the weight rating of your frame.
Masonry and concrete walls
Brick, concrete, and stone surfaces require different hardware. Use masonry nails or masonry screws with a supplied drill bit, or install a sleeve anchor in a pre-drilled hole. For very heavy frames, consider a masonry anchor bolt or a threaded rod system anchored into solid material. Always pre-drill with a bit matching the anchor size, and avoid over-tightening, which can crack the substrate. For best results, verify the anchor is seated squarely and the screw head sits flush with the mounting hardware.
Picture length, weight, and distribution
Distribute weight across two hooks when possible; use two hooks or a wire with two attachment points to balance load. For large frames, use two screws into studs or two anchors with level alignment to keep the picture from tilting. If you must hang on a single point, use a large heavy-duty hook designed for load-bearing and a level to ensure alignment. Even weight distribution prevents tilt and reduces wall stress over time.
Layout planning and measuring
Plan the layout on the wall before drilling. Use a tape measure, level, and painter’s tape to mark exact locations. Measure the distance between the frame’s mounting points and transfer that to the wall. For multi-frame displays, map out exact positions with a temporary template to ensure even spacing. Double-check the vertical alignment with a level before committing to holes or anchors.
Tools and materials overview for hanging pictures
Having the right set of tools improves accuracy and safety. The kit typically includes a stud finder, tape measure, level, pencil, hammer or drill, appropriate fasteners (nails, hooks, anchors, screws, toggles), and, if needed, a masonry drill bit. Keep safety goggles handy for protection during drilling and handling hardware. This is the backbone of a safe, repeatable hanging process for hardware to hang pictures.
Safety and damage prevention when mounting frames
Always verify electrical lines and plumbing before drilling; use a stud finder with live-wire detection and avoid drilling into unknown cavities. Wear eye protection and keep others away during drilling. Use slow, steady pressure and stop if you feel resistance. Re-check the alignment after installing hardware to prevent frame damage. If in doubt, consult a professional or switch to a lighter mounting method.
Maintenance and adjustments after hanging
Check periodically for loose screws or anchors and re-tighten as needed. If a frame becomes loose or slides, re-seat the anchors or switch to a more secure method. After changes, use a level again to guarantee correct alignment and avoid wall damage. Regular checks extend the life of both the frame and the wall.
Common mistakes and quick fixes
Overtightening can strip anchors; using too-short screws can pull out of drywall; missing studs reduces hold. Fixes include switching to longer anchors, repositioning to studs, or using a different mounting method for heavy frames. If you see tilt, adjust by re-leveling and re-marking mounting points.
Final checklist before hanging
Verify weight, wall type, and mounting method; collect all tools; mark locations; drill or drive anchors; hang and level; and perform a final stress test by gently adjusting the frame. A calm, methodical approach minimizes errors and wall damage.
Tools & Materials
- Stud finder(Locate studs or confirm hollow-wall areas behind drywall)
- Tape measure(Accurate spacing between mounting points)
- Pencil(Mark precise wall locations)
- Level(Ensure horizontal alignment)
- Hammer(Install nails or light hooks)
- Power drill(Drill pilot holes or drive screws)
- Drill bits (wood and masonry)(Match bit size to anchors/screws)
- Masonry drill bit(Needed for brick/concrete walls)
- Picture hanging hooks(Light to medium frames)
- Nails(For lightweight framing when appropriate)
- Plastic wall anchors(For hollow walls and lighter loads)
- Screws (assorted sizes)(Anchors and studs require different lengths)
- Toggle bolts(Useful for heavy frames in hollow walls)
- Safety glasses(Eye protection during drilling)
Steps
Estimated time: 30-60 minutes
- 1
Measure weight and plan layout
Identify the picture’s weight and plan where it will hang. This guides the choice of hardware and anchors.
Tip: Record the mounting hole spacing on a scrap of paper to transfer later. - 2
Find wall studs and mark positions
Use a stud finder to locate studs; mark center points with a pencil.
Tip: If no studs are available, plan for anchors rated for the frame’s weight. - 3
Mark drilling points on the wall
Measure the distance between mounting points on the frame and transfer to wall marks.
Tip: Double-check horizontal alignment with a level before drilling. - 4
Choose hardware based on wall and weight
Select hooks, anchors, and screws appropriate for the wall type and frame weight.
Tip: Avoid under-rated anchors; when in doubt, go heavier with rated hardware. - 5
Drill pilot holes or install anchors
Drill holes for anchors or for direct screws into studs; keep bits straight.
Tip: Pre-wet masonry bits or keep they cool with light pressure to prevent wandering. - 6
Secure the mounting hardware
Drive screws into anchors or studs until heads sit flush with mounting plate.
Tip: Do not overtighten; snug is enough to hold without damaging wall. - 7
Hang the picture and level it
Hang the frame on mounting hardware and check level with a spirit or laser level.
Tip: Shims can help fine-tune alignment without re-drilling. - 8
Test and adjust
Gently test the load by applying light pressure; adjust if there is tilt or movement.
Tip: Re-check after 24 hours to ensure the fix holds as wall materials settle.
FAQ
What hardware do I need to hang a lightweight picture on drywall?
For lightweight pictures, a small picture hook or finish nail typically suffices and minimizes wall damage. Always ensure the hook or nail can support the frame’s weight and re-check alignment after installation.
For light pictures on drywall, use a small hook or nail that’s rated for the weight, and re-check alignment after you hang it.
How can I hang a heavy frame without finding a stud?
If no stud is available, use a heavy-duty wall anchor or toggle bolt rated for the frame’s weight. Mount into the wall using anchors that match your screw size and verify the load rating before hanging.
If there is no stud, use a heavy-duty anchor or toggle bolt rated for the frame’s weight and mount into an appropriate wall anchor.
Can I hang frames on plaster walls?
Yes, but use plaster-rated screws or anchors and pre-drill to avoid cracking. Plaster walls benefit from longer anchors that grab behind the lath.
Yes, with plaster walls you’ll want anchors rated for plaster and pre-drill to avoid cracks.
Do I need to find studs every time I hang a picture?
No. For small frames, anchors designed for hollow walls are often sufficient. For larger/heavier frames, studs or masonry anchors are recommended.
Not every time—small pictures can use anchors, but heavy frames should use studs or strong anchors.
What safety precautions should I take when drilling?
Wear eye protection, keep bystanders clear, and confirm your drill bit matches the anchor size. Stop if you encounter resistance or suspect hidden wiring.
Wear safety glasses, keep people away, and match the drill bit to the anchor size.
How can I fix a tilted picture after hanging?
Loosen mounting hardware slightly, adjust the positioning, and re-tighten. Use a level to confirm straightness and consider new anchors if movement recurs.
Loosen, reposition, and re-tighten; re-check with a level and replace anchors if the issue repeats.
Watch Video
Main Points
- Assess weight and wall type before choosing hardware
- Use studs or rated anchors for secure mounting
- Measure precisely and level to prevent tilt
- Check security after hanging and adjust as needed
- Choose the right tools to improve accuracy and safety