Where is hardware acceleration in Windows 11: A practical guide
Learn where hardware acceleration sits in Windows 11, how to enable the main GPU scheduling toggle, optimize per-app performance, and troubleshoot common graphics issues with practical, step-by-step guidance.

By enabling hardware acceleration in Windows 11, you can offload graphics and video tasks to your GPU for smoother playback and snappier UI. Locate the setting under Settings > System > Display > Graphics, then toggle Hardware-accelerated GPU scheduling on. If your PC uses a discrete GPU, you may also adjust per-app graphics preferences for best results.
Why hardware acceleration matters in Windows 11
In modern Windows PCs, hardware acceleration lets the GPU handle graphics and video tasks to free up CPU cycles, reduce latency, and improve responsiveness. On Windows 11, enabling this feature can translate to smoother animations, quicker video playback, and better framerate in games when supported by your hardware. The Hardware team at The Hardware notes that enabling hardware acceleration is most effective on systems with a discrete GPU or a modern integrated GPU that supports acceleration. Before you dive in, ensure your drivers are up to date and your system is on a supported build. In this guide we'll walk through where to find the controls, how to enable the main toggle, and how to fine-tune per-app settings for your workload.
Key components affected by hardware acceleration
Hardware acceleration primarily shifts rendering tasks from the CPU to the GPU. This affects UI responsiveness, video playback (HW decoding), browser rendering, and game engines. On Windows 11, you may notice improvements in window dragging, scrolling smoothness, and video playback efficiency. For professionals running CAD or video editing, offloading workflows can reduce CPU bottlenecks. However, some legacy apps or poorly optimized drivers can experience glitches after enabling acceleration. The Hardware team emphasizes the importance of testing critical apps after enabling any hardware-accelerated option, and keeping drivers updated to maintain stability.
Where to find the hardware acceleration settings in Windows 11
You can manage hardware acceleration from Settings, and you may also adjust GPU scheduling on supported hardware. The typical path is: Settings > System > Display > Graphics. In some builds you will see a separate toggle for Hardware-accelerated GPU scheduling. If you don’t see the toggle, your device or driver may not support it, or you may be on an older build. Always check Windows Update for optional driver updates and verify that your GPU vendor’s software is current. If you search for the phrase "where is hardware acceleration in windows 11", you’ll find the main toggle under Settings, System, Display, Graphics.
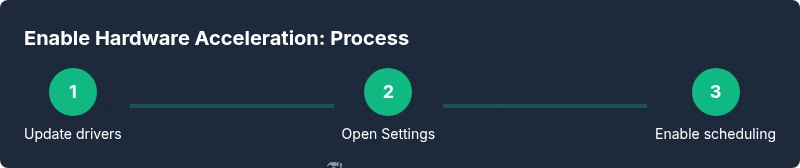
Enabling hardware-accelerated GPU scheduling: a practical walkthrough
To enable hardware-accelerated GPU scheduling, update your GPU drivers first, then open Windows Settings and navigate to System > Display > Graphics. Turn on the Hardware-accelerated GPU scheduling toggle if available, and confirm any prompts. If you don’t see the toggle, your hardware or driver may not support it. After enabling, a quick reboot ensures all components initialize correctly and new GPU features take effect.
Verifying GPU utilization and performance metrics
After enabling hardware acceleration, verify the GPU is active during workload. Open Task Manager (Ctrl+Shift+Esc), switch to the Performance tab, and select GPU. Run your typical tasks—video playback, browser rendering, or games—and observe GPU percentage, memory usage, and clock speeds. You should see higher GPU utilization corresponding to tasks previously CPU-bound, with smoother playback and fewer dropped frames. If utilization remains flat, re-check driver status and per-app settings to ensure the right apps are utilizing the GPU.
Troubleshooting common issues after enabling acceleration
If you experience stuttering, screen tearing, or crashes after enabling hardware acceleration, first verify drivers are current and your system has the latest Windows updates. If problems persist, try disabling the main toggle, then re-enabling it after a clean reboot. Some apps may require per-app graphics settings to be reconfigured. As a safety precaution, create a system restore point before making changes so you can revert easily if instability occurs.
Per-app graphics preferences: fine-tuning behavior
Windows 11 lets you assign a graphics processor per app via Graphics performance preferences. Add the app, then choose between "Let Windows decide", "Power saving", or "High performance". For graphics-heavy apps (browsers with hardware-accelerated rendering, video editors, 3D software), select High performance. For background utilities, Power saving can extend battery life. This granular control helps balance performance and power usage across workloads.
When to disable hardware acceleration or roll back changes
If you notice artifacts, frequent crashes, or drastic throttling after enabling hardware acceleration, consider disabling the main toggle and reverting to default drivers. Always test with a stable workload first, then re-evaluate after driver updates. In some cases, the best approach is to revert specific per-app graphics choices rather than the global setting to maintain stability while still gaining benefits where applicable.
Best practices and quick-start checklist
- Update GPU drivers before enabling hardware acceleration.
- Verify Windows updates are current.
- Enable the main toggle only if available on your hardware.
- Use per-app graphics preferences for fine-tuning.
- Test with your typical workload and monitor GPU activity to confirm benefits.
- Create a system restore point before major changes and keep notes on what settings you changed.
Tools & Materials
- Windows 11 PC with supported GPU(Ensure you’re on Windows 11 (22H2 or newer) and have a GPU that supports hardware acceleration.)
- Updated GPU driver(Download latest driver from NVIDIA/AMD/Intel and install cleanly.)
- Settings app access(You will navigate Settings > System > Display > Graphics; ensure Settings is accessible.)
Steps
Estimated time: Estimated total time: 25-40 minutes
- 1
Update GPU drivers to the latest version
Download and install the latest GPU driver from the manufacturer’s website. A clean install helps prevent leftover driver conflicts. This step ensures compatibility with new Windows 11 graphics features.
Tip: If Windows Update offers a driver, try that first for a stable baseline. - 2
Open Windows Settings
Click Start, then the Settings gear to open the Windows Settings app. You’ll navigate to the graphics controls from here.
Tip: Use the search box in Settings to quickly reach 'Graphics' if you’re unsure of the path. - 3
Navigate to Display > Graphics
In Settings, go to System > Display, then click Graphics to access app-level graphics controls and the global acceleration toggle where available.
Tip: If you don’t see Graphics, your Windows build or hardware may not expose it yet. - 4
Enable Hardware-accelerated GPU scheduling
Toggle the Hardware-accelerated GPU scheduling switch to On if the option appears. This offloads GPU tasks to the GPU hardware path for smoother rendering.
Tip: A reboot after enabling helps ensure the setting takes full effect. - 5
Open Graphics performance preferences
Open the per-app optimization by selecting Graphics performance preferences and choosing apps to optimize.
Tip: Add your most demanding apps first to maximize visible benefits. - 6
Set per-app GPU preference
For each app, choose High performance (GPU) or Let Windows decide depending on your workload.
Tip: High performance is best for GPU-heavy apps, but may impact battery life on laptops. - 7
Restart the computer
Reboot to ensure all changes initialize correctly and new GPU paths are active.
Tip: A clean start helps prevent driver caches from causing conflicts. - 8
Verify GPU activity
After boot, open Task Manager > Performance > GPU to confirm activity during workloads.
Tip: If activity isn’t observed, recheck app-specific settings or driver status. - 9
Test workload and adjust as needed
Run your typical tasks (video, browser, games) and compare against baseline performance. Tweak per-app settings if required.
Tip: Keep a note of which apps benefited most for future adjustments.
FAQ
Where is hardware acceleration located in Windows 11?
It's typically under Settings > System > Display > Graphics, with a toggle for Hardware-accelerated GPU scheduling.
You’ll usually find the switch under Settings, System, Display, Graphics, labeled Hardware-accelerated GPU scheduling.
What is hardware-accelerated GPU scheduling and do I need it?
Hardware-accelerated GPU scheduling is a feature that allows the GPU to manage graphics processing more directly, reducing CPU load and potentially lowering latency. Enable it if your hardware supports it and you’re seeking smoother performance.
Hardware-accelerated GPU scheduling lets the GPU handle more work, which can help with latency on supported hardware.
Will enabling hardware acceleration drain more power?
Power usage can vary. On laptops, enabling acceleration may slightly increase power draw during GPU-heavy tasks, but it can also improve efficiency by reducing CPU work.
Turning it on may change power use; monitor battery life during heavy tasks.
Can all apps benefit from hardware acceleration?
No. Some apps benefit greatly, others see little change. Always test your critical workloads after changing settings.
Some apps benefit, others may not.
How do I disable hardware acceleration if I run into problems?
If issues appear, toggle off Hardware-accelerated GPU scheduling, update drivers, then reboot. If problems persist, revert per-app settings or turn off acceleration entirely.
If you notice crashes or stutter, disable it and test again.
Do I need a discrete GPU to gain benefits?
Both integrated and discrete GPUs can benefit. Discrete GPUs often provide greater gains in heavy graphical tasks.
Discrete GPUs generally give better results, but integrated GPUs can still see improvements.
Watch Video
Main Points
- Enable hardware acceleration where supported by the GPU.
- Update drivers before enabling acceleration.
- Use per-app graphics preferences to tailor performance.
- Test with real workloads and monitor GPU usage.
- Revert changes if instability occurs.