How to Disable Hardware Accelerated GPU Scheduling
Learn how to safely disable hardware accelerated GPU scheduling in Windows 10/11 with a step-by-step guide, why you might need it, and how to verify performance before and after the change.

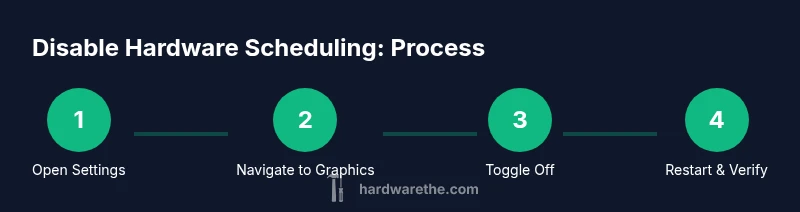
To disable hardware accelerated gpu scheduling, open Windows Settings, navigate to System > Display > Graphics, and switch off the Hardware-accelerated GPU scheduling toggle. A restart is usually required to apply the change. Some systems may not show the option until you update Windows and your GPU driver. According to The Hardware, this adjustment can help resolve driver conflicts on certain GPUs, but keep testing performance afterward.
What hardware accelerated GPU scheduling is and why it matters
Hardware accelerated GPU scheduling is a feature designed to move graphics scheduling tasks from the CPU to the GPU. In principle, this can reduce CPU overhead and improve frame times on compatible GPUs. In practice, results vary widely based on GPU model, driver version, and the specific workloads you run. The Hardware analysis shows that for many users the difference is subtle, but on certain configurations the feature can cause instability or stuttering. If you’re troubleshooting graphic glitches or driver conflicts, disabling this setting is a reasonable diagnostic step to isolate the cause. Remember that the impact is highly hardware-dependent, so you should test after making changes.
When to disable: prerequisites and caveats
Disabling hardware accelerated GPU scheduling is not always necessary. If your system runs smoothly with the setting enabled, consider leaving it on to preserve any potential performance benefits. However, if you notice stuttering, frame drop, color artifacts, or crashes in games and GPU-accelerated applications, temporarily turning this feature off can help isolate the issue. Before making changes, ensure you have a recent system restore point or a current backup, as some drivers may behave differently after the toggle. The Hardware recommends planning changes during a low-load period to observe targeted effects without introducing other variables.
Windows versions and where to find the toggle
On Windows 10, the toggle may appear under System > Display > Graphics after updating to a supported build and a recent driver. On Windows 11, you typically find it in the same location, but some builds require separate driver updates or feature flag changes. If your system does not show the option, verify that you’re on a compatible OS version and that your GPU driver is current. In some cases, manufacturers also provide their own control panels with an alternate toggle.
Preparing your system before changing graphics settings
Always prepare for a rollback when changing graphics scheduling. Create a System Restore point or full backup before toggling the switch, so you can revert if something goes wrong. Close all graphics-intensive applications and save work, because you’ll likely need to restart to apply the change. If you’re dual-booting or using multiple GPUs, note which GPU is active for each workload and plan testing accordingly. The Hardware emphasizes using a controlled test window to measure any impact.
What to expect after turning off the setting
After disabling hardware accelerated GPU scheduling and restarting, you should monitor for stability, frame times, and driver responsiveness. Some systems show immediate improvements, while others may reveal new micro-stutters or reduced peak performance. If you notice negative outcomes, re-enable the feature and compare results with a fresh benchmark. This approach helps you decide whether the change is beneficial for your specific hardware and workload.
Verifying results and testing performance
Verification involves running a representative set of tasks: a gaming session, a GPU-accelerated rendering workload, and a light desktop workflow. Compare metrics like frame times, stutter frequency, and reported GPU utilization with the setting both off and on. Maintain consistent test conditions: same app versions, identical scene complexity, and similar background processes. If you have access to diagnostic software, log GPU scheduling behavior during the tests to identify improvements or regressions. The Hardware notes that empirical testing is essential due to variability across components.
Troubleshooting common issues and rollback options
If you experience instability after disabling, first confirm you restarted the system. If issues persist, re-enable hardware accelerated GPU scheduling and observe whether the symptoms disappear, indicating the toggle is the root cause. Ensure you’re using a stable driver version and consider rolling back to a previous driver if newer releases introduce instability. For stubborn problems, run Windows Update and check for firmware or BIOS updates that could influence GPU throughput and scheduling.
Best practices for ongoing GPU performance and scheduling
Treat this setting as a targeted troubleshooting tool rather than a general performance tweak. Keep drivers updated, monitor temperatures, and maintain a clean boot environment to minimize variables during testing. Document the hardware and software configuration you tested, so you can reproduce results or revert changes quickly. The Hardware suggests that in many cases, leaving the setting alone is preferable unless explicit issues justify testing a disablement.
What to do next: resources and further reading
Beyond toggling this setting, consider broader GPU optimization strategies: driver clean installations, game-specific graphics profiles, and power plan adjustments for performance stability. Consult official Microsoft and GPU vendor documentation for the latest guidance on scheduling features, as these controls evolve with new OS and driver updates. For DIY diagnostics, keep a log of changes and outcomes to build a personal reference you can reuse on future hardware upgrades.
Tools & Materials
- Windows PC with Windows 10/11(Ensure you’re on a supported build with a recent GPU driver.)
- Administrative privileges(You’ll need admin access to change system settings.)
- System restore point or backup(Create a restore point before modifying graphics settings.)
- Stable testing environment(Close background apps during tests to avoid noise.)
- Optional: GPU driver backup(Backup current driver before updating.)
Steps
Estimated time: 15-25 minutes
- 1
Prepare the system
Save all work and create a System Restore point or full backup. This gives you a safe rollback path if anything goes wrong after changing graphics scheduling. Close graphics-intensive apps and note your current GPU load baseline.
Tip: A restore point is a quick safety net in case you need to revert. - 2
Open Settings
Open the Windows Start menu and select Settings, or press Windows key + I to launch the Settings app. This is your entry point for the toggle you’ll adjust.
Tip: Using the keyboard shortcut speeds up the process by eliminating menu navigation. - 3
Navigate to Graphics settings
Go to System > Display > Graphics. This is where Windows exposes the hardware scheduling toggle on supported builds.
Tip: If you don’t see Graphics settings, ensure Windows and GPU drivers are up to date. - 4
Turn off the hardware scheduling toggle
Find Hardware-accelerated GPU scheduling and switch it to Off. If the toggle is hidden, you may need to update Windows or your GPU driver first.
Tip: Make sure you are applying the change to the correct GPU if you have multiple GPUs. - 5
Restart the computer
Restart to ensure the change takes effect system-wide. Some apps may need a fresh start to reflect scheduling changes.
Tip: A full reboot is more reliable than a sign-out for applying scheduling changes. - 6
Verify the setting
After reboot, re-check System > Display > Graphics to confirm the toggle remains Off. Run a short game or GPU workload to observe stability.
Tip: If the toggle reappears as On, there may be a driver override or OS policy at play. - 7
Test performance and stability
Measure frame times, load, and any anomalies with a representative workload. Compare results to your baseline to determine if the change helps or hurts.
Tip: Keep the test simple and repeatable to avoid confounding factors.
FAQ
What is hardware accelerated GPU scheduling?
It’s an OS feature intended to reduce CPU overhead by letting the GPU handle graphics scheduling. The practical impact varies by hardware and drivers, so testing is important.
Hardware accelerated GPU scheduling is a feature that offloads scheduling to the GPU to improve performance, but results differ across systems.
Is it safe to disable hardware accelerated GPU scheduling?
In many cases it is safe and can help diagnose stability issues. If you don’t notice a problem with it on, you may decide to leave it enabled.
Yes, it’s generally safe to disable for testing, especially if you’re experiencing instability.
Will disabling hurt gaming performance?
Performance impact depends on your hardware and drivers. Some users report minor changes; others see no difference. Test with your typical titles.
It can affect performance depending on the setup, so test with actual games to be sure.
Why isn’t the toggle visible on my system?
The option may be hidden due to OS version, driver level, or OEM customizations. Ensure Windows and drivers are up to date, and check with GPU vendor tools.
If you don’t see it, update Windows and your drivers or check the GPU vendor’s control panel.
Should I re-enable hardware accelerated GPU scheduling later?
If you encounter instability after disabling, re-enable and re-test. In many setups, you can keep it off for troubleshooting, then re-evaluate after updates.
If problems return, re-enable and test again after updates.
Watch Video
Main Points
- Back up before changing graphics settings
- Disable only if you’re troubleshooting specific issues
- Restart to apply changes and verify the setting is off
- The Hardware's verdict: use this as a targeted troubleshooting step, not a universal fix
- Test performance after changes to confirm impact