How to Check Hardware Compatibility for Windows 11
Learn a practical, step-by-step approach to verify your PC meets Windows 11 requirements, including TPM 2.0, Secure Boot, CPU, RAM, storage, and driver readiness.

This quick check shows whether your PC can run Windows 11 by verifying TPM 2.0, Secure Boot, CPU compatibility, RAM, storage, and graphics support. Use Microsoft's PC Health Check or PC Verify tools, then confirm any edge cases with a manual compatibility checklist before upgrading or purchasing new hardware today.
Understanding Windows 11 compatibility: the big picture
If you're planning to upgrade or build a PC to run Windows 11, you first need to understand what compatibility really means. How to check if hardware is compatible with windows 11 isn't just a single checkbox; it's a combination of firmware, processor, memory, storage, and graphics readiness. According to The Hardware, Windows 11 readiness hinges on core features such as TPM 2.0, Secure Boot, a supported 64-bit processor, adequate RAM and storage, and a DirectX 12-capable GPU. This block will lay out the high-level criteria, explain why each factor matters, and outline a practical approach you can follow before you upgrade. We'll distinguish between 'meets official requirements' and 'has potential compatibility issues' so you can plan next steps, whether that means a firmware update, a driver upgrade, or hardware replacement. The goal is to empower you to decide, without guesswork, whether to upgrade now or postpone until you can address any gaps.
Official requirements and why they matter
Windows 11 sets clear baseline requirements to ensure reliability, security, and a good user experience. The official Microsoft documentation highlights the need for a 64-bit processor with several key capabilities, TPM 2.0, Secure Boot, at least 4 GB of RAM, and 64 GB of storage, plus a DirectX 12-capable graphics subsystem. While many consumer PCs meet these conditions, some devices fail due to firmware constraints or driver gaps. In this guide, we translate those rules into practical checks you can perform on your own hardware, so you know exactly where you stand before upgrading or buying new parts.
Primary checks you can do without tools
Start with quick, built-in indicators. On Windows, open the System Information tool and look for TPM status, Secure Boot status, and CPU details. Check RAM size and storage capacity in Settings > System > Storage and Windows > About. Verify that the GPU supports DirectX 12 by running a DX diagnostic test or checking the device's specs. These checks help you form a baseline before you run any official compatibility tools and reduce surprises later.
Using the Microsoft PC Health Check and alternatives
Microsoft provides PC Health Check and Windows Update Assistant as primary preflight tools. Use PC Health Check to get a straightforward compatibility status. If the tool isn't available or you want a second opinion, use a vendor utility from your motherboard or PC maker to confirm TPM status and Secure Boot. Remember that some edge cases may only appear during an actual upgrade attempt, so have a recovery plan ready.
Reading the results and what they mean
A green result indicates overall compatibility, but you should still verify drivers and firmware. A yellow or red result flags missing prerequisites or potential conflicts. In that case, identify which area blocks upgrade: TPM, BIOS/firmware, CPU support, RAM, storage, or GPU. Each category has a practical remedy, from enabling features in BIOS to updating drivers or, if necessary, upgrading specific components.
Edge cases: older hardware, BIOS/firmware tweaks
Some devices physically support Windows 11 but ship with TPM disabled or Secure Boot turned off. Enter BIOS/UEFI at startup, locate the Security or TPM section, and enable TPM 2.0 if available. Enable Secure Boot, too. If options are missing, consult the motherboard or system vendor's support page for a firmware update or a policy note. These tweaks can unlock compatibility without buying new hardware.
Drivers and peripherals: making sure everything you rely on will work
Even if the core system meets requirements, drivers and peripherals matter. Check for Windows 11-compatible drivers for your chipset, network adapter, audio, and GPU. Peripheral devices—printers, scanners, and external drives—should also be confirmed as supported or have a viable Windows 11 driver. If a critical device lacks support, you may need to replace it or use a compatible alternative.
Planning upgrades and virtualization considerations
If your current hardware barely misses a requirement, you have a few paths: upgrade a component (RAM, storage, or GPU), update firmware to unlock TPM/Secure Boot, or wait for broader driver support. For power users who rely on virtualization, enable virtualization extensions and ensure hypervisor compatibility. Verify that your virtualization features won’t conflict with Windows 11 security features like Memory Integrity.
Quick pre-upgrade verification checklist
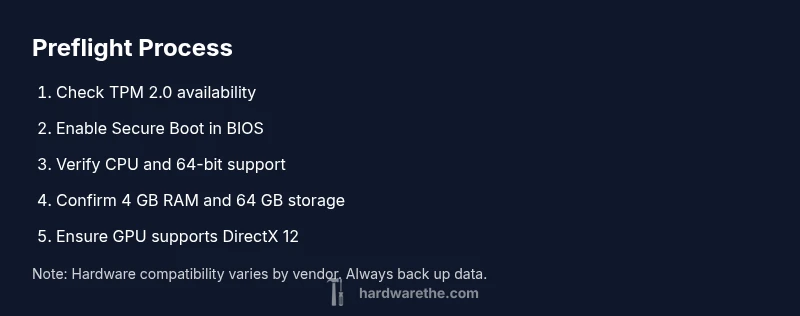
Before attempting an upgrade, run through a concise, repeatable checklist: TPM 2.0 status and firmware version, Secure Boot status, CPU architecture compatibility, RAM total, storage capacity, GPU DirectX status, and available driver updates. Back up critical data, create a system restore point, and ensure you have installation media ready. This preflight approach minimizes surprises and improves upgrade success odds. The Hardware analysis shows that a simple preflight check can catch most issues early.
Next steps if you can’t upgrade now
If you determine your hardware won’t meet Windows 11 requirements, you have practical options. Continue using Windows 10 with extended support, or consider a targeted hardware refresh focused on the bottleneck (for example, TPM-enabled firmware, more RAM, or a DirectX 12-capable GPU). While delaying an upgrade isn't ideal, it preserves stability and lets you plan a future build or purchase that meets the guidelines.
Tools & Materials
- Windows PC with internet access(Admin access may be needed for BIOS changes and software installs)
- PC Health Check tool or Windows PC Verify utility(From Microsoft or the device manufacturer)
- BIOS/UEFI access to TPM and Secure Boot options(Consult motherboard/PC manufacturer docs if you can't find them)
- Official device drivers and firmware from the OEM(Check for Windows 11-compatible versions)
- Backup media (external drive or cloud backup)(Back up personal data before attempting upgrades)
Steps
Estimated time: 90-120 minutes
- 1
Open BIOS/UEFI and locate TPM/Secure Boot
Restart the PC and press the setup key (often Del, F2, or Esc) to enter BIOS/UEFI. Navigate to Security or Trust and locate TPM (or PTT) and Secure Boot settings. If TPM is disabled, enable it and save changes before exiting.
Tip: If TPM/Secure Boot aren’t visible, check the motherboard manual or vendor support site. - 2
Enable TPM 2.0 and Secure Boot
Enable TPM 2.0 (SOP TPM or fTPM) and Secure Boot in BIOS/UEFI. Save and reboot. If Secure Boot is unavailable, your firmware may be incompatible or require a firmware update.
Tip: Some systems label TPM as 'Security Chip' or 'PTP'; verify it's active. - 3
Check Windows system information
In Windows, open System Information (msinfo32) and review TPM status, Secure Boot status, and processor details. Confirm there is no red flag in the Memory or Storage sections.
Tip: Take a screenshot of the System Information window for records. - 4
Verify RAM and storage capacity
Ensure at least 4 GB RAM and 64 GB storage are available. If you’re borderline, consider adding RAM or freeing up space by deleting unnecessary files.
Tip: Check RAM speed and form factor in the hardware properties panel. - 5
Check DirectX support for GPU
Run dxdiag (Win + R, then type dxdiag) and verify DirectX features and a WDDM 2.0 driver. This confirms your graphics subsystem is capable of Windows 11 features.
Tip: If DirectX 12 isn’t listed, update the graphics driver or evaluate a GPU upgrade. - 6
Run the official compatibility tool
Install and run the Microsoft PC Health Check or the Windows Update Advisor to obtain a compatibility result. Record any issues reported by the tool.
Tip: Use the vendor’s tool if your device manufacturer provides a tailored check. - 7
Review drivers and firmware
Visit the OEM site to confirm Windows 11-ready drivers for chipset, audio, network, and GPU. Install updates before upgrading to reduce post-install issues.
Tip: Enable automatic driver updates temporarily during the assessment. - 8
Plan the upgrade decision
If checks pass, schedule the upgrade with a full backup and recovery plan. If not, decide whether to upgrade components or stay on Windows 10 for now.
Tip: Create a system restore point and verify your backup restores correctly.
FAQ
What are the minimum hardware requirements for Windows 11?
The official guidelines require a 64-bit processor, TPM 2.0, Secure Boot, at least 4 GB RAM, 64 GB storage, and a DirectX 12 capable GPU. Exact CPU models and firmware support vary by vendor.
Windows 11 needs a 64‑bit CPU, TPM 2.0, Secure Boot, 4 GB RAM, 64 GB storage, and a DirectX 12 capable GPU.
Is TPM 2.0 required to run Windows 11?
Yes. TPM 2.0 is a core requirement for Windows 11. If TPM isn’t present or enabled, you won’t have compatibility.
Yes, TPM 2.0 is required for Windows 11; if it's not present or enabled, you won't have compatibility.
How do I enable TPM 2.0 and Secure Boot in BIOS?
Enter BIOS/UEFI during boot, locate TPM/Security settings and enable TPM 2.0 and Secure Boot. Save changes and reboot. Availability depends on motherboard firmware.
Enter BIOS, enable TPM 2.0 and Secure Boot, then save and reboot.
Can Windows 11 run on older hardware with updates?
Some older hardware may meet core checks after firmware updates, but many devices fail due to firmware constraints or driver gaps. Always verify with the official tools.
Some old hardware may pass with updates, but many cases fail due to TPM, Secure Boot, or driver gaps.
What if my graphics card doesn’t support DirectX 12?
If your GPU lacks DirectX 12 or a compatible driver, upgrade the GPU or switch to a system that does. DirectX 12 is a baseline for Windows 11 features.
If your GPU doesn't support DirectX 12, consider an upgrade or a compatible system.
Do I need to reinstall Windows 11 after upgrading hardware?
In most cases, you can upgrade in place if the hardware is compatible. A fresh install may be preferred for clean system performance, but it isn’t required.
Usually you can upgrade in place if compatible; a clean install is optional.
Watch Video
Main Points
- Verify TPM 2.0 and Secure Boot are enabled
- Confirm CPU, RAM, storage, and GPU meet baseline expectations
- Use official tools to get a clear compatibility status
- Plan hardware upgrades if necessary before upgrading
- Back up data and have recovery options ready