Hardware for Floating Shelf: A Practical How-To Guide
Discover how to select and install hardware for floating shelf systems. Learn about brackets, rails, anchors, and load considerations for a sturdy, clean floating shelf installation.

Quick answer: You will learn how to select hardware for floating shelves, estimate load capacity, and install securely with clean, hidden brackets. This guide covers bracket types, weight ratings, screw choices, spacing guidelines, and safety checks to ensure a stable shelf that looks as good as it performs.
Understanding hardware for floating shelf
When you talk about hardware for floating shelf, you're focusing on the hidden mounting that makes the shelf appear to float. According to The Hardware, concealed mounting transfers the shelf's load through sturdy brackets or rails into wall studs, delivering strength without visible supports. This approach requires careful matching of bracket type, wall material, and shelf thickness to achieve both performance and aesthetics.
Key components include:
- Concealed mounting brackets or rails that remain behind the shelf face.
- Wall anchors or studs that provide the primary load path.
- Compatible screws sized to bracket holes and wall material.
- A method for attaching the shelf to the brackets (slotted rails, set screws, or clamps).
- Optional anti-tip hardware for tall or heavily loaded shelves.
In practice, the best choice depends on shelf depth, weight expectations, and wall type. For light decorative shelves on studded drywall, a simple concealed bracket kit may suffice. For deeper shelves or masonry walls, you’ll likely need reinforced anchors, longer fasteners, and a rail system that spans multiple studs. The goal is stability, safety, and a seamless, floating look.
Types of mounting systems for floating shelves
Floating shelves can be mounted with several different concealed systems, each with strengths and limitations. The most common options are concealed rail systems that run horizontally behind the shelf, and single- or dual-post brackets that lock into a rail or a wall plate. Some setups use a pair of brackets that slide into a back rail, while others rely on a single central post that bears most of the load. For ultra-clean lines, hidden-clip or clamp mechanisms attach the shelf edge to a bracket without visible brackets beneath the shelf face. When choosing, consider shelf depth, weight capacity, and wall type. Rails that span two studs provide more margin for error on uneven walls, while single-post brackets are easier to install but typically support lighter loads.
A note on materials: steel is most common because of high strength-to-weight ratios; aluminum can be lighter but may require different screws. Finishes should match your shelf and room style, not just the hardware color. Always confirm compatibility with your shelf thickness and mounting pattern to ensure a precise, secure fit.
Weight, load path, and safety fundamentals
The ability of a floating shelf to bear weight hinges on a clear load path: shelf → bracket/rail → wall stud or anchor → wall substrate. The Hardware Team emphasizes choosing components that are rated for the expected load and installed into solid structural members. If you’re mounting on drywall without studs, you must use appropriate anchors and verify that the combination of anchor, screw, and bracket can handle the intended weight. Do not rely on the wall alone. For heavier loads, spread weight across two or more mounting points and consider a continuous rail that anchors into multiple studs. Finally, verify that the shelf is level and plumb before finishing any concealed fasteners; a misaligned shelf looks off and may fail under load.
Material compatibility: wall types and shelf materials
Your wall type and shelf material determine the right hardware. On wood studs, you can use longer self-tapping wood screws that bite into the stud center. On drywall alone, use toggle anchors or sleeve anchors designed for high shear load. On masonry walls—brick or concrete—select masonry screws or anchors and pre-drill with a masonry bit. Shelf material itself should be compatible with the bracket’s load path; thicker shelves distribute weight more evenly and reduce stress at mounting points. If your shelf is engineered wood or plywood, predrill to avoid splitting. Always use hardware that matches the shelf depth and thickness; mismatches can cause the shelf to rock or detach.
Choosing brackets and rails: sizes, materials, finishes
The bracket or rail you choose should be sized to the shelf depth and expected load. For standard 12–14 inch deep shelves, a pair of heavy-gauge steel brackets or a continuous steel rail is typical. Material choices include stainless steel, zinc-coated steel, and anodized aluminum. Finishes should coordinate with the room’s hardware and furniture, but function is more important than color: corrosion resistance matters in kitchens or bathrooms. Check the bracket hole pattern conforms to wall screws and that the screws are long enough to reach studs or anchors. If your shelf will hold heavy items, opt for thicker material and more attachment points to prevent sagging over time.
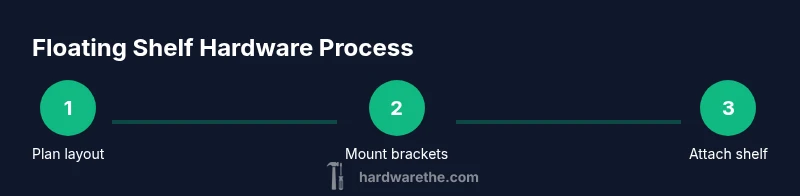
Planning your layout and measuring before you drill
Before you touch a drill, plan your layout carefully. Measure wall height and the intended position relative to other fixtures, marks, or outlets. Use a level to establish a straight baseline, then transfer that line to the wall. Determine the distance between mounting points according to the shelf’s length and weight: longer shelves generally require more mounting points. Mark pilot holes, check for obstructions, and double-check stud locations. Finally, choose the correct wall anchors or screws for your wall type; mismatched hardware is a common cause of failure. A careful plan saves time and reduces the risk of a misaligned, unstable shelf.
Common mistakes and how to avoid them
Common errors include mounting into drywall without proper anchors, misjudging weight, and skipping level checks. Avoid these by always locating studs or using high-quality anchors designed for the wall material. Don’t rush the mounting; take time to confirm spacing and line up brackets with the shelf edge. If you’re uncertain about wall material, test a small area with a drill before committing to the full installation. Use a spacer to maintain consistent depth between the shelf and brackets. Finally, maintain caution around electrical lines and plumbing; accidental hits can cause damage or safety hazards.
Maintenance, alignment checks, and long-term care
A floating shelf benefits from periodic checks. Revisit the level occasionally and inspect screws for looseness; tighten as needed with the correct driver bit. If you notice wobble, verify that all anchors and screws are seated and that the wall substrate hasn’t deteriorated. Clean the brackets and rails to prevent corrosion, especially in humid areas. For high-use shelves, consider re-checking every six months or after moving heavy objects. Repaint or touch up finishes to preserve aesthetics and protect metal from moisture-related rust.
Quick-start checklist and next steps
- Confirm wall studs or suitable anchors and gather the right tools.
- Plan your layout, mark mounting points, and level the baseline.
- Install rails or brackets into studs or anchors, then attach the shelf.
- Verify levelness, test with light loads, and gradually increase weight.
- Perform a final safety check and tidy the workspace.
Now you’re ready to mount your floating shelf with confidence, knowing the hardware supports both form and function.
Tools & Materials
- Stud finder(Locate wall studs behind drywall; mark center lines.)
- Level(Ensure horizontal alignment of brackets.)
- Measuring tape(Measure spacing and shelf depth.)
- Pencil(Mark drill points.)
- Drill/driver(Power drill with appropriate bit sizes.)
- Masonry drill bits(If wall is concrete or brick.)
- Concealed mounting rail kit(Choose compatible with shelf depth.)
- Appropriate screws and anchors(Wood screws for studs, masonry screws or anchors for drywall or masonry.)
- Safety gear (glasses, gloves)(Eye protection during drilling.)
Steps
Estimated time: 60-90 minutes
- 1
Locate studs and plan mounting points
Identify where studs run using the stud finder and visually verify with a small nail test. Mark the center of each stud and establish a baseline for brick and masonry if needed. Plan bracket locations to distribute weight evenly along the shelf length.
Tip: Double-check stud locations with a second method (measuring from a corner or using a magnet) to avoid false positives. - 2
Mark drill points and prepare anchors
Transfer the planned bracket positions to the wall with a level, then mark pilot hole locations. If mounting on drywall without studs, select appropriate anchors rated for the expected load. Pre-arrange anchor types and sizes to match your brackets.
Tip: Use a center punch on hard surfaces to prevent walking of the drill bit. - 3
Drill pilot holes and insert anchors
Drill pilot holes at every marked point using the correct bit size. Insert drywall, masonry, or stud anchors as required, ensuring they sit flush with the wall surface. If using masonry, pre-drill with a masonry bit and gently tap in anchors.
Tip: Drill slowly and keep the bit perpendicular to the wall to prevent wall damage. - 4
Attach mounting rails or brackets to wall
Align rails or brackets with anchors or studs and drive screws until snug. Check that the rails are level and square to the shelf path. Tighten screws evenly to avoid warping.
Tip: Avoid over-tightening which can strip anchors or deform metal brackets. - 5
Position shelf and secure to brackets
Slide the shelf onto the mounted brackets or attach it with set screws/clamps as designed. Ensure the shelf sits flush against the wall and is centered over the bracket pattern. Install any locking hardware if provided.
Tip: Have a second person assist to hold the shelf during final alignment. - 6
Check level and alignment
Use a level to verify horizontal alignment and check both ends of the shelf for even spacing from the wall. Make minor adjustments if needed before final tightening.
Tip: Check both visually and with a straight edge to catch subtle deviations. - 7
Secure hardware and finalize
Tighten all fasteners once level is confirmed. Wipe away dust, recheck for wobble, and perform a light-load test before placing heavier items.
Tip: Keep hardware from backing out by occasionally re-tightening after initial use.
FAQ
Can I mount floating shelves on drywall without studs?
Yes, but only with high-quality anchors rated for the shelf's expected load. Always follow bracket and anchor manufacturer guidelines and avoid exceeding the load ratings.
You can mount on drywall with anchors, but you must use anchors rated for the weight and follow the ratings carefully.
What size brackets do I need for a 24-inch shelf?
For a 24-inch shelf, use two heavy-duty brackets or a continuous rail designed for that span. Ensure the mounting pattern aligns with studs or anchors, and that the hardware supports the shelf thickness and load.
For a 24-inch shelf, use two strong brackets or a continuous rail that fits the span and load.
How can I tell if my wall can support the load?
Assess wall type, stud density, and anchor ratings. If in doubt, consult installation guidelines from the bracket manufacturer or a qualified tradesperson.
Check wall type and anchor ratings; when in doubt, consult the manufacturer’s guidelines.
Can I install on brick or concrete walls?
Yes, but you will need masonry anchors or screws and a masonry bit for pre-drilling. Ensure the anchors are rated for the expected load and compatible with your rails.
Yes, with masonry anchors and the right bit—be sure they’re rated for your shelf weight.
What maintenance is needed after installation?
Periodically check tightness of screws, inspect for wobble, and re-tighten as needed. Clean rails and brackets to prevent corrosion in humid areas.
Check screws and wobble regularly, and clean the hardware to prevent corrosion.
How do I hide the mounting hardware?
Use concealed brackets or rails that sit behind the shelf face. Ensure any set screws or clamps are flush with the shelf edge.
Hide it with concealed brackets that sit behind the shelf and are flush with the edge.
Watch Video
Main Points
- Identify studs or use appropriate anchors for safety.
- Choose brackets/rails sized to shelf depth and load.
- Plan layout and level before drilling.
- Distribute weight across multiple mounting points.
- Recheck alignment after first use.