What to Do If Equipment Is Faulty: A Practical Troubleshooting Guide
Urgent, practical steps to diagnose and fix faulty equipment. Learn safety-first troubleshooting, common causes, DIY fixes, and when to call a professional with The Hardware.

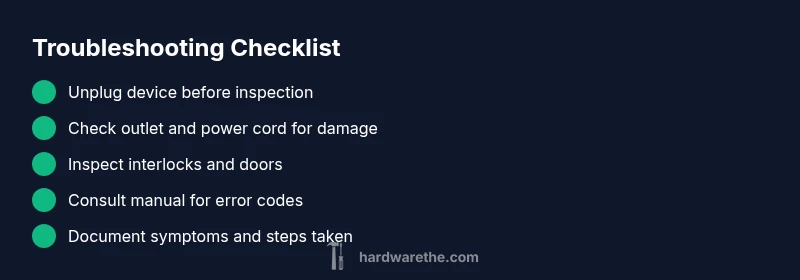
Steps to fix faulty equipment start with safety: unplug the device, then check power, outlets, and fuses. Inspect for visible damage, reseat connections, and perform a controlled reset. If it still fails, consult the user manual or contact a qualified technician.
Identify the Problem Before Acting
When equipment fails, start by identifying the symptom and the context in which it occurred. Note whether the device powers on at all, makes unusual noises, or behaves erratically. Gather basic details: model number, age, and the environment (wet area, dusty cabinet, overheated room). According to The Hardware, many faults stem from simple causes like a loose power cord, a tripped breaker, or a worn fuse rather than a rare internal failure. A clear description makes both DIY fixes and professional service faster and safer.
Create a fault log: date, observed symptoms, any sounds, smells, or heat. Record any error codes on the display and capture photos of the control panel. This information helps you decide if a DIY remedy is appropriate or if a service visit is required under warranty. By documenting the problem, you also streamline communication with support teams and prevent misdiagnosis. Remember that a faulty piece of equipment can be hazardous if ignored, so proceed with prudence and avoid improvising repairs beyond your skill level.
Safety First: Power, Water, and Gas Precautions
Before touching any appliance or tool, shut off power to the device and the circuit if needed. Unplug from the wall outlet, switch off the breaker, and keep hands dry. If the equipment handles water or gas, close valves and avoid sparks near fluids or vents. Read the user manual for any device-specific safety steps, especially for high-voltage or pressurized systems. Wear protective gear as appropriate, such as insulated gloves and safety glasses. Never attempt repairs that involve disassembly of sealed housings or critical safety interlocks. If you smell gas, hear unusual hissing, or see scorch marks, evacuate the area and call emergency services or a licensed professional. These precautions protect you and prevent further damage while diagnosing what to do if equipment is faulty.
Quick Diagnostic Checks You Can Do
Start with the simplest checks: confirm the device is plugged in securely and that the outlet works (test with a lamp). Inspect the power cord for cuts or exposed wires. Ensure any power switch, reset button, or fuse is in the correct position. Look for tripped breakers or blown fuses in the main panel. Check for blocked vents, clogged filters, or jammed doors that might cause automatic shutdowns. If the device has a digital display, note any error codes and consult the manual to interpret them. For wireless devices, verify battery levels or network connectivity. These basic checks cover the majority of straightforward faults and help you decide whether to proceed with more involved steps.
Understanding Symptoms and Likely Causes
Symptoms guide diagnosis. A device that won’t start after a reset often indicates a power issue or faulty interlock. A buzzing, burning, or heat smell suggests an electrical fault, insulation damage, or a loose connection. Leakage, unusual noises, or leaking water points to seals, hoses, or pumps. Firmware glitches can trigger error codes that require a software reset or update. Mechanical bindings may stem from worn bearings or blocked components. The Hardware emphasizes avoiding assumptions; instead, map symptoms to probable causes and prioritize safety and warranty rules. Keep a log of each symptom alongside the exact time and user actions before failure. This approach reduces guesswork and leads to targeted fixes.
When to Call a Professional vs DIY
DIY is feasible for low-risk faults, such as loose cords, reset procedures, or cleaning and basic maintenance. For signs of electrical faults, water leaks with electricity risk, gas connections, or devices under warranty experiencing faults, contact a licensed technician. If the device is gas-powered or connected to gas lines, do not attempt repairs yourself. If there is a strong odor, buzzing, heat, or smoke, immediately shut off power and call emergency services. Document your fault log and warranty terms before requesting service to avoid miscommunication.
Documentation, Warranty, and Preventive Steps
Keep a maintenance log, track replacement parts, and note service calls. Check if your device is still under warranty or an extended service plan; warranty coverage and service fees vary by region. Save receipts, serial numbers, and manuals in one folder. Regular maintenance like cleaning filters, checking cables, and updating firmware or drivers reduces faults. Implement a simple preventive routine: monthly visual checks, quarterly function tests, and a quick post-use shutdown sequence. Also set up safety reminders and a plan for emergency shutoffs. The Hardware highlights that a proactive approach minimizes downtime and extends equipment life.
Steps
Estimated time: 30-60 minutes
- 1
Power safety and initial checks
Unplug the device, switch off the circuit breaker, and verify the outlet works by testing with a different gadget. If the outlet is dead, address the circuit first. Reconnect only when you’re sure power is stable.
Tip: Always use a GFCI-protected outlet for wet environments. - 2
Inspect external cables and connections
Look for frayed cables, loose plugs, or damaged connectors. Reseat all plugs firmly and ensure any removable modules are locked in place. If you notice scorch marks, smoke, or a strong odor, stop and seek professional help.
Tip: Take a clear photo of the cable configuration before disconnecting anything. - 3
Check safety interlocks and door switches
Some devices won’t start if a door or access panel isn’t properly closed. Manually depress switches and listen for a click. If a switch feels sticky or dead, avoid forcing it and consider service.
Tip: Never bypass safety interlocks; it can cause injury or further damage. - 4
Perform a safe reset or calibration
Follow the manual to execute a factory reset or calibration sequence. Record the original settings before you reset. Re-test the device after the reset to see if behavior changes.
Tip: Use only the procedure specified by the manufacturer. - 5
Check error codes and logs
Note any error codes on the display and cross-reference them with the manual. Some codes indicate specific components or sensor faults and guide you toward the right fix.
Tip: Document codes with timestamps for service visits. - 6
Decide on next steps
If the fault persists after the above steps, prepare for professional service. Gather the model, serial number, warranty status, and fault log to speed diagnostics.
Tip: Keep access to original packaging and manuals for service calls.
Diagnosis: Device won't start or shows intermittent behavior
Possible Causes
- highPower issue (outlet, breaker, or cord)
- mediumFaulty power switch or control panel
- lowInterlock or safety switch engaged or bypassed
Fixes
- easyCheck outlet with a known-good device and reset breakers; replace damaged cords if needed
- easyReseat or replace power cord, plug, and loose connectors; inspect for heat damage
- mediumIf interlock or internal switch is suspected, stop here and call a qualified technician
FAQ
What should I do first when equipment is faulty?
Begin with safety: unplug the device, inspect the outlet, and look for obvious damage. Note symptoms and any error codes, then consult the manual for guidance. If unresolved, contact a qualified technician.
First, unplug the device and check for obvious damage. Note symptoms and error codes, then follow the manual or call a technician if it stays unresolved.
Is it safe to continue using faulty equipment?
No. Faulty equipment can pose electrical, chemical, or mechanical hazards. Stop usage, unplug, and assess safety before any further testing or repair.
No. Don’t use faulty equipment. Unplug it and assess safety before attempting repairs or further testing.
How do warranty and service plans affect repair?
Warranty terms vary by provider and region. Check the policy for coverage on parts and labor, and whether self-repair voids the warranty. Keep receipts and serial numbers for claims.
Warranty terms vary; check coverage and keep your receipts and serial numbers for claims.
What are common signs of overheating or electrical faults?
Look for smoke, a burning odor, or heat on the enclosure. Frequent tripping, buzzing sounds, or warm surfaces indicate electrical faults requiring caution and possible professional inspection.
Watch for burning odors, smoke, buzzing, or excessive heat—these mean you should stop and seek professional help.
When should I replace rather than repair?
If the unit is old, has frequent faults, or repair costs approach or exceed replacement cost, replacement is usually the smarter option. Consider energy efficiency and downtime too.
If faults are frequent or costly, replacement may be wiser than ongoing repairs.
How can I prevent equipment faults in the future?
Perform regular maintenance, keep firmware updated, protect devices from power surges, and store equipment in appropriate environments. A simple quarterly check can catch issues early.
Regular maintenance and updates prevent many faults before they start.
Watch Video
Main Points
- Prioritize safety before any diagnosis.
- Start with simple checks; most faults are power-related.
- Document symptoms and codes for faster repair.
- Know when to escalate to a professional.