How to Know If Your Hardware Is Banned
Learn practical steps to determine if hardware is banned, understand why it happens, verify status with vendors, and how to appeal. A thorough, DIY-friendly guide from The Hardware.

You can determine whether your device has been banned by services by checking for lockouts, error codes, and unusual login prompts tied to your hardware. According to The Hardware, hardware bans typically involve blocked IDs rather than user accounts alone. This guide explains how to know if your hardware banned and how to proceed with verification and appeals.
What a hardware ban truly means
A hardware ban is a restriction tied to your device's identifiers rather than your user account alone. When a platform or service detects policy violations or suspicious activity linked to your hardware, access can be blocked at the device level. According to The Hardware, understanding how bans manifest helps DIYers distinguish genuine penalties from temporary errors. This section clarifies the core concept, the kinds of devices affected (PCs, consoles, external hardware), and why manufacturers rely on device-level enforcement. Recognizing the difference between a ban and a routine suspension is crucial for choosing the right remediation path and avoiding unnecessary losses of access to tools and communities you rely on for your projects.
Signals that your hardware might be banned
Several telltale signs point toward a hardware ban. You may see persistent access denial messages when loading services that previously worked, a spike in authentication errors tied to your device configuration, or a sudden loss of features once available on that device. Some platforms display a dedicated ban code or a warning banner, while others rely on a generic error that doesn’t clearly name the ban. If you notice these symptoms after certain hardware changes, it’s reasonable to investigate further. The Hardware team emphasizes documenting the exact messages and timestamps, as these details are often essential during appeals and verification with support.
How bans appear in services and software
Hardware bans can manifest in different ways across platforms. Gaming services may block a device's hardware IDs, while software ecosystems might flag a motherboard, CPU, or network adapter without revealing the reason. You might encounter blocked sessions, restricted feature sets, or complete access denial. It’s common for platforms to associate a ban with a user account as well, which can complicate troubleshooting. The key is to differentiate between a ban on the device and a ban on an account and to verify whether the problem persists across multiple accounts or only one. In many cases, a shared network or a linked account can inflame the situation, so double-check the scope before jumping to conclusions.
How to verify status with your account and service logs
Start by logging into the service with the same device and check for any ban notices or policy violation messages. Review recent activity and compare it with your normal usage to spot anomalies. If the service offers a status page or a support portal, look for device-level notices or hardware-ID blocks rather than generic account suspensions. Collect log files, error codes, and timestamps from both the device and the service portal. This information helps you build a precise timeline of events and supports a fair appeal. Remember, some platforms re-evaluate bans after a grace period, so note the date of any notices for reference.
Collect identifiers: hardware IDs, serials, MACs, and more
A crucial step in understanding whether your hardware is banned is gathering all identifiers that services might associate with your device. This includes hardware serial numbers, MAC addresses, BIOS/UEFI IDs, GPU IDs, motherboard IDs, and any externally connected dongles or peripherals that could be tied to a ban. Document these identifiers with your device model, OS version, and approximate purchase date. Keep a copy of purchase receipts or warranty information as proof of ownership. If you’re unsure which IDs are used by a given service, start with the most persistent IDs (hardware serials, MACs) and then move to component-level IDs if needed.
Check official notices and vendor databases
Before accusing a platform, check official notices from the service and the hardware manufacturer. Many platforms publish policy updates or ban-related notices in their support centers, blogs, or community forums. Some vendors maintain searchable databases or status dashboards for bans, device blocks, or policy changes. The Hardware recommends collecting the exact error codes and messages from your devices and comparing them with the vendor’s documented codes. If no official ban is published, proceed to reach out to support with your collected data to confirm status and next steps.
How to appeal a suspected hardware ban
If you suspect a ban but aren’t certain, file an appeal with clear, factual information. Include your device identifiers, purchase proof, a detailed timeline of events, and any relevant logs or screenshots. Be specific about what changed before the ban appeared and what actions you’ve taken since. A well-prepared submission improves your odds of a fair reassessment. Some platforms offer an automated appeal form, while others require direct contact with support or a policy team. In all cases, maintain a professional tone and avoid emotional language.
Documentation and proof you may need
Prepare a concise packet: device identifiers, purchase receipts, warranty letters, and a log of dates and messages related to the ban. Screenshots of error messages, service notices, and account activity can be supportive. If you have changed any hardware recently (new GPU, motherboard, or network adapter), note these changes and provide rationale for why they don’t violate terms. Organized documentation reduces back-and-forth and speeds up the verification or appeal process.
Preventive steps and how to document appeals effectively
To minimize future false positives, keep a detailed inventory of all hardware components, keep firmware and drivers up to date, and avoid using compromised or counterfeit peripherals. When appealing, attach a clean, chronological timeline showing both the incident and corrective actions. The Hardware cautions against making unsupported claims; stick to verifiable facts, and when possible, reference official policies and codes. This careful approach helps you regain legitimate access without unnecessary delays.
What to do if the ban is legitimate: next steps
If an official determination confirms the ban, use the recommended channels to appeal the decision if a pathway exists, or consider using alternative services while respecting the platform’s terms. In some cases, a device ban can be tied to broader infractions; in others, it may be a one-off error that is corrected after review. Regardless, maintain a record of all communications and keep backups of any supporting evidence. The Hardware’s guidance is to stay proactive and compliant while you navigate the resolution process.
Tools & Materials
- Account with the service or vendor(Needed to verify ban status and submit appeals)
- Current device identifiers (serial numbers, MACs, GPU/CPU IDs)(Collect from OS tools or hardware documentation)
- Official support contact or portal access(For submitting appeals or verification requests)
- Purchase receipts or warranty documents(Useful for ownership proof during appeals)
- Time-stamped error messages and screenshots(Help demonstrate the ban event timeline)
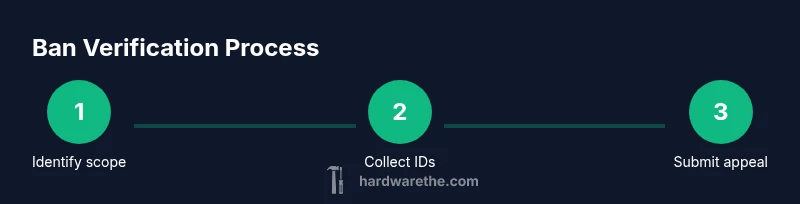
Steps
Estimated time: 40-60 minutes
- 1
Identify scope of the ban
Clarify whether the restriction is device-wide or account-specific. Review the exact error messages and codes to determine if the issue points to hardware identifiers or user credentials. This step sets the direction for all follow-up actions.
Tip: Record the first date and time you saw the ban message to anchor your investigation. - 2
Collect all relevant hardware IDs
Gather serial numbers, MAC addresses, GPU/CPU IDs, and other persistent identifiers. Use system tools or manufacturer utilities to extract clean values. Label each ID with the corresponding component so you don’t mix them up later.
Tip: Take high-quality screenshots of ID lists to attach to any appeal. - 3
Check account status and service notices
Log into the service and review any ban notices, policy updates, or status pages. Compare what you see with the identifiers you collected. If the service shows a device-specific block, note the exact device IDs tied to the message.
Tip: Open a separate browser window or tab for status pages to avoid session changes during testing. - 4
Search official policies and vendor databases
Look for published ban policies and any device-block databases. Verify whether your hardware IDs match those in the policy. If the platform has a knowledge base article on bans, review it for criteria and examples.
Tip: Only use official sources; avoid third-party claims that lack verifiable references. - 5
Prepare a concise appeal packet
Assemble a timeline, supported IDs, receipts, and screenshots. Write a calm, factual summary of what happened, when it happened, and what you’ve done since. Attach only verifiable documentation.
Tip: Keep the packet under two pages; longer submissions reduce the chance of missing key details. - 6
Submit appeal and monitor status
Send the packet through the official portal or support channel. Note the reference number and set reminders to check progress. If you don’t hear back in the stated window, follow up politely with the reference.
Tip: Avoid multiple submissions; one clear case with documentation is more effective.
FAQ
What counts as a hardware ban?
A hardware ban restricts access based on device identifiers rather than solely on a user account. It can affect the entire device or a subset of components. Always verify whether the ban is device-wide before assuming it’s user-related.
A hardware ban blocks access based on device identifiers, not just your account. Verify whether the device or the account is affected by checking messages and support notices.
Can software bans look the same as hardware bans?
Sometimes software bans appear similar to hardware bans because the service uses device checks during login. Distinguish them by testing with a different device or network and by reviewing whether other accounts are blocked on the same device.
Software bans can resemble hardware bans, but testing with another device helps tell them apart. Check if other accounts are affected on the same device.
How do I verify if my device IDs are blocked?
Collect device IDs (serials, MACs, GPU IDs) and compare them to any official ban notices or policy references. Use official support channels to confirm whether these IDs are the basis for a ban.
Gather the device IDs and compare them to official notices. Contact support to confirm if these IDs are the reason for a ban.
What should I include in an appeal packet?
Include a timeline of events, all relevant IDs, receipts, and screenshots of error messages. Keep the narrative concise and factual, referencing official policy language where possible.
Include a clear timeline, IDs, receipts, and screenshots. Be concise and cite official policy language when you can.
Do bans ever disappear on their own?
Some platforms reevaluate bans after a grace period or upon new information. If there’s no official update, continue following the supported appeal process and avoid assuming the ban is lifted.
Bans may be reevaluated after a period; keep following the official appeal steps and don’t assume it’s removed automatically.
How long should I wait for a response after appealing?
Response times vary by platform, but most provide a timeframe in the support portal. If the window passes, send a polite follow-up with your reference ID and a brief status update.
Check the portal for a timeframe, and if needed, follow up politely with your reference ID.
Watch Video
Main Points
- Understand device vs. account bans and identify which applies to you
- Collect and document hardware IDs and purchase proof
- Check official notices before concluding; verify status with support
- Prepare a concise, factual appeal packet with timestamps
- Follow up professionally and keep records for reference