How to Put Hardware on Cabinet Doors: A Complete DIY Guide
Learn a practical, step-by-step method to install cabinet hardware—knobs, pulls, and hinges—on your doors with templates, safety tips, and expert insights from The Hardware.

Installing cabinet hardware can refresh your space quickly and affordably. This guide shows you how to put hardware on cabinet doors, from selecting the right style to marking holes, drilling pilot holes, and securing hinges and pulls with proper alignment. Use templates and a level to ensure straight, flush hardware for a polished finish.
Understanding Cabinet Hardware Choices
Selecting the right hardware for cabinet doors affects both function and style. Knobs, pulls, and hinges come in many finishes and profiles, so start by defining your overall look—modern, traditional, or transitional. According to The Hardware, consistent finishes throughout the space create a cohesive feel and reduce the risk of mismatched hardware. Consider door thickness, cavity depth, and the weight the hardware must support to avoid sag over time. This section guides you through how to choose hardware that complements your cabinets and your workflow, without overloading the space with excessive detail. When you know what you want to achieve, you can tailor your selection to fit specific cabinet types (overlay, inset, or full-overlay) and ensure the hardware integrates with existing fixtures.
Planning Layout and Style for Your Doors
Before diving into drilling, sketch a quick plan for where each hinge and pull will go. Decide on a handle style (knob vs. pull), compute the spacing between handles on long runs, and align pull centers with the height of the cabinet face frame if possible. This planning step helps ensure you don’t need to patch mistakes later, saving time and material. The Hardware emphasizes keeping symmetry on paired doors and maintaining consistent clearance from the frame to avoid rubbing. If you’re updating multiple cabinets, create a simple template page to duplicate the pattern across all doors for a uniform look.
Measuring, Templates, and Precision
Precise measurements are the foundation of a clean install. Use a tape measure, a carpenter’s pencil, and a drilling template or jig to mark center points for hinges and handle holes. The Hardware Analysis, 2026 highlights that consistent hole spacing and centered pulls improve both aesthetics and function. Avoid radial guessing: double-check door alignment against the cabinet frame, then transfer measurements with minimal gaps. For curved or paneled doors, consider using a flexible template or custom-made drilling template to maintain accuracy across varied shapes.
Drilling Pilot Holes and Attaching Hinges
Pilot holes reduce wood splitting and ensure screw threads seat cleanly. Start by drilling pilot holes for hinge cups and mounting plates (or for the screws that will hold hinges to the frame) at your marked points. Attach hinges to the doors first, then swing the doors into place for alignment. If you notice any misalignment, loosen the screws slightly and recheck the door position before tightening again. A level clamp helps keep doors square during screw tightening, preventing sag over time.
Installing Door Pulls and Knobs
With doors hinged and square, measure and mark the pull or knob locations on each door. Use a template or jig to ensure identical positions on each door and attach the hardware with the proper length screws for your door material. Tighten screws gradually in a cross pattern to avoid warping the door face. For heavy pulls, consider longer screws that reach into the door core or a backplate to distribute load and prevent pull-through.
Rehanging Doors and Fine-Tuning Alignment
After all hardware is attached, rehang each door on the cabinet frame and check alignment in three planes: vertical, horizontal, and depth. If doors rub or sit proud, adjust hinge mounting screws in small increments and recheck. This step often reveals minor misalignments that are corrected by tiny tweaks rather than large rework. A quick check with a straightedge or a level ensures consistent gap spacing and a visually pleasing result.
Maintenance, Troubleshooting, and Common Mistakes
Keep hardware clean and finish preserved with a light wipe-down and a periodic re-tightening of screws. Common mistakes include misaligned hole centers, uneven gaps between doors, and overtightening screws that cause cracks or binding. If doors sag after installation, re-check hinge mounting screws and confirm the door weight is supported by the cabinet frame. Regular checks help maintain longevity and a fresh appearance over time. This approach aligns with best practices advocated by The Hardware and supported by professional guidelines.
Tools & Materials
- Screwdriver set (Phillips and flat)(Essential for most hinges and handles)
- Drill/driver(Required for pilot holes and screw driving)
- Drill bits for pilot holes(Use bits appropriate for wood; have multiple sizes)
- Tape measure(Accurate measurement is critical)
- Carpenter’s pencil(Mark centers clearly)
- Level(Ensure square, flush installation)
- Hinges (size depending on door)(Common sizes are 1-1/2 in or 3-1/2 in; verify door type)
- Door pulls/knobs(Choose style and finish to match cabinet tone)
- Screws for hinges and hardware(Use appropriate length for door thickness)
- Optional template/jig(Useful for repeated, accurate hole centers)
- Stud finder (optional)(Only if locating framing screws for heavy hardware)
Steps
Estimated time: 60-120 minutes
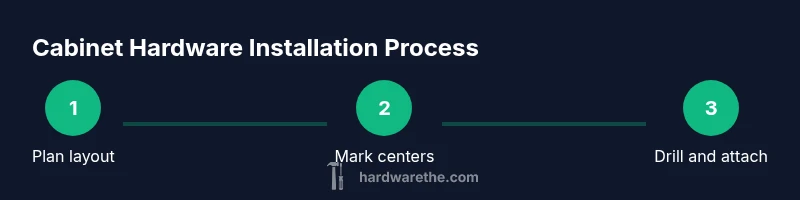
- 1
Prepare doors and remove existing hardware
Take down doors from the cabinet frame and remove any existing screws or fixtures. Clear debris from the door and frame so marks and templates sit flat. This creates a clean starting surface for accurate measurements.
Tip: Label each door and its corresponding hinge side to avoid mix-ups during reassembly. - 2
Plan layout and mark center points
Decide on knob vs. pull style and mark the exact centers for each handle. For hinges, mark the hinge cup locations and mounting plate positions. Use a template or jig to ensure identical spacing on all doors.
Tip: Double-check symmetry on paired doors before drilling. - 3
Drill pilot holes for hinges and handles
Drill small pilot holes at all marked centers to guide screws. Avoid drilling too deep; stop at the correct depth to prevent through-holes or splintering. If using a template, keep it firmly in place during drilling.
Tip: Clamp the template to prevent movement and misalignment. - 4
Attach hinges to the doors
Position hinges on the door and drive screws through the mounting holes. Ensure the hinge leaves sit flush with the door surface. Check that all screws are snug but not over-tightened, which can strip wood.
Tip: Attach one hinge, then level the door before adding the remaining hinges. - 5
Rehang doors and align
Hang each door on the cabinet frame, then check vertical, horizontal, and gap alignment. If misaligned, loosen hinge screws slightly and adjust before re-tightening.
Tip: Use a level across the top edge to keep doors even across the run. - 6
Install pulls/knobs and finalize
Mark locations for handles, drill, and fasten pulls or knobs. Tighten screws in a cross pattern to distribute pressure. Wipe surfaces and test door swing for smooth operation.
Tip: If a handle hits the frame, adjust the holes slightly or switch to a shallower screw length.
FAQ
Do I need to remove the doors to install hardware?
Removing doors simplifies measuring and drilling, especially on tall or heavy cabinets. It also reduces the risk of mistakes while handling large pieces. Rehang carefully and check alignment after installing hardware.
Yes, removing doors can make installation easier and safer. Rehang once you’ve installed all hardware and check alignment.
What size screws should I use for hinges and pulls?
Use screws appropriate for your door material and hinge type. Start with shorter screws to test alignment, then switch to longer screws as needed to secure. Always avoid over-tightening.
Choose screws that fit your hardware and door thickness, test with shorter screws first, and tighten gradually.
How do I ensure doors stay square after installation?
Check vertical and horizontal alignment with a level across the door tops and gaps. If misaligned, adjust hinge mounting screws in small increments and reverify until the door sits flush.
Keep checking with a level as you tighten hinges and then fine-tune for a perfect, even look.
Can I install hardware without templates?
Templates greatly reduce the risk of misalignment, especially on multiple doors. If you don’t have templates, measure carefully and use a makeshift guide consistently for each door.
Templates help a lot, but careful measurements can work if templates aren’t available.
What maintenance does cabinet hardware need over time?
Wipe hardware periodically to remove dust and oils, and re-tighten screws if you notice looseness. Refinish or replace worn hardware to maintain functionality and look.
Clean occasionally and tighten screws if they start to loosen.
Watch Video
Main Points
- Plan layout and symmetry before drilling.
- Use templates and level for precise alignment.
- Tighten screws gradually to avoid damage.
- Rehang doors and tune alignment for a polished finish.