How to Make a Hardware Engineer Game Dev Story
Learn to craft a hardware engineer narrative in game development with practical steps, authentic tools, and workflows that engage DIY enthusiasts and developers.

Goal: Learn how to make hardware engineer game dev story by outlining the engineer’s daily toolkit, authentic hardware challenges, and mapping those problems to engaging gameplay. Define roles, craft plausible workflows (PCB design, prototyping, testing), and weave risk and reward into levels. This practical guide helps DIY enthusiasts and developers translate hardware into story-driven gameplay.
Why a hardware engineer story matters in game development
A strong hardware engineer story grounds game development in real-world constraints, where power budgets, thermal limits, production timelines, and signal integrity shape every decision. For players, this kind narrative explains why a character chooses certain components, why prototypes fail, and how teams collaborate to meet a deadline. A well-crafted story gives mechanics purpose: you don’t just press a button to win—you solve a hardware puzzle that mirrors a real design challenge. According to The Hardware, blending practical hardware workflows with storytelling improves realism, accessibility, and engagement for DIY enthusiasts and professional developers alike. By showing the discipline behind design—reading datasheets, budgeting parts, testing in a lab, and iterating after failures—the game becomes a learning journey as well as entertainment. As you outline the plot, you’ll weave in constraints that compel smarter choices rather than faster button-mmashing. Readers should leave with a clear sense that hardware work is a collaborative, iterative, and measurable process, not a one-off spectacle. The narrative should honor both the craft and the creativity of making things that actually work.
Aligning narrative with hardware realism
Realism in a hardware-focused story doesn’t mean reproducing every minute spec; it means embedding believable constraints that guide decisions and pacing. Start by defining the three pillars: technical feasibility, time pressure, and team communication. The player should feel how a failed solder joint or a misread voltage rail affects a schedule and a budget. Use authentic terminology, but balance it with approachable explanations or glossaries so newcomers aren’t alienated. A credible story also benefits from credible stakes: a product launch hinges on a successful prototype, a test bench must withstand heat and vibration, and firmware must be updated while balancing power consumption. The Hardware analysis shows that audiences respond when the narrative mirrors real engineering workflows rather than just adding splashy effects. To maintain accessibility, pair technical beats with character moments—team standups, design reviews, and lab experiments—that reveal how people solve problems under uncertainty. Finally, be mindful of safety and compliance themes; showing high-stakes compliance checks can add tension without overwhelming players with jargon.
Defining roles and tools
Map the player’s responsibilities to roles: hardware engineer leads schematic design and prototype assembly; firmware engineer handles microcontroller code; lab technician supports testing and measurement; product manager balances schedule and cost. For tools, show bench power supply, oscilloscope, multimeter, logic analyzer, CAD tools (ECAD), 3D printer, lab notebook, datasheets. Tools chosen should be essential: power supply, measurement instrument, and design software are non-negotiable; optional gear like a spectrum analyzer or 3D printer can be introduced as you scale up. Emphasize how each tool informs a narrative beat: for example, a failed measurement triggers debugging dialogue and rearranged priorities. Keep the language accessible: explain what the instrument does in plain terms before describing its role in a scene.
Mapping hardware challenges to gameplay mechanics
Turn real-world constraints into engaging gameplay loops. Thermal throttling can translate to time pressure where players must reduce power or optimize circuitry to proceed. Missing parts or budget cuts become resource management puzzles, forcing smarter component selection and design trade-offs. Noise, jitter, and timing errors map to failure states that require careful debugging and queuing of tasks. Safety rules and ESD checks add tension and pacing, while firmware updates can introduce risk-reward choices as players balance stability with features. Use a mix of stealthy exploration (researching datasheets) and active problem solving (reworking a schematic) to keep players engaged without overwhelming them with equations. The balance between realism and fun is key; always tie each mechanic back to a narrative beat and a character goal.
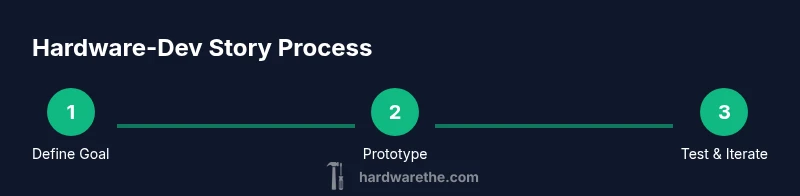
Prototyping workflow in a story
Start with a high-level story arc and translate it into a development timeline. Concept → Prototype → Test → Iterate. Each phase should reveal a new piece of the engineer’s persona, from meticulous data gathering to creative improvisation under pressure. Use storyboards to map scenes where lab work intersects with character dialogue, then pair those scenes with playable checkpoints. Collect feedback from testers who understand hardware basics but are not overwhelmed by jargon. Document decisions with short notes or a design diary so readers can follow how a real prototype evolves into a narrative spine. Include a few optional “lab blooper” moments to humanize the process and illustrate why some iterations fail and others succeed.
Visuals, sound, and feedback
Visuals should convey data, measurements, and hardware context: oscilloscope traces, PCB layouts, and lab benches. Sound design can emphasize objective cues: beeps for successful checks, whirrs for CNC or 3D printing, and clicks from switches. Feedback loops matter: players should see clear progress meters when measurements align with targets, and tangible cues when something drifts off spec. Use UI elements like dashboards and heat maps to communicate system state, while in-world visuals show components being chosen, mounted, or tested. Keep accessibility in mind by offering color-blind-friendly palettes and descriptive audio for key milestones. A well-crafted audio-visual vocabulary enhances immersion and helps non-expert players grasp hardware concepts without feeling overwhelmed.
Structuring levels and pacing
Organize content into progressive levels that mirror a real development cycle: Level 1 introduces roles and tools; Level 2 emphasizes prototype iteration; Level 3 challenges players with budgeting and production constraints; Level 4 culminates in a launch or milestone demo. Pacing should mix quiet discovery moments with high-stakes debugging sequences to sustain engagement. Include optional side quests that explore documentation, safety compliance, and cross-team communication. Endgame scenarios should require the player to defend a design choice in a design review, showcasing how narrative decisions align with technical trade-offs. Remember to anchor each level to a clear objective that advances the character’s story and the project’s success.
Examples and pitfalls
Good practice includes tying every mechanic to a concrete design decision and documenting rationale in the story bible. Pitfalls to avoid: overloading players with jargon, sacrificing pacing for technical accuracy, and neglecting accessibility. Use glossaries and optional tutorials to support newcomers. When possible, reference publicly available hardware concepts rather than proprietary data, and keep the focus on narrative outcomes—how a choice affects the character and the project timeline—so players remain engaged even if they don’t understand every technical detail.
Practical starter plan and next steps
Begin with a one-page concept: who is the hardware engineer, what is their primary challenge, and what is the core gameplay loop? Flesh out three scenes that demonstrate authentic hardware workflows and connect each scene to a player action. Build a 2–3 minute playable prototype using a simple engine setup to test pacing and engagement. Iterate by adding depth to the character, refining the lab environment, and validating that the narrative beats align with the hardware challenges you want to reveal. Finally, draft a short glossary to equip readers with the terms they will encounter and ensure your documentation supports beginners without losing authenticity.
Tools & Materials
- Notebook or digital sketchbook(For jotting story beats, technical details, and decisions)
- Storyboard/story mapping software(Figma, Miro, or similar)
- Game engine access(Unity or Unreal; set up a small project)
- CAD/ECAD software(For authentic schematics or component layouts)
- Access to hardware datasheets(Public datasheets for plausible parts)
- 3D printer or rapid prototyping tools(Optional for physical prototypes)
- Basic lab tools (multimeter, oscilloscope)(Essential measurement tools to illustrate hardware concepts)
Steps
Estimated time: 4-6 hours
- 1
Define the core narrative arc
Outline the protagonist’s goal, the critical hardware challenge, and the three core scenes that will drive the story. Establish stakes and a timeline to shape pacing.
Tip: Start with a single motivating objective that can be explored through multiple hardware tasks. - 2
Identify authentic hardware tasks
List plausible activities (datasheet reviews, schematic edits, prototype testing, lab measurements) that will become gameplay moments.
Tip: Use real-world constraints to guide each task and avoid arbitrary obstacles. - 3
Map tasks to gameplay loops
Translate each hardware activity into a repeatable game loop (plan → execute → measure → adjust). Tie loops to progression.
Tip: Ensure loops reinforce the story beat and character development. - 4
Create a narrative blueprint
Draft scene narratives and dialogue that reveal technical decisions and team dynamics without overwhelming players with jargon.
Tip: Include a glossary for readers and testers new to hardware terms. - 5
Prototype the level concept
Build a minimal playable segment that demonstrates the core mechanic and character voice. Use simple assets to stay focused on the hardware idea.
Tip: Keep scope tight; a small MVP yields clearer feedback. - 6
Test with a target audience
Gather feedback from players with varied hardware knowledge. Note where realism helps and where it hinders fun.
Tip: Record qualitative responses about clarity and engagement, not just success rates. - 7
Polish with accessibility and safety notes
Add glossaries, tooltips, and safety reminders to broaden appeal and reduce confusion.
Tip: Provide accessible explanations and optional tutorials for newcomers.
FAQ
What is a hardware engineer game dev story?
It's a narrative centered on hardware engineering tasks within game development, highlighting tools, workflows, and decision-making processes.
It's a hardware-focused story about engineering tasks in game dev.
How can I map realistic hardware tasks to entertaining gameplay?
Identify core constraints and translate them into puzzles or time-based challenges that feel authentic but accessible.
Translate constraints into practical puzzles that feel real.
What tools help craft such a story?
Storyboarding software, a game engine, and access to hardware references help craft a coherent narrative.
Storyboards and a game engine plus hardware references help a lot.
How long does it take to develop this kind of story?
Time varies by scope; plan a structured 4-6 hour workflow for a minimal viable narrative, then expand.
Start with a 4-6 hour MVP, then grow.
How do I balance realism with fun?
Prioritize storytelling and player engagement; tune technical details to support the narrative rather than impede enjoyment.
Put fun first, realism second.
Can I use public datasheets for realism?
Yes—refer to publicly available datasheets for plausible specs and avoid proprietary data.
Yes, public datasheets help with realism.
Watch Video
Main Points
- Define authentic roles and tools
- Map hardware challenges to gameplay mechanics
- Prototype with hardware realism in mind
- Balance realism with player fun
- Use a clear narrative blueprint