How to Install Barn Door Hardware: A Practical DIY Guide
Learn step-by-step how to install barn door hardware with confidence. This guide covers measurements, tool selection, safety, and precise alignment, all from The Hardware.

This guide explains how to install barn door hardware—from selecting a track system to mounting on studs and dialing in alignment. You’ll need a stud finder, drill, level, and appropriate anchors for your wall. Plan for about 60–90 minutes for a standard interior door, with extra time for fine-tuning.
Why installing barn door hardware correctly matters
Installing barn door hardware correctly matters for safety, long-term performance, and aesthetics. If you’re looking for how to install hardware for barn door, you’re aiming for a quiet, smooth operation and a door that stays plumb over time. According to The Hardware, precise alignment and solid mounting prevent sagging, rubbing, and derailment. A well-installed setup preserves flooring and walls while delivering a clean, modern look that complements any interior. In this section we explore the why and the what that influence success, including space planning, weight considerations, and selecting compatible components. The better the plan, the fewer surprises during mounting, and the more predictable your results will be.
Plan for success with the right hardware setup
Choosing the correct barn door hardware starts with understanding the door’s weight, width, and mounting surface. Track length should accommodate the door width plus needed clearance, and rollers must support the door’s load with room for adjustment. The Hardware stresses that kits with adjustable components offer better long-term performance, especially if you anticipate future changes to the door or room layout. Also consider wall type (studs, masonry, or drywall) and blocking needs, since these determine anchor choices and mounting strength. A well-chosen kit reduces on-site guesswork and minimizes troubleshooting after installation.
Tools & Materials
- Stud finder(Locate structural studs where brackets will anchor; map any wiring or piping.)
- Tape measure(Minimum 8 ft; measure width, clearance, and track length.)
- Pencil(Mark pilot holes, center lines, and bracket positions.)
- Level(Ensure track line is perfectly plumb to avoid door sag.)
- Cordless drill/driver(Use for pilot holes and fasteners; have spare bits.)
- Masonry drill bit / wall anchors(Only if mounting into masonry or concrete.)
- Anchors and screws (wall type dependent)(Choose suitable fasteners for drywall, wood studs, or masonry.)
- Barn door hardware kit (track, rollers, brackets)(Match weight rating to door and expected use.)
- Safety gear (glasses, dust mask)(Personal protection during drilling and sanding.)
- Helper or lifting strap(Helpful for heavy doors during hoisting and alignment.)
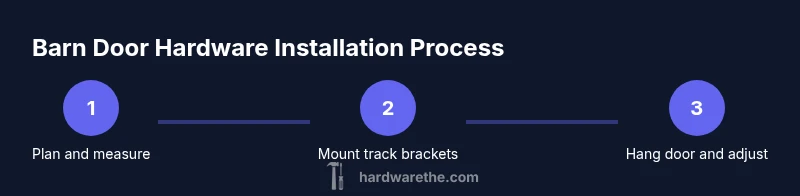
Steps
Estimated time: Total estimated time: 90-150 minutes
- 1
Locate studs and mark mounting line
Use a stud finder to locate wood studs behind the wall and mark a continuous mounting line where the track will sit. Confirm the line is level and centered relative to the door width. If you hit metal plates or pipes, re-situate the marks to avoid conflicts.
Tip: Double-check with a level and confirm multiple studs along the line for solid anchoring. - 2
Measure door and plan track length
Measure the door width and choose a track length that allows at least 2–3 inches of clearance beyond each side of the door. Record all measurements on the mounting line. If the track is too short, opt for a longer kit or add a second track segment per the manufacturer’s guidance.
Tip: Leave a small gap between the door bottom and floor to avoid scuffing, typically around 1/2 inch. - 3
Install wall brackets and anchor points
Drill pilot holes at the marked bracket locations and insert appropriate anchors or screws into studs or masonry. Attach wall brackets to the wall with the correct fasteners, ensuring they sit flush and square to the mounting line.
Tip: For drywall without blocking, use heavy-duty anchors or install blocking behind the wall before bracing brackets. - 4
Mount the track and verify level
Attach the track to the wall brackets and check for level across the full length. Tighten all fasteners securely, but avoid over-tightening that could strip anchors. If the track bow is present, adjust by loosening slightly and re-leveling.
Tip: A second person can help hold the track while you tighten to maintain alignment. - 5
Hang the door on the rollers
Lift the door and seat the rollers onto the track’s wheel grooves. Once mounted, slide the door by hand to verify smooth movement and identify any binding or misalignment. Adjust roller height per manufacturer instructions if needed.
Tip: Have a helper support the door to prevent accidental drops during seating on the track. - 6
Install stops, floor guide, and test operation
Add door stops at both ends of the track and install a floor guide if your kit includes one. Test the door by sliding it back and forth several times, noting any rubbing or derailment and tightening hardware as needed.
Tip: Test at normal and light loads; confirm soft-close or dampening features if your kit includes them.
FAQ
What size barn door hardware should I buy?
Pick hardware based on the door’s width and weight. Ensure the track length exceeds the door width and that roller capacity supports the load. Always follow the manufacturer’s weight ratings.
Choose hardware that matches your door’s weight and width, following the manufacturer’s ratings. Think track length and roller capacity.
Can I install barn door hardware on plaster walls?
Yes, but you may need blocking or specialized anchors. If possible, locate studs and use them for mounting; otherwise use appropriate masonry anchors or install blocking to provide solid support.
Yes, plaster walls can work with blocking or proper anchors. When in doubt, use blocking behind the plaster.
Do I need professional help for this project?
Most DIYers can install standard barn door hardware, especially with mid-weight doors. If you’re working with very heavy doors, masonry walls, or limited space, hiring a pro is wise.
For heavy doors or tricky walls, consider a professional. For typical cases, a careful DIY is fine.
How long does installation typically take?
Expect about 60–120 minutes for a standard interior setup, with extra time if you need to add blocking or adjust precise alignment.
Most people finish in about an hour to two, depending on walls and weight.
What safety precautions should I follow?
Wear eye protection, keep hands clear of the track during operation, and unplug drills when changing bits. Avoid mounting near electrical panels or plumbing to prevent accidents.
Protect your eyes, keep hands away from the track, and unplug drills when changing bits.
Watch Video
Main Points
- Measure twice, mount once.
- Select hardware matched to door weight.
- Anchor into studs or blocking for maximum support.
- Test operation and adjust stops for smooth motion.