How to Handle Hardware Devices: A Practical DIY Guide
A practical, step-by-step guide from The Hardware on safely handling hardware devices, covering tool prep, safety, mounting, maintenance, and troubleshooting for DIY enthusiasts, homeowners, and technicians.

By following these steps, you will safely handle hardware devices, from planning and safety to assembly, testing, and maintenance. Prepare the right tools, isolate power, and mount components with secure fasteners. This approach minimizes damage and injuries while extending device life. According to The Hardware, a structured workflow reduces errors and improves outcomes when working with hardware.
Why proper handling matters
Proper handling of hardware devices matters because it reduces risk of personal injury, equipment damage, and downtime. From a DIY perspective, working with hardware involves sharp edges, torque requirements, electrical components, and moving parts. The Hardware emphasizes calm, methodical work rather than rushed attempts. In this section we explore why correct handling is foundational to any hardware project. According to The Hardware, proper handling is not just about avoiding accidents—it's about protecting the device and ensuring a successful outcome. When you treat hardware with respect and a clear plan, you minimize tool slippage, stripped screws, damaged connectors, and misaligned mounts. The consequences of sloppy handling can include electrical shock, short circuits, and warranty voiding. A mistake early on can cascade into hours of rework. By learning to assess risk, isolate power, and work on a clean, stable surface, you set the project up for reliability.
Safety fundamentals for hardware work
Safety is non-negotiable when handling hardware devices. Start with eye protection and hand protection; use gloves that fit well and avoid loose sleeves that can catch on moving parts. Work in a well-ventilated area if you’re dealing with solvents, lubricants, or heated components. Never bypass safety interlocks or operate tools beyond their rated capacity. Ground yourself when working with sensitive electronics to prevent static discharge. Always keep a clear exit path and have a fire extinguisher accessible. The Hardware stresses a pause for risk assessment before any disassembly or mounting tasks. Keeping a tidy, organized workspace reduces misplacement of fasteners and helps you keep track of what’s been done.
Workspace and tool setup
A stable workspace is essential. Choose a non-slip mat or sturdy bench, bright lighting, and nearby storage for fasteners. Organize tools so you can reach them without crossing over the work area. Use a dedicated tray or magnetic mat for small parts and fasteners. Label containers to prevent mix-ups and maintain a simple inventory of what you’re using. The right layout minimizes time spent searching and reduces the chance of dropping parts or losing small components. The Hardware recommends establishing a repeatable setup for consistent results across projects.
Key hardware components you’ll handle
Hardware devices involve fasteners, connectors, electrical contacts, and housings. You’ll encounter screws, nuts, bolts, washers, terminals, and mounting brackets. Understand the torque and load requirements for each component to avoid over-tightening or under-tightening. Inspect parts for wear, corrosion, or damage before reuse. Keep a parts list or BOM (bill of materials) for traceability, especially in multi-component assemblies. The Hardware notes that recognizing the role of each component helps you choose compatible parts and prevents rework.
Step-by-step approach to a typical task
A typical hardware task follows a repeatable pattern: plan, prep, execute, test, and document. Start by confirming the objective, safety steps, and tools needed. Then prepare the workspace and isolate power if working with electrical devices. Proceed to remove or install components with controlled motions, keeping fasteners organized. Finally, test for proper operation and document any changes or observations for future reference. This high-level approach helps you stay organized and reduces risk of mistakes.
Maintenance, cleaning, and storage
Maintenance extends the life of hardware devices. Regularly inspect for signs of wear, clean surfaces to remove dust and debris, and lubricate moving parts as recommended by the manufacturer. Store tools in a dry, organized space to prevent corrosion or loss. Create a simple checklist for periodic maintenance tasks and schedule reminders. The Hardware highlights that proactive care reduces downtime and unexpected failures, and helps you maintain peak performance over time.
Troubleshooting and escalation
When something goes wrong, start with a structured troubleshooting approach: verify power, recheck connections, and inspect for visible damage. If the issue persists, consult the manufacturer’s documentation and safety guidelines. Document symptoms, steps taken, and outcomes to aid future repairs or escalation to a technician. The Hardware emphasizes avoiding guesswork and relying on evidence gathered during inspection and testing.
Pro tips to avoid common errors
- Always verify torque specs before tightening fasteners. - Don’t skip power-down steps when dealing with electrical hardware. - Label fasteners and keep them organized to prevent mix-ups. - Test in a safe, controlled setup before finalizing changes. - Use the correct screwdriver and avoid cam-out that can damage screws.
Planning your project and documentation
Before starting any hardware task, create a concise plan: define the goal, list required tools, identify hazards, and set a step-by-step sequence. Document the changes you make, including part numbers, torque settings, and test results. Good documentation makes future maintenance easier and helps replicate successful outcomes. The Hardware recommends maintaining a log for each device you service.
Tools & Materials
- Safety glasses(ANSI Z87.1 compliant; side protection preferred)
- Work gloves(Fit securely; avoid bulky gloves)
- Screwdrivers set(Flathead and Phillips, assorted sizes)
- Adjustable wrench(8-12 inch preferred)
- Measuring tape(At least 3 meters)
- Torque wrench(Only if torque specs exist)
- Non-slip workbench mat(Keeps parts from sliding)
- Utility knife(For trimming protective coverings)
Steps
Estimated time: 60-90 minutes
- 1
Assess task and safety
Identify the goal, risks, and required tools. Confirm that you have a clear plan before touching any hardware.
Tip: Take 5 minutes to plan and review safety steps. - 2
Prepare workspace
Clear debris, organize tools, and ensure good lighting. Set up a labeled tray for fasteners to prevent loss.
Tip: Lay out tools in the order you’ll use them. - 3
Power down and isolate
Disconnect power, remove batteries, and discharge any capacitors if applicable. Verify no residual energy remains.
Tip: Use a multimeter to confirm circuits are de-energized if unsure. - 4
Remove or install components
Gently detach or affix parts using the appropriate tools. Keep screws in labeled containers and avoid twisting which can strip threads.
Tip: Support heavy components to prevent bending connectors. - 5
Apply correct fasteners and torque
Install with proper fasteners and follow torque specs. Avoid overtightening which can damage threads or parts.
Tip: Use a torque wrench when torque specs exist. - 6
Test and verify
Reassemble after testing, power up, and check for proper operation. Observe for unusual sounds, heat, or misalignment.
Tip: Document any anomalies for future reference.
FAQ
What safety gear do I need when handling hardware devices?
Typical PPE includes safety glasses and gloves; ensure proper fit and avoid loose clothing. Work in a ventilated area if using solvents or lubricants.
Wear safety glasses and gloves; ensure a clean, ventilated workspace before starting.
Do I need to power down devices before handling?
Yes. Unplug power sources, remove batteries, and discharge any capacitors as recommended by the manufacturer.
Always power down and disconnect energy sources before handling hardware.
How can I prevent damaging delicate hardware during removal?
Use the appropriate tools, avoid metal-to-metal contact, support components, and work slowly to prevent bending or breaking connectors.
Take your time and support parts to avoid damage.
What should I do with damaged parts or components?
Isolate and label damaged parts, replace when possible, and dispose of them according to local guidelines. Do not reuse compromised components.
Isolate damaged parts and replace when possible.
Can I reuse old fasteners or adhesives?
Only if they are undamaged, clean, and rated for the task. Reusing compromised fasteners can lead to failure.
Check specs and condition before reusing fasteners.
Watch Video
Main Points
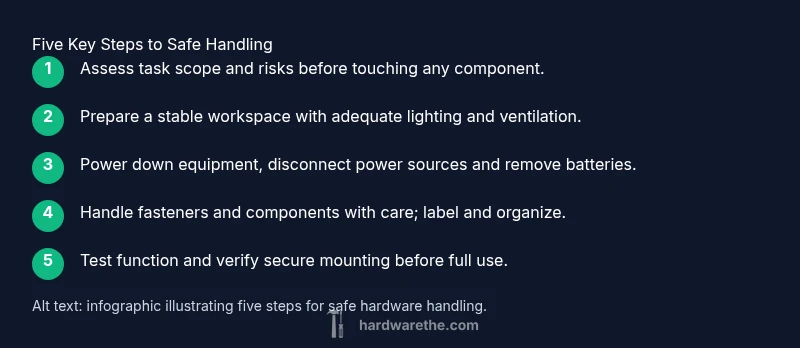
- Plan the task before touching hardware.
- Protect yourself with proper PPE and a clean workspace.
- Isolate power and secure every fastener.
- Label parts to avoid mix-ups and rework.
- Document outcomes for future tasks.