How to Remove Cabinet Handles: A DIY Guide
Learn step-by-step how to safely remove cabinet handles, fill holes, and prep surfaces for new hardware or paint. This practical DIY guide from The Hardware covers tools, safety, and troubleshooting for a clean, durable finish.

Goal: Remove cabinet and drawer handles safely and cleanly. You’ll identify mounting style, select the right driver, and remove hardware without damaging the door or drawer. After removal, fill holes if needed, and plan replacement options. This quick answer introduces the process and prep steps for a durable refresh.
What removing handles accomplishes
Removing cabinet and drawer handles is a common DIY upgrade that can refresh a kitchen, bath, or workshop without replacing entire cabinetry. It lets you switch to a different style, reduce snag hazards, or prepare faces for repainting or staining. The process is straightforward when you understand mounting types, tool needs, and finish protection. According to The Hardware, successful removals start with a quick assessment: identify screw heads, whether screws thread into the door edge or behind a backplate, and whether decorative caps conceal mounting hardware.
By removing hardware you gain access to the cabinet face for filling holes, installing backplates, or choosing new handles with different hole spacing. If you plan to repaint, removal reduces risk of paint drips on metal or wood. If you’re upgrading to modern pulls, removing old hardware ensures precise alignment for new holes and avoids misalignment that can ruin the look.
Types of mounting hardware you'll encounter
Most cabinet handles and drawer pulls use one of a few mounting styles. Exposed screws sit flush with the face and are visible when the hardware is removed; concealed mounting uses backplates or decorative caps to hide the screws. Edge-mount screws thread directly into the cabinet door edge, while surface-mount installations rely on a cross-bar or mounting plate. Understanding your mounting type helps you choose the right driver and anticipate any extra steps, like removing a plastic cap or lifting a cover plate before accessing screws. If you’re unsure, photograph the back side of the hardware before removal so you can replicate the pattern when installing replacements. Finally, watch for center-to-center (C-C) measurements; most hardware sold today lists C-C in millimeters rather than inches, so a quick conversion ensures your new handles align with existing holes or guides.
Safety and surface protection during handle removal
Safety comes first when using hand tools around cabinets. Put on eye protection to shield from small metal shards, and wear a dust mask if sanding or drilling nearby. Protect the surrounding finish with painter’s tape to prevent scratches or paint bleed, especially on painted doors. Work slowly, keeping your body aligned with the door or drawer to avoid bending or cracking the panel. If you encounter stubborn screws, apply a little penetrating oil and give it time to soak. Never pry with metal tools under the edge of the face frame; soft plastic or wood shims can prevent chipping.
Planning your removal session
Plan a dedicated removal session to avoid reassembling parts mid-project. Gather screws and any small parts in labeled containers or zip bags so you can match them to the corresponding holes on reinstall. Take a quick photo of the current layout, including hole spacing and screw type, to guide your replacement hardware choices. If you intend to repaint, consider removing the doors from the cabinet frame to simplify painting and protect the hinge areas. Finally, ensure you have a good workspace with ample lighting and a clear surface to lay out hardware and tools.
The removal steps in detail
The removal process typically follows a predictable sequence. First, identify the screw type and fit the correct driver. Next, hold the handle steady and loosen the screws until they fully disengage; keep the screws in a small container to prevent loss. If the screws are hidden behind caps, gently pry off the cap with a thin blade. If a backplate is present, remove it after the screws come free. When you remove the hardware, check for any remaining debris and clean the face surface. Finally, place all hardware in labeled bags or containers to simplify later reinstallation.
Repairs after removal: holes and finish
With the hardware removed, inspect the hole pattern and surface. Small holes can be filled with a color-matched wood filler or putty; bigger gaps may require a patch plate or wood filler plus sanding. Once dry, sand smooth with fine-grit paper and wipe clean. If you’re repainting, reseal and prime the area before applying the finish to ensure an even appearance. If the existing holes do not align with your new hardware, you can relocate them, using a drill guide to keep the hole centers precise and evenly spaced. In some cases, shellac or stain might be necessary to match the surrounding surface.
Replacing with new hardware or finishing the surface
When you’re ready to reinstall, dry-fit the new handles without fully tightening the screws to confirm alignment. Mark the hole centers using a pencil, or use a template provided with the new hardware. Drill pilot holes if needed, starting with a small bit to avoid splitting the door; then drive in the mounting screws until snug. For mismatched hole patterns, consider using backplates, larger screws, or slightly different handles that share the same center-to-center spacing. After installation, check that all handles sit flush, spin freely, and are aligned consistently across the row.
Troubleshooting and best practices
If a screw head strips, try a rubber band under the screwdriver for extra grip, apply a drop of penetrating oil, and reattempt with a firm, straight approach. If the screw won’t budge, stop to avoid damaging the door, and consider using a screw extractor or tapping a larger screw into the same hole. Avoid over-tightening new hardware, which can strip the material or squeeze the door slightly. Protect finishes with masking tape during final finishing, and store removed parts in a labeled container for future use.
Authority sources
For further reading on tool safety and best practices in DIY hardware work, consult reputable sources on safe-handling and cabinetry projects:
- OSHA guidelines on hand tool safety and safe operating practices: https://www.osha.gov/
- Better Homes & Gardens DIY cabinetry guidance and project tips: https://www.bhg.com/
- The Family Handyman cabinet hardware removal tips: https://www.familyhandyman.com/
Quick-reference checklist
- Identify mounting type and screw head before removing
- Gather the correct driver and protective gear
- Protect the surface with tape and lay out hardware in labeled containers
- Patch holes and prep surfaces if repainting
- Double-check alignment before reinstalling new handles
- Store screws and hardware safely for future use
Common mistakes to avoid
- Rushing removal and marring the door face
- Forcing screws or prying caps, which can crack veneer
- Ignoring hole alignment when replacing hardware
- Skipping patching of holes, leading to an uneven surface
Tools & Materials
- Phillips head screwdriver (size #2)(Most cabinet hardware uses #2 Phillips)
- Flat-head screwdriver (slotted)(Use only if your screws are slotted)
- Hex key / Allen wrench (6- or 8-point)(Some handles use Allen screws)
- Utility knife(Optional for cap removal or trim clean-up)
- Drill/driver with bits (Phillips and hex)(To drive screws and predrill holes if needed)
- Wood filler or epoxy putty(To fill old screw holes or repair damaged areas)
- Putty knife(For smooth filler application)
- Painter’s tape(Protect edges and faces during work)
- Safety glasses(Eye protection during tool use)
- Gloves(Optional for grip and protection)
- Vacuum or soft brush(Clean up dust after patching)
Steps
Estimated time: 30-60 minutes
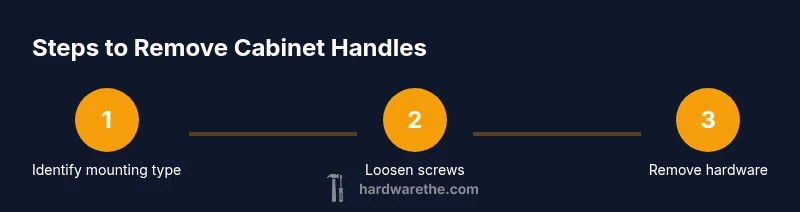
- 1
Identify mounting type
Examine each handle to determine whether screws are visible, concealed behind caps, or mounted via a backplate. This guides your choice of driver and the order of steps.
Tip: Look for decorative caps that hide screws; photographing layout helps reinstall accurately. - 2
Choose the correct driver
Select a driver that matches the screw head (Phillips, slotted, or hex). Using the wrong bit can strip the screw head.
Tip: Have a small selection of bits ready so you’re not forced to force a fit. - 3
Loosen screws
Firmly grip the handle, apply steady pressure, and turn screws counterclockwise until they loosen. Keep the handle from spinning freely as you work.
Tip: If the screwdriver starts to skip, apply a brief tap to seat the bit. - 4
Remove screws and hardware
Once loosened, pull the screws out and lift the handle away. Place screws in a labeled bag to prevent loss.
Tip: Use a magnetic tray or sealable bag for each location. - 5
Capbacks or backplates
Gently pry off any caps or backplates to reveal hidden fasteners, keeping your tool angle shallow to avoid chipping.
Tip: Work slowly and use a thin blade to minimize surface damage. - 6
Inspect for hidden fasteners
Check behind caps or plates for additional screws or mounting plates. Remove as needed before full removal.
Tip: Take a quick photo of any nonstandard backings for reference. - 7
Plan for replacement or finish
Decide whether to install new handles or repaint. If reusing the same holes, stick with the existing spacing; otherwise, plan new pilot holes.
Tip: Using a template helps ensure accurate hole placement.
FAQ
What tools do I need to remove cabinet handles?
Typically a screwdriver (Philips #2 or flathead), plus an Allen wrench for specialty screws. Some handles hide screws behind caps or backplates. Have a few bit options ready and take photos of the layout.
You’ll usually need a screwdriver and possibly an Allen wrench; some handles have hidden screws behind caps.
How do I remove handles with concealed mounting?
Carefully pry off decorative caps to access hidden screws or backplates. Use the appropriate driver and keep all small parts together in labeled bags.
Concealed mounting usually hides screws behind caps; pry them gently and use the right driver.
What if a screw head is stripped?
Apply penetrating oil and use a rubber-band grip or a screw extractor if needed. Avoid forcing the screw to prevent further damage.
If the head is stripped, apply oil, grip with a rubber band, and try an extractor if necessary.
Should I patch holes before repainting?
Yes. Fill with color-matched filler, sand smooth, prime, and repaint for a uniform finish.
Patch holes first, then repaint for a smooth look.
How do I align new handles with existing holes?
Measuring center-to-center spacing is critical. If spacing differs, relocate holes or use backplates and re-drill.
Make sure the new handles line up with the holes, or relocate them carefully.
Watch Video
Main Points
- Identify mounting type before removing any screws.
- Use the correct driver to prevent head stripping.
- Patch holes and prep surfaces for a flawless finish.
- Plan layout for new hardware to ensure perfect alignment.