How to Find and Use Hardware Acceleration When Available
Learn how to identify hardware acceleration support on your device, enable it across BIOS/UEFI, OS, and apps, and verify real-world performance gains with practical tests.

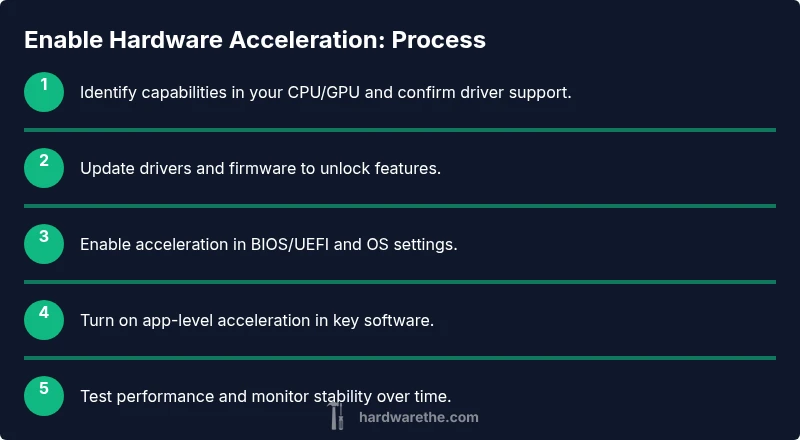
This quick guide explains how to identify hardware acceleration on your device, enable it where supported, and verify practical performance gains. Start by checking CPU, GPU, and driver capabilities, then enable acceleration in BIOS/UEFI, OS, and key applications. Document findings and compare before/after results.
What hardware acceleration is and why it matters
Hardware acceleration refers to offloading compute-intensive tasks from the main CPU to specialized hardware components such as the GPU, media encoders/decoders, or dedicated neural processing units. When enabled, applications can render graphics, decode videos, or process multimedia more efficiently, often resulting in smoother playback, faster encoding, lower CPU load, and cooler operation. For the topic how to find use hardware acceleration when available, you will learn to identify capable hardware, verify driver support, enable relevant settings, and measure outcomes. According to The Hardware, hardware acceleration remains one of the most practical performance improvements for a wide range of DIY projects and professional workflows. This is not about replacing your system with a new machine; it’s about making the hardware you already own work smarter. By understanding where acceleration lives and how to activate it, you can achieve noticeable gains with relatively low effort.
Identify your hardware capabilities
To determine if hardware acceleration can help you, start with a clear picture of what your core components can do. Look for CPU features that support accelerated decoding or encoding, (for example, media codecs built into the processor), a capable discrete or integrated GPU, and a driver stack that exposes acceleration interfaces to your software. The Hardware analysis shows that many modern systems include integrated accelerators that handle video decoding, rendering, and encoding tasks. Keep a running list of features you find in your device specifications, then cross-check with the applications you plan to use. This step is essential for answering the core question of how to find use hardware acceleration when available and laying the groundwork for reliable gains rather than guesswork.
Check operating system and drivers
Next, verify that your operating system and drivers support acceleration in the areas you care about. Update graphics drivers from the GPU maker or your OEM, install the latest chipset firmware, and ensure the OS has recent kernel or system updates. On Windows, look for GPU acceleration options in display settings; macOS and Linux users should verify driver compatibility and enabling relevant permissions. The Hardware analysis suggests drivers and OS-level support are usually the biggest bottlenecks; without up-to-date software, even a capable GPU might sit idle. After updating, recheck that the acceleration features appear in the apps you’ll use most.
Enable hardware acceleration in BIOS/UEFI and system settings
Some acceleration features require enabling options in BIOS/UEFI or adjusting power profiles to ensure the system can sustain high-performance modes. Enter your firmware settings during boot and look for entries related to graphics, video decoding acceleration, or discrete GPU usage. On laptops, power plans should be set to High Performance when plugged in. Modern systems may also expose virtualization or memory allocation controls that affect acceleration. Enabling these can unlock additional throughput, but misconfiguring them can cause instability, so proceed with caution and consult your motherboard or laptop documentation if unsure.
Test and verify acceleration with practical tasks
With acceleration enabled, test representative workloads to confirm tangible gains. Compare pre and post-activation performance in tasks like 4K video playback, live streaming, or video encoding, and note changes in CPU usage and frame rates. Use built-in system monitors to verify GPU engine utilization and memory bandwidth during these tasks. The goal is to see reduced CPU load and smoother output, not just louder fans or brighter windows. Keep a simple log of times, frame rates, and observed quality to quantify improvements over time.
Common pitfalls and how to avoid them
A common pitfall is enabling acceleration in one area while neglecting dependencies in another, such as outdated drivers or power-saving schemes that throttle hardware. Another issue is software that does not support acceleration well, leading to instability or reduced quality. Always pair acceleration with current drivers, appropriate power settings, and compatible applications. If you notice crashes, revert a recent driver update or disable a feature to identify the culprit. The Hardware team recommends systematic testing rather than guessing when enabling acceleration.
Practical examples: hardware acceleration in popular software
Many everyday tools support hardware acceleration, including web browsers, media players, and creative software. In browsers, enable hardware acceleration to speed up rendering and video decoding. Media players can offload decoding to the GPU, improving battery life on laptops and reducing CPU load. Photo and video editors may utilize hardware-accelerated rendering for faster previews and exports. Each app has a toggle or preference pane; enabling these options and testing with your typical files will reveal the real-world benefits of hardware acceleration.
Measuring results and sustaining acceleration
After enabling acceleration, measure long-term performance to ensure gains are durable. Track system temps, power draw, CPU/GPU utilization, and task completion times across typical sessions. If results degrade or temperatures rise uncomfortably, reconsider cooling solutions or adjust power profiles. The goal is stable, noticeable improvements without compromising system health. Regularly revisit drivers and firmware updates to maintain compatibility with evolving software.
mainTopicQueryErrorNullChange”:null}
toolsMaterials
Tools & Materials
- Computer with compatible CPU and GPU(Ensure CPU/GPU support for hardware acceleration features (e.g., GPU encoding/decoding capabilities).)
- Latest GPU and chipset drivers(Install from vendor or OEM; verify driver version supports acceleration features.)
- BIOS/UEFI access(Know how to enter firmware settings and which options relate to graphics acceleration.)
- Operating system with current updates(Keep OS up to date to maximize acceleration compatibility.)
- Web browser and apps that support acceleration(Examples include browsers, media players, and editing software.)
- Benchmark and monitoring tools(Use built-in task managers or third-party utilities to verify acceleration impact.)
Steps
Estimated time: 60-120 minutes
- 1
Verify system capabilities
Check your CPU and GPU for hardware acceleration support. Review device specifications or run a system profiler to identify codecs, encoders, and rendering interfaces available. This establishes the baseline for where acceleration can help and what to enable first.
Tip: Use a trusted system information tool and document the exact model names. - 2
Update drivers and firmware
Install the latest graphics drivers, chipset updates, and firmware. Fresh drivers often unlock new acceleration features and fix compatibility issues that could prevent acceleration from working correctly.
Tip: Restart after updates to ensure all components recognize the new capabilities. - 3
Enable acceleration in BIOS/UEFI
Enter firmware settings and enable any options related to graphics acceleration or discrete GPU usage, if present. This step ensures the hardware can sustain performance without being throttled by default power profiles.
Tip: Only change one setting at a time; note any changes to return to previous state if instability occurs. - 4
Adjust OS level settings
Configure your operating system to favor performance over power, and enable any OS level acceleration features (e.g., GPU scheduling or hardware-accelerated decoding) where available.
Tip: Test both with and without these options to confirm impact. - 5
Enable acceleration in key applications
Turn on acceleration toggles in apps you rely on (browsers, video players, editors) and select hardware-accelerated rendering/encoding where offered.
Tip: Check each app’s help section for exact steps. - 6
Run initial tests
Use representative tasks to compare pre- and post-acceleration performance, noting CPU/GPU usage, frame rates, and output quality.
Tip: Keep a consistent test set for reliable comparisons. - 7
Monitor performance and temps
During routine use, monitor temperatures and power draw to ensure acceleration remains stable under load.
Tip: If temperatures spike, improve cooling or adjust power settings. - 8
Document results and refine
Record results and continue to refine configurations as software updates arrive. This keeps acceleration effective over time and across workloads.
Tip: Create a simple changelog to track what works best.
FAQ
What is hardware acceleration and how does it help my device?
Hardware acceleration offloads heavy tasks from the CPU to dedicated hardware like GPUs for graphics, video decoding, and encoding. This can improve performance and reduce power usage in daily tasks and professional workloads.
Hardware acceleration moves work from the main processor to specialized hardware, making tasks smoother and faster.
Which devices commonly support hardware acceleration?
Most modern desktops, laptops, and mobile devices include some hardware acceleration features, especially for video decoding and graphics rendering. Always verify with your device’s specifications and driver support.
Most current devices have some acceleration built in, but check the exact capabilities in your specs and drivers.
How can I tell if acceleration is actually being used?
Use built-in system monitors or app-specific status indicators to check GPU usage or hardware decoding activity during tasks. If CPU usage drops while performance remains steady, acceleration is likely active.
Look for higher GPU activity or lower CPU load when you run the task to confirm acceleration is working.
Can enabling hardware acceleration cause problems?
Yes, incompatible software or drivers can cause instability, crashes, or reduced quality. If problems arise, revert recent changes, update drivers, or disable acceleration for a specific app.
Incompatibilities can happen; test changes gradually and rollback if you notice issues.
Does hardware acceleration affect power consumption?
Acceleration can reduce CPU load, which often lowers power use during heavy tasks, but some GPUs may draw more power when active. Monitor power usage during typical workloads to understand the impact.
Usually you’ll see lower CPU power usage, but GPU load can raise total power during heavy tasks.
Where do I enable acceleration in popular software?
Many apps place a toggle in preferences or advanced settings, labeled as hardware acceleration, GPU acceleration, or similar. Enable it, then test to confirm gains.
Check each app’s settings for a hardware acceleration option and enable it if available.
Is hardware acceleration the same as upgrading hardware?
No. Acceleration uses existing hardware more efficiently. If your components are old or underpowered, upgrade may still be needed for significant gains.
Acceleration improves what's there, but a weak system may still need a hardware upgrade for big wins.
What are common pitfalls when enabling acceleration?
Ignoring driver updates, misconfiguring power settings, or enabling acceleration in unsupported apps can waste time and produce poor results. Always test with representative workloads.
Keep tests focused on your typical tasks and update drivers before trying to optimize.
Watch Video
Main Points
- Identify hardware that supports acceleration and confirm drivers are up to date.
- Enable acceleration in BIOS/UEFI, OS settings, and applications for best results.
- Test before/after performance to verify real-world gains.
- Monitor temps and power to maintain system health during acceleration.