Can You Paint Hardware Gold? A Practical DIY Guide for Cabinets and Fixtures
Learn how to safely paint cabinet hardware gold with durable finishes. This guide covers prep, finishes, step-by-step methods, and maintenance for knobs, pulls, and hinges.

Yes—it's possible to paint hardware gold with durable, professional-looking results. Start by removing the hardware, cleaning thoroughly, and lightly sanding. Choose a high-adhesion primer, then apply several thin coats of gold spray paint or electroplating alternative, and finish with a clear topcoat. Seal high-wear areas for longevity and protection.
Why gold hardware remains popular for cabinets and fixtures
Gold-toned hardware can elevate many spaces. It pairs with warm woods and cool neutrals alike, offering a timeless, upscale look without a full remodel. If you’re wondering can you paint hardware gold, the answer is yes—and it’s a popular DIY route when updating inexpensive pulls or handles. According to The Hardware, a brushed gold or antique brass vibe can be more forgiving of fingerprints and wear than bright polished finishes. Start by deciding the exact shade you want—soft brushed gold, matte champagne, or a bright brass—and test on a scrap sample first to confirm you like the result in your lighting. This approach helps you visualize how the finish interacts with your cabinet tones, door profiles, and hardware shapes.
Finishes and methods to achieve gold
There are several ways to achieve a gold finish, each with its own pros and cons. Spray paints with a durable enamel base are the most accessible for DIY projects and work well on metal pulls and hinges with proper prep. For a premium look, you can apply gold leaf sheets using water-based sizing and a clear sealant, though this method requires patience and careful application. If durability and cost balance matter, a high-quality gold spray paint under a clear topcoat is often the best compromise. The leaf method yields a luminous, luxury effect but is less forgiving for busy kitchens. Consider the location and wear pattern of the hardware when choosing a method, and prefer finishes designed for metal and frequent handling.
Prep and cleaning: the foundation of a lasting finish
Remove all hardware from doors and drawers and store screws with their corresponding pieces. Wash the hardware in warm, mild detergent to remove grease and fingerprints, then dry completely. For stubborn residue, wipe with a small amount of isopropyl alcohol on a lint-free cloth and allow to dry. Lightly sand the metal surfaces with fine-grit sandpaper (around 320-400 grit) to improve primer adhesion, then wipe away dust. Proper prep is essential: without it, paint or leaf won’t adhere evenly, leading to premature chipping or dull spots.
Choosing the right finish for durability
Durability should drive your choice of finish, especially in kitchens, bathrooms, or frequently used furniture. If you’re painting, select a primer formulated for metal and a enamel-based spray paint with good adhesion. For a satin or matte gold look, your clear topcoat should be compatible with enamel and resist yellowing over time. If you opt for gold leaf, seal with a protective coating to prevent tarnish and minimize upkeep. In damp spaces, choose water-resistant sealants and avoid products that claim moisture resistance without real durability testing.
Maintenance and care for gold-painted hardware
Once finished, give the hardware a gentle break-in period before full reassembly. Avoid harsh cleaners; use a soft cloth and mild soap if needed. Wipe in the direction of the grain when applicable and dry thoroughly to prevent moisture from seeping into joints. For high-traffic areas, re-seal or re-coat every 1-2 years to maintain color integrity and sheen. With proper care, gold-painted hardware can retain its look for many years, though you may recoat after heavy wear or chips.
Common mistakes and how to avoid them
Rushing prep or skipping primer is a common mistake that leads to peeling or uneven color. Over-spraying can cause runs or splotchy edges; apply multiple thin coats and allow complete drying between passes. Using the wrong topcoat or a non-metal-specific product reduces durability and can cause yellowing or cracking. Finally, neglecting to test the finish on scrap hardware first can hide color shifts or adhesion issues until after installation.
Tools & Materials
- Screwdriver set (Phillips and flat-head)(Use the appropriate bit for each screw head.)
- Warm soapy water, mild detergent(For initial cleaning of grime.)
- Isopropyl alcohol (70% or higher)(De-greases surfaces after washing.)
- Fine-grit sandpaper (320-400 grit)(Lightly scuff metal to improve adhesion.)
- Lint-free cloths(For cleaning and finishing without fibers.)
- Metal primer (oil- or water-based)(Promotes enamel adhesion on metal.)
- Gold enamel spray paint (enamel-based)(Choose a high-quality brand; 2-3 cans recommended.)
- Clear topcoat spray (matte/satin)(Protects the finish from wear.)
- Gold leaf sheets (optional)(For premium leafing, requires sizing and sealant.)
- Gold leaf sizing (adhesive)(Liquid adhesive for leaf application.)
- Painter's tape and drop cloths(Protect surrounding surfaces.)
- Protective gloves(Keeps oils off hardware; prevents staining.)
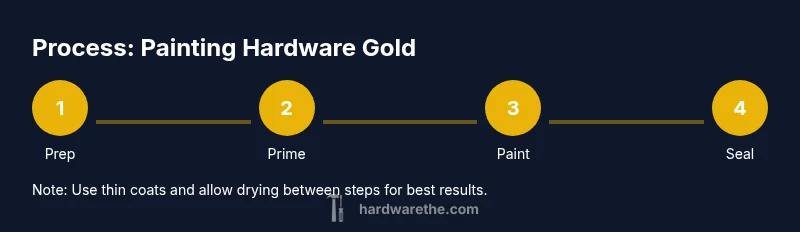
Steps
Estimated time: Active: 1.5-2.5 hours; total project: up to 24 hours including cure
- 1
Remove hardware
Use the screwdriver to detach knobs, pulls, and hinges. Place screws in labeled bags and keep pieces organized by location. Inspect each piece for damage and note any screws that require replacement.
Tip: Take photos of how hardware is mounted to simplify reinstallation. - 2
Clean hardware thoroughly
Wash hardware in warm, soapy water, then rinse and dry. Use isopropyl alcohol on stubborn grime and ensure all oils are removed before painting.
Tip: Ensure pieces are completely dry to prevent paint defects. - 3
Degrease and prep metal
If you see polishing residue, wipe again with alcohol. Lightly sand surfaces to create micro-scratches for improved primer grip.
Tip: Wipe away all dust after sanding with a microfiber cloth. - 4
Apply metal primer
Coat evenly and allow to dry per manufacturer instructions. A single even layer is better than multiple thick coats.
Tip: Primer should be tack-free before painting. - 5
Base coat with gold paint
Apply thin, even coats of enamel gold spray, holding can 8-12 inches away. Let each coat dry before applying the next to avoid drips.
Tip: Avoid pooling by keeping coats ultra-thin. - 6
Build color with additional coats
Continue applying light coats until you achieve the desired depth of color. For leaf-options, apply sizing and wait until tacky before leaf placement.
Tip: Test color on scrap hardware first. - 7
Seal with topcoat
Spray with a clear topcoat in light, even passes. Allow full cure time as specified by the product to maximize durability.
Tip: Use a matte or satin finish for a modern look, gloss for a classic pop. - 8
Reassemble and test fit
Attach hardware back to doors and drawers, then open/close to check clearance. Wipe away any fingerprints after reassembly.
Tip: Record screw lengths and mating parts to simplify future maintenance.
FAQ
Can I paint hardware gold with regular spray paint?
Yes, regular spray paint can work if you use a dedicated enamel-based product and follow proper prep, priming, and sealing steps for durability.
Yes, you can use spray paint for gold hardware, but prep and sealer are essential for lasting results.
Will painted gold hardware wear off with frequent use?
Wear resistance improves with proper primer and a protective topcoat. Avoid harsh cleaners and long exposure to moisture for best longevity.
Durability improves with primer and a topcoat; avoid abrasive cleaners.
Do I need to remove the hardware before painting?
Yes. Removing hardware ensures even coverage, prevents overspray on surrounding surfaces, and makes cleaning and drying easier.
Always remove hardware for clean, even coverage.
Is gold leaf more durable than spray paint for kitchen hardware?
Gold leaf provides a luxurious finish but is generally less durable than enamel spray paints and requires careful sealing to protect it.
Gold leaf looks great but is less durable and needs protection.
Can I repaint gold hardware in the future?
Yes, you can repaint by repeating prep, priming, and painting steps. Keep track of any wear areas and recoat as needed.
You can repaint later by redoing the prep and paint steps.
Watch Video
Main Points
- Test your gold shade on scraps before committing.
- Prep and primer are critical for durability.
- Thin coats yield smoother, longer-lasting results.
- Choose a sealant matched to your environment and finish.