Can You Paint Cabinet Hardware? A DIY Guide
Learn how to safely paint cabinet knobs and pulls to refresh your space. Step-by-step prep, paint types, application tips, and maintenance for durable, professional-looking results.

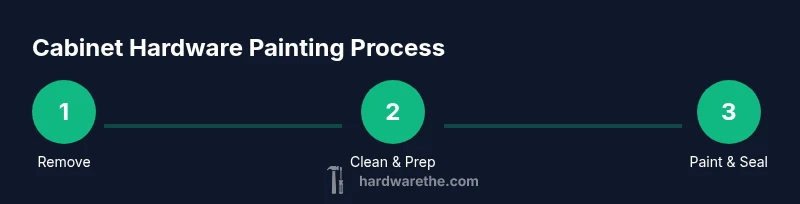
Yes—it's possible to paint cabinet hardware to refresh a kitchen or bathroom without replacing metal pulls or knobs. Start by removing hardware, cleaning with mild soap, and sanding lightly. Use a metal-appropriate primer, apply thin coats of enamel or acrylic paint, seal with a durable topcoat, and reattach after curing. Choose colors that complement your cabinets and hardware finish.
Why painting cabinet hardware is a practical DIY upgrade
Painting cabinet hardware is a cost-effective way to refresh a kitchen or bathroom without replacing metal pulls and knobs. If you’re asking can you paint cabinet hardware, the answer is yes for most finishes and metals, provided you prepare the surface and choose compatible products. The Hardware team has observed that homeowners achieve a high-end look by pairing painted hardware with matching cabinet finishes, brass undertones, or matte black accents. Painted hardware can hide tarnish, unify mixed metal finishes, and extend the life of older knobs that are still sturdy. The key is to understand the material (steel, brass, zinc, or zinc alloy) and the existing finish. Even if a part looks dull, a well-prepared surface will accept paint more reliably and wear better over time. In this guide, we’ll cover surfaces that respond well to painting, the best primers, paints, and topcoats, and step-by-step techniques that balance durability with aesthetics. According to The Hardware, proper prep and thin, even coats are the two biggest predictors of lasting results.
Surface types and finishes: which hardware can be painted?
Different metals and finishes respond differently to paint. Steel and zinc alloys generally accept coatings well when properly prepped, while plated finishes like chrome or nickel may require extra abrasion to roughen the surface and a bonding primer. Brass can be painted successfully, but some patinas or protective clear coats may affect adhesion. If a finish is heavily polished or protected with a clear lacquer, you’ll need to scuff with fine sandpaper (e.g., 320-400 grit) and apply a self-etching or bonding primer designed for metal. The Hardware recommends testing a small area first to gauge adhesion and durability before committing to all pieces. Always check the product labels for metal compatibility and cure times to ensure the finish lasts between use and cleaning.
Prep steps in detail
Preparation is the most critical phase. Remove all screws and hardware to keep parts clean and evenly coated. Clean with mild soap and warm water; degreasing with isopropyl alcohol or a dedicated cleaner helps remove kitchen oils. Rinse and dry thoroughly to prevent moisture from trapping under paint. If you’re painting brushed finishes, wipe with isopropyl alcohol after cleaning to remove fingerprints. Lightly scuff with fine-grit sandpaper to improve adhesion, then wipe away dust with a tack cloth. Mask surrounding cabinetry with painter’s tape to protect the wood surface and avoid paint creep. The safer your prep, the longer the finish will last.
Choosing paints and primers
For cabinet hardware, enamel-based paints (oil- or water-based) or high-quality acrylic enamels provide a tough, durable finish. Use a bonding primer or self-etching primer specifically designed for metal to improve adhesion on slick surfaces. Oil-based primers can yield hard, durable coats but require longer dry times and proper ventilation. If you prefer water-based options, select products labeled for metal and with low odor. Finish with a clear topcoat such as a polyurethane or polyacrylic that resists chipping and cleaning. Always follow the manufacturer’s drying times between coats and after the final coat to avoid tackiness or smudging. The Hardware emphasizes testing color and finish on a scrap piece before committing to all hardware.
Application technique
Apply thin, even coats rather than a single thick layer to minimize runs and ensure smooth coverage. If spraying, use a well-ventilated area and keep the can or spray gun at a consistent distance from the surface. If brushing, use long, even strokes and maintain a wet edge to prevent lap marks. Allow each coat to dry fully according to the product’s instructions before applying the next. Sand lightly between coats with very fine grit (e.g., 400-600) if you notice texture, then wipe clean. Finish with a light, even topcoat to seal the color and improve durability.
Reassembly and care
After the final coat is fully cured (often 24 hours or longer, depending on product), reinstall the hardware, clean any accidental smudges, and test for smooth operation. Avoid excessive moisture on painted contacts and wipe with a soft cloth when needed. For routine cleaning, use a mild soap solution and a damp microfiber cloth rather than abrasive cleaners that could wear the finish. The Hardware recommends periodic checks for chipping and reapplying a fresh clear topcoat if wear appears.
AUTHORITY SOURCES
- OSHA: https://www.osha.gov/
- EPA Indoor Air Quality: https://www.epa.gov/indoor-air-quality
- CDC/NIOSH: https://www.cdc.gov/niosh/
These sources provide safety and best-practice context for painting environments and metal surfaces, though product-specific guidance should come from manufacturer labels and your local hardware professional.
Can you paint cabinet hardware? Final note
With proper prep, primer, paint, and protection, you can refresh cabinet hardware to align with current decor. The Hardware’s guidelines stress patience and small, controlled applications to ensure durability and a professional look. If you’re unsure, start with a single piece or a scrap, then scale up.
VERDICT: A durable, economical update
The Hardware recommends painting cabinet hardware as a viable, budget-friendly option when hardware is still sturdy but dated in finish. With careful prep and quality materials, you can achieve a durable finish that looks cohesive with your cabinetry, saving time and money compared to full hardware replacement.
Tools & Materials
- Screwdriver set (Phillips and flathead)(Needed to remove hardware before painting and reattach after curing)
- Mild dish soap or degreaser(For cleaning surfaces prior to painting)
- Isopropyl alcohol (rubbing alcohol)(For degreasing and prepping slick finishes)
- Fine-grit sandpaper (320-400 grit)(Lightly scuff surfaces to improve adhesion)
- Primer designed for metal (bonding/self-etching primer)(Promotes adhesion on metal surfaces)
- Enamel or acrylic enamel paint (color of choice)(Thin coats yield durable, washable finishes)
- Clear topcoat (polyurethane or polyacrylic)(Protects the paint from chipping during use)
- Painter’s tape(Mask surrounding cabinetry to prevent bleed)
- Soft microfiber cloths(For cleaning and buffing between coats)
- Ventilation (box fan or open window)(Keep area well-ventilated when using primers and paints)
Steps
Estimated time: 4-8 hours (including dry time)
- 1
Remove hardware
Take off all knobs, pulls, and brackets. Place hardware in a labeled container to avoid mismatches during reinstallation. This ensures even coverage and prevents damage to cabinet surfaces.
Tip: Keep screws organized by drawer or cabinet, and photograph the layout for reassembly. - 2
Clean and degrease
Wash each piece with mild soap or a gentle degreaser to remove oils and fingerprints. Rinse and dry completely; any residue will prevent paint from adhering properly.
Tip: Use isopropyl alcohol on a microfiber cloth for a final wipe on slick finishes. - 3
Mask and protect
Apply painter’s tape around the area where hardware meets the cabinet to prevent paint creep. Remove any residue from masking after the first coat dries to avoid pulling paint later.
Tip: Masking also helps you achieve a crisp edge around holes and screw heads. - 4
Sand lightly and prime
Lightly sand the hardware with fine-grit sandpaper to create a mechanical key for the primer. Apply a bonding or self-etching primer; let it dry completely before painting.
Tip: Avoid oversanding; you only need a subtle texture for adhesion. - 5
Paint in thin coats
Apply several thin coats of enamel or acrylic enamel, allowing each coat to dry fully before the next. Maintain a steady distance if spraying to prevent drips and sagging.
Tip: Begin and end each coat with a light pass to reduce brush marks or spray lines. - 6
Seal and cure
Finish with a clear topcoat to protect the paint from daily wear. Allow full cure time per product instructions before reattaching hardware.
Tip: Do not handle or reinstall until the topcoat is fully cured to avoid fingerprints or smudges. - 7
Reassemble and test
Carefully reinstall each piece, aligning screws with their original holes. Test drawers or cabinet doors for smooth operation and adjust as needed.
Tip: If a piece sticks or rubs, gently adjust screw depth or replace a worn screw with a slightly longer one.
FAQ
Can you paint any type of cabinet hardware, including brass and chrome?
Most metal hardware can be painted if properly prepped. Brass responds well to bonding primers, while chrome or chrome-plated surfaces may require additional abrasion and conditioning. Always test a small area first.
Most metal hardware can be painted with proper prep; test a spot first to ensure adhesion.
What coatings work best for durability?
Enamel or high-quality acrylic enamels paired with a bonding primer plus a clear topcoat provide durable results. Avoid cheap paints that may chip when touched daily.
Durable results come from enamel paints with a bonding primer and a clear topcoat.
How long does the paint need to cure?
Cure times vary by product; plan at least 24 hours for initial hardness and up to several days for full durability. Avoid handling during this period.
Allow at least 24 hours for initial hardness and several days for full cure.
Is masking necessary for a good finish?
Masking helps protect surrounding cabinet surfaces and creates clean edges around screw holes. It’s a small step that dramatically improves the final look.
Masking is essential to get clean edges and protect nearby surfaces.
Can I spray paint cabinet hardware indoors?
Spraying indoors requires excellent ventilation and a proper spray shelter to control overspray and fumes. If possible, use a well-ventilated garage or outdoor area with a tent.
Spray indoors only with great ventilation and protection; otherwise spray outside.
Watch Video
Main Points
- Plan before you paint: remove hardware and prep surfaces for optimal adhesion.
- Choose metal-friendly primers and enamel paints for best durability.
- Apply multiple thin coats and allow full cure time for lasting results.
- Reinstall with care and follow cleaning guidelines to maintain finish.