How to Stop Hardware: A DIY Maintenance Guide
Learn practical, proven steps to stop hardware failures before they disrupt your project. Quick diagnostics, preventive maintenance, and reliable routines keep tools and fittings performing.

Goal: Learn how to stop hardware issues before they derail a project. This guide covers practical checks, safe wear mitigation, and routine maintenance you can perform with common tools. You’ll need basic hand tools and common spare parts; following the steps will extend hardware life and reduce unexpected failures. According to The Hardware, proactive maintenance saves time and money.
What It Means to Stop Hardware
When people talk about stopping hardware problems, they mean reducing failures, wear, and unexpected downtime in tools, fasteners, hinges, and cabinets. The goal is not to freeze hardware in place, but to create a predictable maintenance routine that catches wear early. The Hardware team emphasizes that proactive checks, cleanings, and timely part replacement save time and money across home workshops and job sites. In practice, stop hardware means building a simple, repeatable habit: inspect, clean, tighten, lubricate, test, and document. This approach minimizes surprises and extends the life of your components.
Core Principles of Stopping Hardware Problems
There are a few non-negotiable ideas that drive durable hardware performance. First, establish clear installation standards so parts are seated correctly the first time. Second, use the right lubrication and fasteners for each material, avoiding cross-contamination. Third, acknowledge wear symptoms early: looseness, rust, squeaks, and misalignment are signals to act. Fourth, implement a simple schedule that families and teams can follow, even when busy. Finally, track outcomes to learn which actions reduce downtime most effectively. By aligning with these principles, you create a resilient system that withstands regular use.
Quick Diagnostics You Can Run at Home
Start with visible checks: ensure screws and bolts are tight, hinges align, and handles function without binding. Next, inspect for corrosion, dirt buildup, or moisture intrusion around metal parts. Test electrical connections with a multimeter if you work with power tools or appliances, ensuring no loose wires. Listen for grinding, rubbing, or squeaks that indicate worn bearings or misalignment. Finally, confirm the lubrication is appropriate and not attracting dust. These checks help you stop hardware problems before they escalate.
Common Failure Points by Hardware Category
Fasteners often fail from over-tightening or corrosion. Cabinet hardware can sag if mounting holes wear out, while hinges lose alignment with loose mounting screws. Sliding mechanisms degrade with dirt, grime, or graphite-free lubrication. Electrical contacts corrode if moisture enters the panel. By recognizing these categories, you tailor maintenance: replace worn screws, refresh mounting points, clean tracks, and re-torque as recommended by manufacturer guidelines.
Tools and Techniques for Safe Maintenance
Before you touch any equipment, disconnect power if you’re working with electrical devices. Gather a basic toolkit: screwdriver set, pliers, microfiber cloth, degreaser, and light lubrication. Use appropriate lubricants—dry graphite on some locks, silicone spray on others—and apply sparingly. Clean components with a gentle cloth; never use abrasive cleaners on delicate finishes. For stubborn grime, warm soapy water or a mild solvent can help. If screws strip, use a thread-chasing tap or replacement screws. Maintain a clean workspace to avoid misplacing small parts.
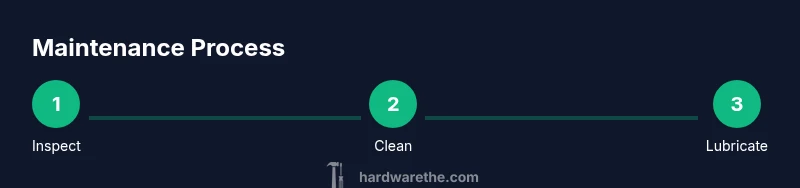
Step-by-Step Maintenance Plan You can Implement This Weekend
Step 1: Inspect all critical components for wear and looseness. Step 2: Clean metal surfaces and tracks; dry thoroughly. Step 3: Tighten fasteners to manufacturer torque guidelines and realign moving parts. Step 4: Lubricate moving surfaces with the recommended product. Step 5: Reassemble, test function under light load, and note any signs of remaining play. Step 6: Schedule the next check and document outcomes in a simple log. Step 7: Review your plan and adjust the maintenance frequency based on usage, environment, and observed wear. Step 8: Store spare parts in a labeled container for quick replacements. Step 9: Share the plan with others who use the same hardware to ensure consistency across tasks.
How to Prevent Future Wear with a Preventive Schedule
Create a calendar for routine checks: monthly quick inspections, quarterly deeper cleanings, and semi-annual torque verification. Use a checklist that covers alignment, fastener security, and lubrication points. Rotate tasks among team members, assign responsibilities, and keep spare parts on hand to reduce downtime. The idea is to normalize maintenance as a project hygiene practice, not a rare event. Implement simple metrics to track improvements, such as reduced downtime minutes per week and fewer calls for adjustments.
When to Call a Professional
If you encounter persistent misalignment after multiple adjustments, damaged tracks, or electrical diagnostics that indicate deeper wiring issues, a professional service is warranted. Do not continue operating equipment that shows heat, buzzing, burning smells, or smoking contacts. A qualified technician can diagnose structural wear, cracks, or hidden corrosion and advise on replacement rates and safety protocols. Early professional input can prevent costly failures and ensure safety.
Common Mistakes and How to Avoid Them
Avoid over-oiling, which can attract dust and gum up parts. Never skip safety steps—disconnect power, wear eye protection, and use proper tools. Don’t force parts that resist; wrong torque or forced movement can stretch threads or crack fittings. Keep parts organized, document changes, and update your maintenance schedule as needed. Also, avoid substituting lubricants meant for one material with others; always follow the manufacturer’s guidance for each component. Finally, test after every adjustment and log the result to build a reliable history of performance.
Tools & Materials
- Screwdriver set (flathead and Phillips)(Assorted sizes to fit common fasteners)
- Torque wrench(If you work with metal panels or precision mounts)
- Pliers (needle-nose)(For gripping and alignment)
- Microfiber cloths(Lint-free for cleanings)
- Degreaser or mild cleaner(Use compatible with finishes)
- Lubricant (silicone spray or dry graphite as appropriate)(Apply sparingly to moving parts)
- Replacement fasteners (screws, nuts)(Keep a small assortment of common sizes)
- Replacement tracks/bearings or gears(Only if you know the exact part is worn)
- Multimeter(For electrical connections when applicable)
- Small magnetic parts tray(Keeps screws organized)
Steps
Estimated time: 2-4 hours
- 1
Inspect critical components
Power down and visually inspect for wear, looseness, misalignment, or damage. Check mounting points and track how parts move. Compare current state to a known-good baseline if possible.
Tip: Take before/after photos to document changes. - 2
Clean surfaces and tracks
Remove dust and grime from all contact points. Avoid harsh chemicals on delicate finishes; use a soft brush and a microfiber cloth. Dry thoroughly before reassembly.
Tip: Wipe in the direction of part movement to avoid drifting dust. - 3
Tighten and realign
Torque screws to manufacturer guidelines and re-align moving parts as needed. Check that edges meet cleanly and there is no binding.
Tip: If possible, use a torque wrench to ensure correct preload. - 4
Lubricate moving parts
Apply the recommended lubricant sparingly to joints and tracks. Avoid oiling everything at once; apply in thin coats and wipe away excess.
Tip: Test one sample area first to confirm compatibility with finishes. - 5
Test under light load
Operate the mechanism through a full cycle at low stress to verify smoothness and alignment. Listen for new noises and observe any stickiness.
Tip: Keep hands clear of pinch points during testing. - 6
Replace worn components
Identify any screws, tracks, or bearings showing significant wear and replace with correct sizes. This prevents cascading failures.
Tip: Keep a small parts kit organized by category. - 7
Reassemble and safety check
Reassemble, ensure guards and covers are secure, and perform a quick safety check. Verify guards deploy and disengage as designed.
Tip: Double-check that wiring is routed away from moving parts. - 8
Document results and schedule next check
Log what was done, measurements if taken, and the next inspection date. Use a simple notebook or digital note for follow-up.
Tip: Set calendar reminders to maintain consistency. - 9
Review maintenance plan
Assess what worked, what didn’t, and adjust frequency based on usage and environment. Share lessons with others using the same hardware.
Tip: Adjust the plan after each major project to improve reliability.
FAQ
What does it mean to stop hardware?
Stopping hardware means reducing wear and preventing failures by implementing a simple, repeatable maintenance routine. It focuses on early detection, proper lubrication, correct fastener tension, and timely part replacement.
It means reducing wear and preventing failures with a simple, repeatable maintenance routine.
How often should I inspect hardware?
Inspect monthly quick checks and perform deeper cleanings quarterly or after heavy use. Adjust the cadence based on environment and observed wear.
Check monthly basics and deeper cleanings quarterly, adjust as needed.
Can I stop hardware problems without replacement?
Yes, many issues can be resolved by tightening, cleaning, and lubing moving parts. Replacement is needed when wear or damage exceeds function.
Sometimes you can fix it with maintenance; replacement is needed if wear is severe.
Is lubricating always safe?
Lubricants should be chosen to match the material and environment. Apply sparingly and avoid contaminated or mismatched products.
Choose the right lubricant and apply sparingly.
What are signs of imminent hardware failure?
Look for persistent looseness, unusual noises, binding, rust, corrosion, or heat. These indicate deeper wear that needs attention.
Watch for looseness, noise, binding, or heat as warning signs.
What if I don’t have the exact replacement parts?
Use compatible substitutes only if specified by the manufacturer. When in doubt, contact a professional or order exact replacements.
Only use substitutes if allowed by the manufacturer; otherwise consult a pro.
Watch Video
Main Points
- Inspect regularly to catch wear early
- Tighten, align, and lubricate per guidelines
- Document results to track improvements
- Schedule and follow a preventive maintenance plan