What hardware for Jellyfin: A practical DIY server guide
Learn what hardware for jellyfin you need to build a reliable home media server. This guide covers CPU, GPU, RAM, storage, and networking with practical ranges for 2026.

Goal: you will learn what hardware for jellyfin you need to run a reliable home media server. We cover CPU/GPU transcoding, RAM, storage, network bandwidth, and cooling, plus practical budget ranges and configuration tips to match your library size, concurrent streams, and remote access. This quick answer helps you plan before buying hardware.
what hardware for jellyfin: core goals
When you plan hardware for Jellyfin, your goals are reliability, smooth playback, and reasonable energy use. The keyword is what hardware for jellyfin to anchor the discussion. For most families, the server should handle direct playback and occasional transcoding without stuttering. The Hardware's guidance emphasizes three pillars: CPU power, memory headroom, and fast storage. By thinking in terms of library size, concurrent streams, and network topology, you choose a platform that stays responsive under peak load. In this section, we outline the practical targets you should aim for before selecting components, avoiding over-design or under-provisioning. According to The Hardware, selecting the right hardware for Jellyfin starts with library size and streaming habits, and the team found that multicore CPUs with adequate RAM and solid fast storage deliver the best bang for the buck in most homes.
CPU considerations for jellyfin
Jellyfin uses CPU primarily for decoding and, when needed, transcoding. A modern multi-core processor with at least four physical cores provides ample headroom for direct play and light transcoding, while six to eight cores help with higher concurrent streams and larger libraries. Consider x86_64 architectures (Intel/AMD) for broad compatibility and robust encoders. If you plan heavy transcoding or multiple 1080p/4K streams, prioritize higher core counts and clock speed, and ensure your cooling is adequate to sustain peak performance. For ARM-based mini servers or NAS devices, verify that the platform offers solid Jellyfin support and GPU acceleration options if you anticipate frequent transcoding.
GPU acceleration and transcoding
Hardware transcoding can dramatically reduce CPU load and improve playback across multiple clients. If your library requires several simultaneous transcodes, a compatible GPU or integrated acceleration (e.g., Intel Quick Sync, NVIDIA NVENC, or AMD VCE) is worthwhile. Not all devices expose GPU acceleration to Jellyfin, so check the platform and drivers first. For lightweight needs, CPU transcoding with modern CPUs may be sufficient; for larger libraries or 4K streams, GPU-accelerated transcodes can keep CPU temperatures lower and improve energy efficiency. Always test with your typical media formats to confirm real-world gains.
RAM and caching strategy
RAM provides the fast path for metadata caching, transcoding buffers, and library indexing. A conservative starting point is 8 GB for small libraries and direct playback; upgrade to 16 GB or more if you maintain a large library or multiple concurrent streams. Memory helps with metadata pulls, thumbnail generation, and database operations, reducing disk I/O. If using Docker containers or virtual machines for Jellyfin, ensure the host has headroom to prevent swapping, which would degrade performance. In practice, monitor memory usage during peak hours and scale up as needed to maintain responsive UI and metadata updates.
Storage architecture for Jellyfin
Storage layout affects both OS performance and media access times. A fast SSD (at least 120–240 GB) is ideal for the Jellyfin OS, database, and caches, while larger, reliable HDDs or SSDs serve as media storage. Separate OS and media drives reduce contention and simplify backups. For larger libraries, consider a RAID setup or a capable single-volume pool with backups to protect against drive failure. Plan media storage with room to grow, and ensure that drive health is monitored so you can replace failing drives before they fail completely.
Network and remote access
Networking is a key bottleneck when streaming high-bitrate video, especially from remote clients. A wired Gigabit Ethernet network is the minimum; 2.5 GbE or 10 GbE is beneficial if you anticipate multiple simultaneous transcodes or 4K streams. If you must rely on Wi‑Fi, use a strong 802.11ac/ax router with a reliable 5 GHz channel and consider bridging the server to a wired mesh if possible. Enable secure remote access via TLS, keep firmware updated, and use a dynamic DNS service if your home IP changes. The Hardware analysis shows that many home Jellyfin servers perform well with a balanced network setup and appropriate QoS rules.
NAS vs PC vs Raspberry Pi: where to host
Choosing the host for Jellyfin depends on your goals and budget. A dedicated NAS can simplify reliability and backups but may limit transcoding performance depending on the model. A repurposed desktop or mini PC offers flexibility and upgrade paths, often at the cost of energy efficiency. Raspberry Pi devices are affordable and low-power but typically struggle with multiple 1080p/4K transcodes or large libraries unless you limit features. For most users aiming for smooth transcoding and easy upgrades, a small form factor PC or a mid-range NAS with a capable CPU and RAM provides the best balance between performance and maintenance.
Budget scenarios for different households
Your budget determines the hardware path. Entry-level builds with a modern quad-core CPU and 8 GB RAM can handle a handful of streams and small libraries, though you’ll benefit from upgrades as your collection grows. A mid-range setup with 6–8 cores, 16–32 GB RAM, and fast SSDs will comfortably support several simultaneous streams and larger libraries. High-end configurations add more cores, 32–64 GB RAM, multiple SSDs for cache and libraries, and robust GPUs for heavy transcoding. Regardless of budget, prioritize a clean software stack, reliable storage, and good cooling to keep Jellyfin responsive over time. The goal is to align hardware with library size, streaming habits, and future growth.
Setup, maintenance, and upgrade plan
Plan a setup that allows gradual upgrades. Start with a solid CPU, adequate RAM, and a fast OS drive; then scale storage and memory as your media collection grows. Regularly back up Jellyfin metadata and library data, and monitor drive SMART status and temperature. Keep Jellyfin and its dependencies up to date and document your configuration so future upgrades don’t disrupt playback. A clean upgrade path reduces downtime and keeps your Jellyfin server reliable for years.
Common pitfalls and troubleshooting tips
Common issues include stuttering during transcoding, high CPU temperatures, and slow library scans. Avoid bottlenecks by profiling CPU and memory usage during peak hours and adjusting transcode settings accordingly. Ensure your storage has sufficient throughput, verify that the network link isn’t saturated, and keep OS and drivers current. When things go wrong, check Jellyfin’s server logs and the client’s playback logs to pinpoint whether the problem is CPU, disk I/O, or network related. A methodical approach helps isolate issues quickly.
Tools & Materials
- Server chassis or enclosure(Rackmount or mini-ITX form factor; ensure ventilation)
- CPU (multi-core, 4+ cores)(x86_64 preferred for broad support)
- RAM (8-32 GB)(Budget to mid-range builds: 8-16 GB; large libraries: 16-32 GB)
- OS/ Jellyfin drives (SSD)(OS and database on fast storage (120-240 GB))
- Media storage drives(HDDs or SSDs with ample capacity; consider RAID)
- GPU (optional for transcoding)(NVIDIA/AMD supported if you plan hardware encodes)
- Network interface(Gigabit Ethernet minimum; 2.5GbE+ for heavier use)
- Power supply(Headroom for drives and GPU (80+ Bronze/Gold))
- Cooling solution(Adequate airflow; consider additional fans)
- UPS or surge protection(Safeguard against power loss and data corruption)
Steps
Estimated time: 90-120 minutes
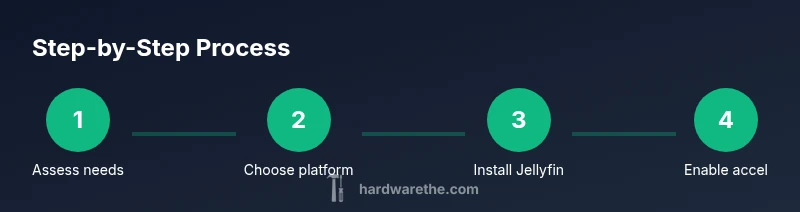
- 1
Assess needs
Identify library size, streaming habits, and whether you will transcode often. Write down the number of simultaneous streams you expect and the typical media formats you serve. This baseline determines CPU, RAM, and GPU requirements.
Tip: Start with a conservative estimate and plan for upgrades. - 2
Choose a platform
Decide between a NAS, a dedicated mini PC, or a repurposed desktop. Each has pros and cons for power efficiency, expandability, and ease of maintenance. Make sure the platform supports Jellyfin and your chosen transcoding options.
Tip: If you expect growth, pick a platform with upgrade paths. - 3
Install OS and Jellyfin
Install a stable OS with Jellyfin from official sources or Docker. Create a dedicated user and directories for media, metadata, and backups. Ensure network access is configured for the server’s IP.
Tip: Use a fixed IP or DHCP reservation to avoid address changes. - 4
Enable hardware acceleration
Install GPU drivers if you plan transcoding offload. Enable VA-API (Linux) or NVIDIA NVENC in Jellyfin’s transcoding settings. Run a test transcode to verify acceleration is active.
Tip: Check Jellyfin status page to confirm hardware acceleration is detected. - 5
Organize media and metadata
Set a clear folder structure for movies, TV, and extras. Point Jellyfin to these libraries and configure metadata downloaders to keep your catalog current without slowing the server.
Tip: Keep a separate cache directory on fast storage for metadata. - 6
Configure remote access securely
Set up TLS, enable authentication, and if needed, use a VPN for remote access. Consider dynamic DNS if your home IP changes. Validate that ports aren’t exposed unnecessarily.
Tip: Use strong passwords and rotate API keys when possible. - 7
Test and tune transcoding
Play back a representative set of files from different clients. Monitor CPU, memory, and network usage during peak times. Adjust transcoding settings to balance quality and performance.
Tip: If stuttering occurs, reduce the number of concurrent transcodes or adjust bitrates. - 8
Plan backups and monitoring
Schedule regular backups of configuration, metadata, and library databases. Set up health monitoring for disks and power to catch failures early.
Tip: Automate notifications for failures or threshold breaches. - 9
Document the setup
Capture the hardware model, OS version, Jellyfin version, and network config. A clear reference saves time on future upgrades or troubleshooting.
Tip: Keep a quick-start sheet for new users.
FAQ
Do I need a GPU for Jellyfin transcoding?
Not always. If you have a modest library and few concurrent streams, a capable CPU with hardware acceleration enabled may be sufficient. A GPU helps when you expect multiple concurrent transcodes or high-bitrate content.
Nope, you can start with a good CPU and enable acceleration; add a GPU later if you need more power.
Can Jellyfin run on a Raspberry Pi?
Yes, Jellyfin can run on Raspberry Pi, but performance is limited. It's suitable for small libraries or direct-play scenarios; transcodes or large libraries may require more powerful hardware.
You can use a Pi for light use, but expect limits with transcoding.
What is the difference between direct play and transcoding in Jellyfin?
Direct play streams media in a compatible format without modification. Transcoding converts video on the fly to match the client’s capabilities, which uses CPU/GPU resources and may reduce quality if resources are constrained.
Direct play is simpler and lighter; transcoding costs CPU and possibly GPU power.
How much RAM do I need for large libraries?
For large libraries and frequent metadata processing, 16–32 GB is a practical range. More RAM helps with caching, faster metadata operations, and supporting additional concurrent streams.
More RAM helps Jellyfin stay fast as your library and user base grow.
Is Jellyfin hardware accelerated transcoding available on all GPUs?
GPU acceleration support depends on the GPU and drivers. Check Jellyfin’s hardware acceleration docs for your platform to confirm supported codecs and enablement methods.
Check compatibility first; not all GPUs support every codec or driver.
Watch Video
Main Points
- Define library size and concurrency before choosing hardware
- Prioritize CPU cores and available RAM for smooth transcoding
- Use SSDs for OS/cache and separate storage for media
- Enable hardware acceleration when appropriate and test
- Plan backups and monitor hardware health regularly