How to Install Hardware in a Computer: A Practical Guide
A practical, step-by-step guide to how to install hardware in a computer safely and effectively. This article covers compatibility, tools, step-by-step actions, testing, and troubleshooting for DIY upgrades. From RAM to PCIe cards, learn best practices with guidance from The Hardware.

This guide shows you how to install hardware in a computer safely and efficiently. You’ll learn the common upgrades (RAM, storage drives, PCIe cards, cooling) and the exact tools and precautions you need. By following these steps, you’ll complete upgrades with confidence and avoid static damage or misalignment. The Hardware team guides you through a reliable, practical approach to how to install hardware in computer.
Why how to install hardware in computer matters
Knowing how to install hardware in computer correctly affects system performance, reliability, and longevity. According to The Hardware, a careful, methodical approach reduces static risk, improper seating, and damage to connectors. A well-executed upgrade isn't just about turning on the PC tomorrow—it’s about lasting stability for years. This guide covers RAM, storage drives, PCIe expansion cards, and cooling components with practical steps, tool recommendations, and troubleshooting tips to help you complete upgrades efficiently. Whether you’re doing a first upgrade or a routine refresh, you’ll stay on track and minimize downtime while you learn how to install hardware in computer. A solid install begins with planning, safety, and precise seating of each component, so keep this why-instruction in mind as you proceed.
Safety and static precautions
Static electricity is the silent enemy of modern electronics. Before you touch any component, ground yourself and work on a non-conductive surface. Use an anti-static wrist strap if possible, and keep metal objects away from motherboard traces. The goal is to avoid any electrostatic discharge that could damage sensitive circuits. Remember also to power down completely and unplug from the wall, then press and hold the power button for several seconds to discharge residual energy. These precautions set the foundation for a safe, reliable install and reflect best practices from The Hardware.
Compatibility and planning your upgrade
Before buying or installing hardware, verify compatibility with your system. Check the motherboard’s manual for supported RAM speeds, slots (DIMM types), PCIe lane availability, and power requirements. Storage interfaces vary (SATA vs NVMe), and case clearance matters for larger GPUs or cooling upgrades. Planning reduces wasted time and prevents components from arriving that won’t fit. This mindset aligns with The Hardware guidance on performing a prepared, compatible upgrade rather than guessing in the moment.
Workspace, tools, and safety essentials
Create a clean, organized workspace with ample lighting and a stable surface. Gather essential tools: a quality screwdriver set (Phillips and possibly Torx), strain-relief cables, a small parts tray for screws, and an anti-static mat or wrist strap. Keep manuals like the motherboard or device guides within reach. A prepared workspace reduces scramble time and helps you stay focused on how to install hardware in computer with minimal risk of damage. The Hardware notes that a tidy workspace correlates with fewer lost screws and quicker reassembly.
Preparing RAM and storage for installation
RAM modules install in fixed, clearly labeled slots on the motherboard. Align the notches on the memory with the slot keys, then firmly press until the latches click. For storage drives, identify the correct interface (SATA or NVMe) and secure the drive with the supplied screws or brackets. Ensure cables are routed away from fans and heat sinks to maintain cooling performance. As you prepare, verify that the motherboard supports the module type and size you’re installing, and confirm the drive’s compatibility with your system. This preparation aligns with best practices in hardware guidance from The Hardware.
Installing PCIe cards and drives
When installing expansion cards, remove the appropriate expansion slot covers and seat the card firmly in the PCIe slot. Use a screw to secure the bracket to the case. For drives, mount into bays or attach to M.2 slots as required by your board, then connect data and power cables as appropriate. Avoid forcing components into slots; if resistance is felt, re-check alignment. A precise, patient approach prevents bent pins and damaged connectors, a point emphasized in The Hardware’s installer guidance.
Cable management, power connections, and final checks
Reconnect the power supply cables and any case fans, ensuring no cables block fans or airflow. Tidy cables with ties or Velcro, keeping routes neat to promote airflow and future maintenance. Before powering on, re-check all seated components, memory positions, and connector orientations. Power up and enter BIOS to confirm hardware is detected and running at rated speeds. If something doesn’t show up, re-check seating and connections. The Hardware stresses that thorough verification reduces post-install issues and improves long-term reliability.
First boot, testing, and post-install troubleshooting
The first boot should show POST success and recognition of the newly installed hardware. If the system boots but reports errors, consult BIOS logs, reseat components, and run built-in diagnostics for memory, storage, or GPU. Keep spare screws and brackets organized in a labeled container as you test. Basic compatibility checks and stress testing confirm a solid installation and help prevent repeat visits to the hardware bench. This phase reflects The Hardware guidance on validating upgrades through testing before use.
Tools & Materials
- Anti-static wrist strap(Ground yourself before touching components)
- Magnetic screwdriver set (Phillips #1 & #2)(Essential for most PC screws)
- Small parts tray(Keep screws and spacers organized)
- ESD-safe work mat or clean surface(Reduces static risk during handling)
- Motherboard and device manuals(Important for compatibility and seating)
- Spare screws/brackets supplied with hardware(Use with case and mount points)
- Cable ties or Velcro straps(For neat cable management)
- Thermal paste (only if CPU heatsink is touched or replaced)(Follow manufacturer guidance if applying TIM)
Steps
Estimated time: 60-90 minutes
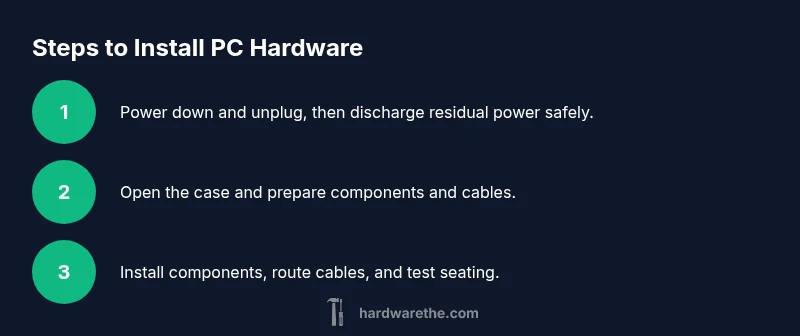
- 1
Power down and unplug
Shut down the computer and unplug the power cord. Press and hold the power button to discharge residual energy. This step prevents electric shock and protects sensitive components during handling.
Tip: Label the power cable and unplugged components to avoid confusion during reassembly. - 2
Open the case and inspect the area
Remove the side panel to access internal components. Visually inspect the interior for any dust or debris and plan cable routes before touching parts. This gives you a clear path for the upgrade and reduces risk of accidental damage.
Tip: Keep track of panel screws in a labeled container. - 3
Ground yourself and prepare tools
Attach the anti-static strap and ensure your workspace is dry and clean. Gather all needed tools within reach before starting. This reduces interruptions and helps maintain static-safe conditions throughout the install.
Tip: Wipe down surfaces and avoid working on carpet. - 4
Install RAM and storage components
Align RAM sticks with the notch in the slots and press evenly until the latches click. For storage, mount drives in their bays or slots and secure with screws. Ensure correct orientation and seating to prevent boot or speed issues.
Tip: Double-check module orientation before seating. - 5
Install PCIe cards and drives
Gently seat expansion cards into the correct PCIe slot and secure the bracket with a screw. Mount drives in their proper bays or connectors, then attach data and power cables. Do not force components; alignment is key.
Tip: Use one hand to guide the card and the other to press evenly. - 6
Reconnect cables and tidy routing
Reconnect power, data, and fan cables, routing them to avoid obstructing fans or airflow. Use cable ties to keep bundles neat and allow adequate cooling. A tidy build makes future maintenance easier and reduces heat buildup.
Tip: Leave a little slack at connectors to prevent stress. - 7
Power on and verify hardware
Power up the system and enter BIOS to verify that new hardware is detected and operating at expected speeds. If something isn’t recognized, reseat the component and re-run basic diagnostics. This final check confirms a successful upgrade.
Tip: If POST fails, consult the board manual for diagnostic codes.
FAQ
Do I need to power off the computer before installing hardware?
Yes. Always power down, unplug, and discharge residual power before handling components to prevent shock and damage. This is a foundational safety step for any hardware upgrade.
Always power off and unplug before handling components to stay safe and avoid damage.
What if I don’t know the motherboard compatibility for my upgrade?
Check the motherboard manual for supported RAM types, PCIe slots, and storage interfaces. Verify form factors and power requirements to ensure compatibility before purchasing.
Check the manual for supported RAM, slots, and interfaces to ensure compatibility.
Can I install hardware without static protection?
Static can damage sensitive components. Use an anti-static strap or mat, avoid touching contacts, and handle components by edges only.
Static protection is essential—use an anti-static strap or mat and handle edges only.
How do I know RAM is installed correctly?
Align the notch with the slot and press until the latches click. Confirm in BIOS or operating system that the RAM shows the expected size and speed.
Make sure RAM clicks into place and appears correctly in BIOS or OS.
Why are some screws not included with my kit?
Install kits vary; use the screws provided with the case or motherboard brackets. If in doubt, consult the manual to identify the exact fasteners required.
Kit screws vary; check the manual to find the exact fasteners you need.
Watch Video
Main Points
- Plan and verify compatibility before installing components.
- Ground yourself and use static-safe tools.
- Seat components firmly and avoid forcing connections.
- Test thoroughly after installation to confirm proper operation.