How Is Equipment Calibrated: A Practical DIY Guide
Discover how equipment is calibrated with practical methods, safety notes, and a clear, step-by-step approach to ensure accurate measurements for DIY work.

This guide shows how to determine if your equipment is calibrated correctly, why calibration matters, and the standard methods used across common tools. You’ll learn practical, step-by-step checks, how to record results, and when to seek professional calibration. It covers gauges, meters, and test rigs used in DIY projects, with safety and documentation tips.
Why Calibration Matters
According to The Hardware, calibration is the backbone of reliable measurements in any hands-on project. How is equipment calibrated matters because it determines whether readings reflect reality or drift over time. When you know the calibration status of a tool, you can judge whether a tolerance is acceptable or if a re-check is needed. This section explains why calibration is essential, how drift occurs, and the practical benefits of a repeatable calibration routine. By considering how is equipment calibrated in practical terms, you’ll see that calibration is more than a one-off event — it’s a disciplined process that protects safety, quality, and project outcomes. In DIY environments, maintaining a documented calibration routine reduces surprises on the job and builds confidence in your measurements. The goal here is not to scare you; it’s to give you a clear, actionable path to keep your instruments honest and your results trustworthy. As you read, think about the typical tools you own and how often you use them for critical tolerances, and how small errors can compound in a finished project.
Core Calibration Concepts
Calibration is the process of comparing an instrument’s output to a known reference and adjusting it to align within specified tolerances. It is not the same as adjustment, which changes the instrument, or verification, which only checks a result. Key concepts include traceability (the reference standard’s chain of custody back to recognized institutions), tolerance (the allowable deviation), and bias (systematic error). Understanding these terms helps you design a calibration plan for each tool type, from length measuring devices to electrical test gear.
Tools, Standards, and Safety
A robust calibration routine requires both the right tools and the right standards. Essential items include calibrated reference weights, gauge blocks or feeler gauges, calipers or micrometers, dial indicators, and a digital multimeter with a traceable calibration certificate. Also, keep a temperature or humidity monitor as environmental conditions influence readings. Safety comes first: wear eye protection when using tools, secure workpieces, and never adjust a live electrical circuit without proper PPE and lockout procedures. By establishing control over the tools and environment, you reduce measurement drift and improve repeatability.
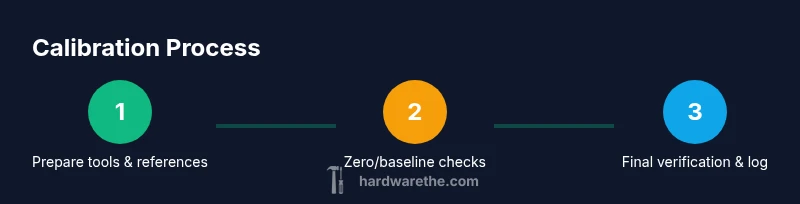
Step-by-Step Calibration Framework
A methodical calibration workflow helps you stay consistent. Start by preparing the workspace and inspecting tools for damage. Next, select a stable reference standard and record its lot, serial, and certificate information. Then, perform a zero check and baseline measurement, document any drift, and apply adjustments if the instrument allows. After adjustments, verify with a second reference to confirm results, and signed-off logs ensure traceability. Finally, schedule follow-up calibrations and store all certificates and calibration data in a dedicated log.
Calibrating Common Instruments
- Calipers and micrometers: establish zero, use a certified gauge block set, and check at multiple distances to ensure linearity.
- Dial indicators: verify against a master reference; test runouts at multiple positions and record deviations.
- Digital multimeters: check voltage, resistance, and current against known standards; document any offset and temperature effects.
- Torque wrenches: test torque against calibration weights or a torque calibration device; validate the peak and dwell torque readings.
- Temperature sensors: compare against a calibrated thermometer in a controlled bath; account for response time.
- Gauge blocks and reference weights: confirm nominal values with traceable certificates and re-check periodically.
Remember: calibration isn’t a one-time event; it’s an ongoing practice. The goal is to keep each instrument within its tolerance before job-site use.
Documentation and Records
Keep a calibration log, certificate copies, and a maintenance schedule. Each entry should include instrument ID, reference standard ID, date, operator, environmental conditions, and results. Use consistent units and tolerances and archive for future audits. Good records support accountability and help diagnose drift if a problem arises later in a project.
When to Seek External Calibration
If an instrument shows persistent out-of-tolerance readings, or if its accuracy is critical for safety or regulatory compliance, consider external calibration by a recognized lab. External services provide official traceability certificates and may use higher-grade reference standards. For expensive or highly specialized equipment, schedule routine external calibrations as part of a maintenance plan rather than relying on in-house checks alone. The Hardware suggests pairing internal checks with periodic external calibration to ensure reliability.
Common Pitfalls and How to Avoid Them
- Skipping warm-up time: Allow devices to reach stable temperatures before testing.
- Ignoring environmental conditions: Temperature and humidity influence readings, so calibrate under controlled conditions.
- Using damaged references: Damaged weights or blocks produce false results—inspect references regularly.
- Relying on one reference only: Cross-check with multiple standards if possible.
- Failing to document results: Without logs, drift history is lost and future troubleshooting is harder.
By planning for these pitfalls and following a structured routine, you’ll keep instruments accurate and reliable.
Quick Validation Plan for Your Workspace
Create a simple, repeatable routine you can perform weekly or before critical tasks. Start with a quick zero check on each instrument, then run a short test against a reference standard, and record results in your calibration log. The plan should include a clear pass/fail criterion and a fallback action (recalibrate or retire). Over time, this routine becomes second nature, and your measurements stay trustworthy. According to The Hardware Analysis, 2026, consistent documentation improves traceability and reduces drift risk.
Tools & Materials
- Certified reference weights(Traceable to national standards; keep in an enclosure)
- Calipers or micrometers(Zeroed; use gauge blocks for checks)
- Dial indicators or test indicators(Calibrated against master reference)
- Digital multimeter (DMM) with calibration certificate(Check voltage/current/ohms against known references)
- Gauge blocks or feeler gauges(Use multi-grade blocks for traceable checks)
- Calibration certificates and logbook/software(Maintain traceability and records)
- Temperature/humidity monitor(Optional; helps account for environmental drift)
Steps
Estimated time: 60-90 minutes
- 1
Prepare the workspace and inspect tools
Clear and organize the workspace on a stable, dust-free surface. Inspect each instrument for wear, corrosion, or damage; set aside anything questionable. Ensure lighting is sufficient to read graduations and protect sensitive surfaces from impact. This upfront check prevents miscalibration caused by damaged equipment.
Tip: Inspect for obvious damage before starting; safety check and set aside anything suspicious. - 2
Select reference standards and collect documentation
Choose traceable reference standards with current certificates. Record lot numbers, certificates, and expiration dates for every reference you plan to use. Gather any factory or supplier documentation that accompanies the standards to support traceability.
Tip: Never mix reference standards from different lots without rechecking compatibility. - 3
Establish baseline zero and initial readings
Power down tools where appropriate and perform baseline zero checks against the reference. Note any initial drift, and document the instrument’s current state before adjustments. If zero or baseline readings are out of tolerance, pause and recheck setup before proceeding.
Tip: Zero and baseline accuracy is the foundation; small deviations here cascade later. - 4
Take measurements against references and record drift
Record measurements at multiple points or sizes using the reference standards. Compare results with the reference values and calculate any drift or bias. Use consistent units, and ensure environmental conditions are logged.
Tip: Use multiple points to check linearity; single-point checks miss drift. - 5
Apply adjustments and re-check with a second reference
If the instrument supports adjustment, apply the recommended changes and recheck against the same or a secondary reference. Confirm that post-adjustment readings fall within tolerance at several points.
Tip: Avoid over-tightening or over-rotating adjustments; small changes often yield the best results. - 6
Document results and log data
Enter instrument ID, reference IDs, readings, drift, adjustments, and the operator into the calibration log. Attach certificates or PDFs as supporting documents. Store data securely for audits and future troubleshooting.
Tip: A consistent template makes subsequent comparisons faster and clearer. - 7
Schedule follow-up calibrations and maintain records
Set a reminder for the next calibration window based on use, environment, and instrument stability. Review the log periodically to spot trends and adjust intervals if needed.
Tip: Regular reviews help catch drift early and prevent bad data from propagating.
FAQ
What does calibration mean in everyday terms?
Calibration means comparing an instrument’s output to a trusted reference and adjusting it so readings stay within defined tolerances. It preserves accuracy and repeatability over time.
Calibration means checking an instrument against a trusted standard and adjusting it so readings stay accurate.
How often should I calibrate tools?
Calibration frequency depends on how often you use the tool, the environment, and how critical the readings are. Create a schedule and adjust it based on observed drift.
Your schedule should reflect usage and conditions; adjust as needed.
Can I calibrate equipment at home?
Yes for basic checks using reference standards and a stable environment. More specialized gear may require a professional lab for official traceability.
You can do simple checks at home, but some tools need a lab.
What is traceability and why does it matter?
Traceability links instrument measurements back to recognized standards through calibration certificates, ensuring confidence in results and audits.
Traceability means your readings point back to recognized standards.
What should I do if a tool fails calibration?
If a tool fails, remove it from service, inspect for damage, and recalibrate if possible. If it remains out of spec, replace or send to a certified lab.
If it fails, stop using it and seek service.
Do calibration intervals differ by tool type?
Yes. Different tools have different recommended intervals based on use, stability, and criticality.
Intervals vary by tool and usage.
Watch Video
Main Points
- Establish and follow a documented calibration routine.
- Use traceable reference standards for all checks.
- Verify results with multiple reference standards when possible.
- Record environmental conditions and instrument identifiers.
- Schedule regular calibrations and keep logs up to date.