Can You Mix Brass Hardware with Stainless Appliances? A Practical Guide
Learn practical guidance on mixing brass hardware with stainless appliances, including finish strategies, care, and design tips to create cohesive spaces. The Hardware team shares actionable steps and maintenance advice.

Yes. You can mix brass hardware with stainless appliances by planning a cohesive finish scheme, keeping a common metal accent, and balancing textures. Start with a primary finish and introduce brass as an accent through cabinet knobs, faucet trim, or lighting. Maintain consistent care and avoid patina gaps by choosing compatible brass tones.
Can you mix brass hardware with stainless appliances? Why this pairing works and when to avoid
can you mix brass hardware with stainless appliances is a common design question for homeowners and DIY enthusiasts. According to The Hardware, thoughtful mixed-metal strategies can enhance a kitchen or bath when approached with intent. The goal is not to overwhelm with competing metals, but to create a visual dialogue that guides the eye. Start by identifying a dominant finish for major surfaces—often stainless on appliances—and introduce brass as intentional accents. If you slip into random brass placement or overly bright finishes, the look can feel chaotic rather than curated. The best-path approach is to plan a small set of brass accents and balance them with the broader stainless palette to achieve a cohesive appearance. The keyword can you mix brass hardware with stainless appliances should guide your planning discussions, but the actual design decisions hinge on light, texture, and proportion rather than pure guesswork.
In practice, mixed-metal spaces succeed when there is an overarching narrative: call it warmth, luxury, or industrial contrast. Textures like brushed brass can soften the cool shine of stainless steel, while highly polished brass can reflect light in a lively way when paired with the right cabinet color and countertop material. The Hardware team has found that a purposeful, restrained approach—limiting brass usage to 2–4 key pieces per room—yields the most elegant results. Remember that consistency in scale, finish aging, and maintenance is essential to avoid a disjointed look as finishes age differently over time.
Understanding finishes: brass vs stainless in design
Brass and stainless belong to a family of metals that offer distinct visual language. Brass introduces warmth, depth, and a vintage-modern vibe, while stainless brings cool, clean reflectivity and a contemporary edge. When you consider mixing them, you’re balancing two primary aesthetics: warmth versus restraint. A successful pairing often starts with a clear decision about the dominant metal and then introduces the other as a supporting character rather than the star. Lighting plays a crucial role: brass accents in warm light zones can appear richer, whereas stainless can recede in low light and feel more neutral. To keep the look cohesive, consider how each metal will interact with your existing cabinetry, countertops, and flooring. The Hardware’s guidance emphasizes choosing brass tones—bright, satin, or antiqued—and matching them to the level of stainless sheen to avoid a jarring contrast. In essence, plan the finish family first and then test small samples in your space to visualize the result before committing.
How finishes influence lighting, reflections, and perceived quality
Metal finishes don’t just sit on a surface; they actively interact with light and surroundings. Brass has warmer undertones that can bounce amber highlights across a room, while stainless reflects the color and intensity of nearby surfaces. When you mix these finishes, you’re shaping how a space feels. A bright, polished brass pull on a gray cabinet can create a warm focal point, while satin brass tones can harmonize with brushed stainless dashboards for a more subdued, refined feel. Perceived quality is also influenced by consistency in the metal’s patina or polish. If brass develops a warmer patina over time while stainless remains highly polished, the space can feel deliberately aged or poorly coordinated depending on the context. The key is controlled aging expectations and maintenance routines that keep both metals looking intentional rather than mismatched.
When mixing is appropriate: space, style, and use cases
Mixing brass with stainless works well in spaces that mix traditional and modern design cues. Kitchens with stone countertops and light wood cabinets can benefit from brass hardware as a unifying accent that adds character. Bathrooms with chrome fixtures may feel refreshed by brass drawer pulls that echo a brass faucet or lighting fixture. The decision should reflect how often the area is used, how easily finishes degrade under wear, and how much time you’re willing to invest in maintenance. For high-use areas like kitchen drawers, choose durable brass finishes (e.g., satin or aged brass) that hide fingerprints better than high-polish options. If you’re outfitting an open-concept space, ensure the brass pieces appear in visual clusters rather than scattered singles to anchor the design. The goal is a coherent, not chaotic, finish story that aligns with your lighting plan and color palette.
In sum, can you mix brass hardware with stainless appliances? Yes, when you approach it with a deliberate plan, consistent tones, and mindful placement. The Hardware notes that success hinges on balance, light, and a clear finish hierarchy that guides the eye naturally across the room.
Practical guidelines for choosing brass tones and stainless shades
Not all brass is created equal for mixed-metal looks. Brass finishes range from bright yellow brass to warm antique and brushed variants. Stainless comes in varieties from mirror-polished to satin, each with a subtly different reflected color. A practical approach is to pick a brass tone that harmonizes with your space’s undertones. If your cabinetry leans toward warm undertones, a warmer brass can feel cohesive; for cooler palettes, brushed or satin brass may read more naturally against stainless. You should also consider the scale of the hardware. Larger pulls and handles in brass can dominate a small kitchen, while tiny brass accents on a cabinet door can feel subtle in a large room. Finally, test paint samples or digital renders to visualize how the brass and stainless interact under your lighting. The Hardware emphasizes starting small with 2–3 brass fixtures and expanding only after you confirm the overall mood.
For stainless, choose a shade that matches or complements your appliance finish—polished finishes pair well with bright brass, while brushed stainless often reads better with antiqued or satin brass. You can also reference the space’s hardware family: if your cabinet hinges or drawer slides are stainless, Brass knobs or pulls can tie the room together without overpowering the primary design language.
Case studies: practical scenarios in kitchens and baths
Consider a modern kitchen with light gray cabinetry and white quartz countertops. A pair of antique brass knobs on the uppers paired with stainless steel appliance handles can create a warm invitation while preserving the clean lines of the stainless appliances. In a secondary bathroom with brushed nickel fixtures, introducing aged brass as an accent on towel bars and a vanity handle can create visual interest without clashing with the existing fixtures. Another example is a farmhouse-inspired kitchen that pairs matte black fixtures with brass knobs on white painted cabinets; here, stainless appliances maintain a sleek modern feel, while brass brings warmth. The key is to tie together the metal finishes through a shared motif—mirror frames, light fixtures, or cabinet hardware shapes—that repeats across rooms.
When evaluating case studies, focus on lighting, color palette, and the finish’s aging behavior. Brass ages differently from stainless, so plan for how both metals will appear in five, ten, or twenty years. The Hardware’s field observations highlight that a cohesive finish system leads to a space that feels deliberately designed rather than an eclectic mishmash.
Installation and maintenance considerations
If you’re installing mixed-metal hardware, start with a clean, dry mounting surface. Use compatible screws and anchors for cabinetry materials, and verify that fasteners won’t create galvanic corrosion when brass contacts stainless components. To avoid water spots and tarnish on brass, clean with a gentle brass cleaner or a vinegar-based solution followed by a dry wipe. For stainless, use non-abrasive cleaners and microfiber cloths to prevent micro-scratches. A light application of mineral oil to brass can slow tarnish in humid spaces, but be mindful not to leave residues that could attract dust. Regular maintenance—at least monthly in busy kitchens—helps sustain the intended look. The Hardware recommends testing any cleaning product on a small hidden area first to ensure it won’t dull the finish or remove patina unexpectedly.
Budgeting and planning for mixed-metal hardware
A mixed-metal approach does not have to be expensive. Start by selecting a high-impact brass piece (a faucet or cabinet hardware) and paired stainless elements that appear in multiple places to create a visual anchor. Calculate total costs by listing all target hardware, then compare finish options within each product line to find affordable matches. Consider mid-range finishes that offer durability and consistent patina over time rather than premium options that may patina differently. The goal is to achieve a cohesive look that doesn’t require a complete overhaul of cabinets and appliances all at once. The Hardware suggests budgeting for a small pilot set first and re-evaluating after a few weeks of real-world use.
When planning, also factor in maintenance costs for brass care products and potential refinishing needs. Keeping a dedicated maintenance kit with soft cloths, mild cleaners, and protective sprays can extend the life of mixed-metal hardware and preserve the visual harmony.
Quick-start checklist: initial steps and common mistakes
- Define your dominant metal first, then add brass as an accent.
- Choose 2–4 brass pieces to begin with and keep other fixtures stainless to avoid clutter.
- Test finishes in both bright and dim lighting to see how the brass reads.
- Maintain consistent hardware scale and shape to prevent visual confusion.
- Avoid mismatching brasses that are too cool or too yellow against the stainless spectrum.
- Don’t neglect maintenance; brass requires gentle cleaning to preserve its intended look.
Common mistakes include overusing brass, selecting mismatched tones, and neglecting lighting. The right balance brings warmth without overpowering the stainless foundation.
Final note on maintenance and future updates
As finishes age, tones shift at different rates. Periodically reassess the overall balance; you may find a small adjustment—such as swapping a single brass pull for a stainless knob—provides a more cohesive look. The Hardware recommends viewing mixed-metal projects as ongoing design updates rather than one-time decisions. With proper planning, you can refresh the space by rebalancing accents rather than doing a full overhaul.
Additional considerations: safety and warranties
Mixing metals typically does not affect safety systems or warranties for most residential fixtures. However, verify product warranties for any integrated appliances and fittings, especially if you’re replacing parts or modifying corrosive-prone installations. Use approved mounting hardware and avoid makeshift fasteners that could compromise safety or structural integrity. If in doubt, consult a professional installer or the manufacturer for guidance.
Tools & Materials
- Finish samples (bright brass, satin brass, antique brass)(Test samples against your space lighting)
- Soft microfiber cloths(For safe cleaning of brass and stainless)
- Non-abrasive cleaner suitable for stainless(Avoid chlorine-based cleaners)
- Brass cleaner or lemon juice + salt paste(Optional for brass polishing)
- Screwdriver set and nut driver(Standard cabinet hardware sizes)
- Masking tape and painter's tape(Mask areas during installation)
- Measuring tape and level(Ensure precise alignment)
- Patience and a small toolkit for adjustments(Track fit and alignment)
- Protective gloves(Prevent fingerprints during handling)
Steps
Estimated time: 2-4 hours
- 1
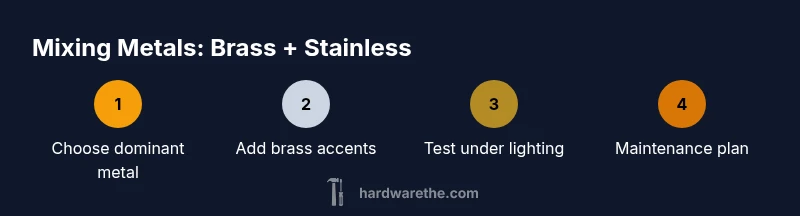
Define your dominant metal
Identify whether stainless or brass will be your primary finish in the space. This decision guides where brass accents will be placed and helps prevent a chaotic mix. Start by selecting a few key stainless elements and plan brass inserts around them.
Tip: Document a rough layout or mood board to visualize balance. - 2
Select brass accents with intent
Choose 2–4 brass pieces that will anchor the room—these could be cabinet pulls, a faucet trim, or lighting fixtures. Match the brass tone (bright, satin, antique) to the undertone of the space. Avoid overloading with too many brass elements.
Tip: Limit high-contrast combinations to maintain elegance. - 3
Test lighting and reflections
Place the brass accents in different lighting conditions to observe how reflections interact with stainless. If possible, test in daylight and evening settings to see how the metal reads under warm and cool lights.
Tip: Take photos at multiple times of day to compare. - 4
Check hardware scale and proportion
Ensure the size and shape of brass pieces are harmonious with existing stainless hardware. A mismatch in scale can look deliberate but end up feeling discordant over time.
Tip: Use similarly styled silhouettes across metals for coherence. - 5
Plan installation order
Install the primary stainless components first, then add brass accents. This helps you verify alignment and overall balance without the brass pieces blocking critical connections.
Tip: Keep originals in safe places in case you need to revert. - 6
Apply care routines for longevity
Establish a simple maintenance routine: wipe brass regularly to avoid fingerprints and protect stainless with a gentle cleaner. Avoid abrasive pads that can scratch finishes.
Tip: Create a small checklist and include brass care steps. - 7
Document and reassess after a month
Review the space after a few weeks to see if the metal balance holds under daily use. Adjust placement or finishes if the look shifts unexpectedly due to lighting or wear.
Tip: Make small, reversible changes first.
FAQ
Can you mix brass hardware with stainless appliances?
Yes. With a clear plan, balanced tones, and careful placement, brass accents can complement stainless appliances for a cohesive look. Start small and test in your space.
Yes. With a clear plan, balanced tones, and careful placement, brass accents can complement stainless appliances. Start small and test in your space.
What finishes of brass pair best with stainless?
Satin and antique/brushed brass typically pair well with various stainless shades because they reduce glare and create warm contrast without overpowering the space.
Satin or antique brass typically pairs well with stainless by creating warm contrast without glare.
How do I care for mixed-metal hardware to prevent tarnish?
Clean brass with non-abrasive cleaners and dry immediately. For stainless, use a mild detergent and microfiber cloth to prevent scratches and water spots.
Clean brass gently and dry it, while cleaning stainless with a mild detergent and microfiber cloth to prevent scratches.
Will mixing metals affect warranty or safety?
Generally, metal mixing does not affect safety or warranties when using standard hardware and approved mounting methods. Check individual product warranties for exceptions.
Usually it won't affect warranties if you use approved mounting methods; always check product warranties for any exceptions.
What are common mistakes when mixing metals in the kitchen?
Overdoing brass, choosing tones that clash, or ignoring lighting can ruin the look. Start small and observe how finishes read in different lights.
Common mistakes include overdoing brass and ignoring lighting. Start small and test in different lights.
Can I mix metals in bathrooms or outdoors?
Yes, but use rust-resistant brass and weatherized stainless, and consider sealing finishes to prevent tarnish or corrosion in humidity and outdoor conditions.
Yes, with rust-resistant finishes and proper sealing for humidity or outdoor use.
Watch Video
Main Points
- Define a dominant metal first
- Introduce brass as intentional accents
- Balance warmth with stainless reflections
- Test in lighting before finalizing
- Maintain consistency in scale and finish