How to Fix Hardware Issues on iPhone: A Practical DIY Guide
Learn a practical, step-by-step approach to diagnosing and repairing common iPhone hardware issues, with tools, safety tips, and testing methods to keep your device working.

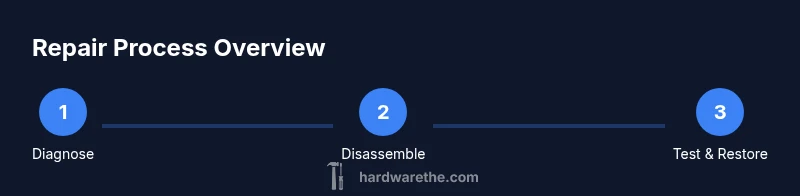
In this guide you will learn how to diagnose and fix common hardware issues on iPhone, from battery and display problems to charging and speaker faults. Follow a safe, tool-assisted process with clearly defined steps, required tools, and thorough testing. This approach emphasizes proper diagnosis, careful disassembly, and verifying results before returning the device to use.
Understanding the scope of hardware issues on iPhone
If you're wondering how to fix hardware issues on iphone, start with a clear diagnosis that distinguishes between a component fault and a software glitch. According to The Hardware, a structured, tool-assisted approach yields reliable results and reduces the risk of secondary damage. Begin with a careful visual inspection and non-destructive tests before any disassembly. You’ll categorize issues into button/sensor faults, display and touch problems, charging and power issues, and audio/camera faults. This categorization helps you decide whether to repair, replace, or escalate to a professional service.
Beyond symptoms, consider the device age, warranty status, and spare parts availability. The Hardware analysis shows that battery and display faults are among the most frequent hardware concerns, but never assume a fault without verification. Keep a record of tests, observations, and replacements to minimize guesswork and protect user data. Always back up important information before attempting any repair; data loss is a separate risk.
Common hardware problems and how to identify them
Typical hardware issues include a swollen or aging battery, a cracked or unresponsive display, charging port problems, defective speakers or cameras, and problematic home button sensors. Start by noting when symptoms occur and whether they’re intermittent or persistent. For example, battery issues often manifest as sudden power drops or unexpected shutdowns, while a loose display cable can cause flickering after reassembly. The goal is to verify the fault with multiple checks before replacing parts.
Document symptoms with dates and, if possible, photos of any physical damage. If you can reproduce a fault with a simple test, that strengthens your diagnosis. Remember that environmental factors like moisture exposure or extreme temperatures can mimic hardware faults. A systematic checklist helps you avoid missing the true root cause and prevents unnecessary replacements.
Tools, safety, and setup for iPhone repairs
Working on iPhone hardware requires careful handling and the right tools. Gather a dedicated repair kit that includes pentalobe screwdrivers, a suction cup, plastic opening tools, tweezers, and anti-static accessories. Safety first: power down the device completely and unplug any cables before opening. Use an ESD-safe workstation and wear a grounded wrist strap if available. Keep track of screws and small parts, labeling them as you go. The goal is to minimize static discharge, accidental punctures, and connector damage while keeping the interior clean and organized.
Step-by-step repair framework (high-level)
A safe repair framework emphasizes diagnosis, controlled disassembly, and careful reassembly. Start by confirming the fault, then prepare your workspace with the right tools. Follow procedural checks for connectors and shields, replace only the faulty component with a compatible part, and re-test thoroughly. This section outlines the logical flow without duplicating the step-by-step details that follow.
Using this framework helps ensure you don’t overlook a secondary issue, such as a damaged connector or adhesive that traps dust. The goal is not just to fix a symptom but to restore overall reliability while preserving data and device integrity.
When to repair versus replace and sourcing parts
Many hardware issues can be resolved with a careful repair, particularly if the fault is a damaged connector, worn battery, or a scuffed screen that still functions. However, if the iPhone is older and multiple failures occur, consider a battery-first or screen-first replacement to extend overall life. Always source authentic or high-quality compatible parts from reputable suppliers. Check compatibility by model number and batch codes, and confirm return policies in case parts are incompatible. The decision to repair versus replace should weigh cost, risk, and long-term usefulness.
Post-repair testing and verification
After reassembly, power the device cautiously and perform a battery, display, touchscreen, camera, mic, and speaker test. Confirm that the display responds smoothly, that the camera focuses, and that charging works reliably on different cables. Validate sensors, loudness levels, and physical buttons. If any test fails, revisit the suspected components and recheck connectors. Proper testing ensures the repair is durable and safe for daily use.
Tools & Materials
- Pentalobe screwdriver (P2)(iPhone external screws; keep track of each screw's location)
- Suction cup and opening picks(For screen separation without damage)
- Plastic spudger and nylon tool(To disconnect cables without marring housings)
- Tweezers (anti-static)(Handling small components and connectors)
- ESD-safe wrist strap(Prevents static damage to logic boards)
- Replacement parts kit (battery/display/camera)(Only if diagnosing or replacing the specific fault)
- Isopropyl alcohol wipes(Clean contacts and surfaces before reassembly)
- Magnetic mat or organizer(Keep track of tiny screws)
- opening reseal tape or adhesive strips(Reapply as needed for waterproofing)
Steps
Estimated time: 60-120 minutes
- 1
Power down and disconnect from power
Shut down the iPhone completely and unplug any connected cables. This reduces the risk of short circuits while you work. If the device is unresponsive, perform a standard forced restart before proceeding.
Tip: Ensure the device has cooled down if it was in use to avoid heat damage during disassembly. - 2
Open the chassis with care
Remove the external screws with a P2 screwdriver and gently separate the display using a suction cup and opening tool. Work slowly to avoid bending the frame or damaging the front-facing sensors.
Tip: Support the display gently; never pry from the connectors directly. - 3
Disconnect battery safely
Locate the battery connector and carefully unplug it using a plastic tool. This isolates power, reducing the risk of a short when reconnecting other components.
Tip: If you see corrosion or swelling, stop and replace the battery rather than continuing. - 4
Inspect connectors and cables
Check all ribbon cables and connectors for signs of wear, debris, or loose seating. Reseat any connectors using a consistent, straight motion and avoid applying sideways pressure.
Tip: Use a bright light and magnification if needed to spot bent pins. - 5
Replace the faulty component
Install the new part (battery, display, or camera) and ensure it matches your model. Reconnect the cables in the correct order and secure any shields.
Tip: Do not reuse old adhesive if the part includes new seals; reseal as recommended by the part provider. - 6
Reassemble with care
Reconnect the battery, realign the display, and reattach screws in their original positions. Ensure no cables are pinched and the chassis sits flush.
Tip: Double-check screw lengths and positions to prevent misalignment. - 7
Power on and run tests
Power up the device and run a battery, screen, camera, microphone, speaker, and sensor test. Confirm touch response and verify that the device charges correctly with multiple cables.
Tip: If the device won’t boot, retrace steps to inspect connector seating. - 8
Document results and monitor
Record the component replaced, the symptoms observed, and the test results. Monitor performance for a few days to ensure long-term reliability.
Tip: Keep a spare parts log in case future maintenance is needed.
FAQ
What are the most common hardware issues on iPhone?
Battery wear, screen damage, charging port faults, camera and speaker problems are among the frequent hardware concerns. Diagnosing accurately before replacement saves time and money.
Common issues include battery wear, screen damage, charging port faults, and camera or speaker problems. Start with careful diagnostics before replacing parts.
Can I fix hardware issues myself at home?
Yes for straightforward problems with the right tools and safety knowledge. Complex faults or water exposure often require professional service to avoid further harm.
Yes, you can fix some issues at home if you have the right tools and stay within safety guidelines; complex faults may require a pro.
Should I replace the battery first or the display?
Prioritize replacing the component that most heavily correlates with your symptoms and cost. If the battery is swollen, replace it first for safety and reliability.
If you see swelling, start with the battery; otherwise, prioritize the component responsible for your main symptoms.
Will opening my iPhone void the warranty?
Opening an iPhone can affect warranty status depending on the service provider and device. Check the terms and consider professional service if under warranty.
Opening the device can affect warranty; verify terms with the provider before proceeding.
What safety precautions should I follow?
Power down before starting, use ESD protection, work on a clean surface, and avoid puncturing the battery or cables. Wear eye protection if a component may snap.
Power down, use ESD protection, keep a clean work area, and avoid puncturing any battery or cables.
Where can I source reliable replacement parts?
Use reputable vendors and verify compatibility by model, coloration, and batch numbers. Review return policies in case parts don’t fit.
Buy parts from reputable sources and check compatibility; keep returns handy if something doesn’t fit.
Watch Video
Main Points
- Identify the fault before disassembly.
- Power down and unplug before opening the device.
- Use proper tools and ESD precautions.
- Source authentic parts and follow model-specific guides.
- The Hardware recommends documenting screws and steps as you go.