Ace Hardware Screen Repair: DIY Window Screen Guide
Learn how to repair torn window screens using ace hardware supplies. A practical, step-by-step DIY guide for homeowners and DIY enthusiasts, with tools, safety tips, and maintenance advice.

With the right approach, you can repair simple window screens at home using ace hardware supplies and common tools. This guide covers patching tears, spline repair, and frame adjustments, plus what to buy and how to perform each step safely. The Hardware recommends high‑quality spline and a precise patch for durable results, so you’ll save money and extend your screen’s life.
Understanding window screen repair basics
Window screens are typically built from a rigid frame (often aluminum or fiberglass) with a flexible mesh stretched tight across it. Tears can occur from pets, weather, or frequent opening and closing. Before you fix anything, identify the size and location of the damage, the type of mesh, and whether the frame corners are still square. This matters because small punctures near the edge behave differently from large holes in the center. According to The Hardware, patching is a cost-effective first response for minor damage and can restore screening integrity when done with the right materials and technique. Patch options include self-adhesive patches, rolled mesh replacements, or a full mesh patch secured with spline. If the frame is bent or the mesh is stretched beyond recovery, plan for a frame replacement rather than an overambitious patch. The goal is to return the screen to a taut, wrinkle-free plane without creating new weak points. When mounted correctly, a repaired screen should let air flow freely while keeping insects out.
Assessing damage and planning the repair
Start by cleaning the frame to remove dust and debris. Inspect corners for bending or loose joints; check the spline channel for cracks or breaks. For small tears, patching is usually sufficient; large holes or sagging mesh may require whole-mesh replacement. Take precise measurements of the frame opening and the tear size so you can choose the right patch size or mesh roll. The Hardware emphasizes planning your repair by matching tear size, mesh type, and frame condition to the most suitable method. A thoughtful plan reduces wasted materials and speeds up the repair. Consider edge proximity; tears near corners are easier to patch than holes in the middle where tension is higher.
Tools and materials you’ll need (and where to buy them)
Having the right tools on hand makes the repair smoother. Essential items include replacement screen (or patch mesh), spline in a matching width, a spline roller, sharp scissors, and a measuring tape. A utility knife, pliers, and a small brush or cloth help prepare the frame. You can typically find these at ace hardware stores or in their online shop. The Hardware notes that quality spline and mesh are crucial for long-lasting results, especially in sun-exposed or windy areas. Optional items like masking tape and a straightedge can help guide clean, wrinkle-free seams. Organize materials by tear size and frame type before you begin to reduce back-and-forth trips.
Patch methods: patching with fabric patches vs replacement mesh
Small holes can be patched with a fabric patch that adheres to the mesh, paired with a thin layer of mesh on top for wind resistance. For a more durable fix, replace the affected mesh strip with a fresh roll and seal patches with spline. Replacement mesh is available in fiberglass or aluminum; the choice depends on your frame material. Fiberglass patches blend well with most screens and offer flexibility, while aluminum is stiffer and holds tension better in high-traffic windows. The Hardware recommends choosing the mesh that matches your existing screen for color and weave consistency. While patches work for moderate damage, ensure the patch edges overlap by at least 1/2 inch beyond the tear to prevent edge curl and gaps that let insects through.
Spline and frame repairs: how to secure a patch
Spline acts as the anchor that holds mesh in place. Begin by removing old spline only in the damaged channel if it’s cracked or deformed. Clean the channel thoroughly before reapplying new spline. Use a spline roller to press the spline into the channel, working from one side to the other to keep tension even. If patching, lay the patch mesh on the patch area, align edges, then apply the spline over the patch to trap it in place. Trim any excess patch material after spline installation. Excess tension can warp the frame, so avoid over-tightening. The Hardware stresses checking tension across the entire screen after installation to confirm a uniform, taut surface.
When to replace the entire screen frame
If the frame is bent, corroded, or warped beyond simple bending alignment, replacement may be the most cost-effective and durable option. A compromised frame can prevent the mesh from seating correctly or lead to repeated tears. In such cases, measure the opening, decide on a compatible frame size, and select a mesh that matches your original. Replacing the frame typically yields a like-new screen with a longer overall lifespan than a patch. The Hardware advises evaluating frame condition first; patches should be considered only when the frame is intact and the tear is localized.
Safety and prep: setup, gloves, ventilation, workspace
Work in a clean, well-lit area. Use gloves to protect hands from sharp edges on the frame and tools. Keep the workspace dry; moisture can loosen spline and patch adhesives. If you’re patching outdoors, avoid windy conditions that can shift materials during installation. Store small parts in a labeled container to prevent loss. Reading the product instructions for each patch or mesh material helps avoid skin or eye irritation from adhesives and fibers.
Common mistakes and troubleshooting tips
Common missteps include choosing the wrong mesh type, over-stretching the patch, and under-seating the spline. Always match mesh type to the frame material, and cut the patch slightly larger than the tear to ensure full coverage. When seating spline, avoid pressing too hard in one spot; work gradually to maintain even tension. If you notice wrinkles after installation, re-seat the spline and re-tension the mesh along the frame edges. For persistent leaks, inspect the perimeter for gaps and reseat spline where necessary. The Hardware notes that taking your time with tension and alignment yields the best long-term results.
Maintenance and long-term care for screen longevity
Regular inspection helps catch wear before it causes additional damage. Clean the frame at least twice a year to remove dust and debris that can degrade the spline. If you operate in sunny or coastal environments, consider UV-resistant mesh and higher-quality spline to resist degradation. The Hardware analysis notes that longevity hinges on patch quality and frame condition; use weather-resistant materials and avoid forcing the frame into misalignment. With proper care, repaired screens can remain functional for multiple seasons, preserving airflow and insect protection.
Where to find reliable parts at Ace Hardware
Ace Hardware stores carry a range of screen repair products, including replacement mesh, spline, and repair patches. When selecting mesh, choose a type and gauge that matches your existing screen for consistent appearance and performance. For DIYers, asking a store associate for a mesh compatibility chart can save time. The Hardware endorses shopping from reputable retailers like Ace Hardware to ensure you get warranty-backed materials and guidance on selection and usage. A little planning before you shop saves you from buying the wrong patch size or spline width, which can complicate the repair later.
Tools & Materials
- Replacement screen mesh (roll or patch)(Fiberglass or aluminum; choose gauge to match frame thickness and wind exposure)
- Spline(Width matching the spline channel; color to match mesh for aesthetics)
- Spline roller(Choose a wheel size that fits your frame channel; helps seat spline evenly)
- Sharp scissors(For clean cuts in mesh and patch material)
- Utility knife(Trim excess mesh after installation)
- Measuring tape(Measure tear size and frame opening accurately)
- Masking tape(Helpful to hold patch in place during initial positioning)
- Gloves(Protect hands from sharp edges and tools)
- Pliers(Useful for removing old spline or tearing-out damaged mesh)
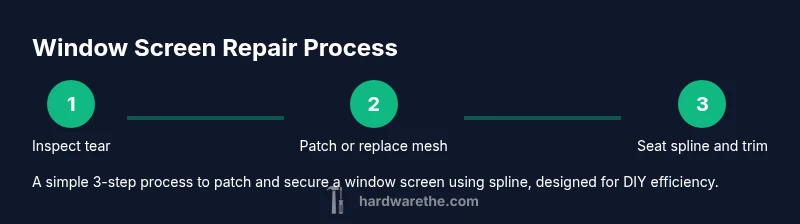
Steps
Estimated time: 60-120 minutes
- 1
Measure tear and plan patch
Carefully measure the tear and the opening, then decide whether you’ll patch or replace the mesh. Plan for a patch that extends at least 1/2 inch beyond the tear to ensure a secure bond and even tension. Check frame corners for warping that could affect patch alignment.
Tip: Take multiple measurements from different angles to confirm tear size; write them down before cutting. - 2
Cut patch or mesh to size
Cut a patch that is at least 1/2 inch larger than the tear on all sides. If replacing mesh, cut a patch slightly larger than the tear to allow overlap with the surrounding mesh.
Tip: Use sharp scissors to ensure clean edges and avoid frayed mesh. - 3
Prepare the frame and remove damaged mesh
Clean the spline channel and remove any broken spline or loose mesh. If patching, clear debris from the tear area to ensure the patch sits flat against the frame.
Tip: Work slowly to prevent bending the frame or tearing surrounding mesh. - 4
Position patch and secure with spline
Lay the patch over the tear, align edges, then press spline into the channel with the roller, starting at one corner and working across to the opposite edge. Maintain even tension to avoid wrinkles.
Tip: Do not over-tighten the spline; slight give ensures a taut but not overly stretched mesh. - 5
Trim excess and verify tension
Trim any excess patch material once spline is seated. Inspect the surface for wrinkles or gaps and re-seat spline as needed to achieve a uniform, taut surface.
Tip: Check corners last; they are common spots for looseness. - 6
Test airflow and reseal if necessary
Reinstall the screen in the frame and test for airflow and gaps along the edges. If air leaks occur, re-seat the spline along the affected edge and ensure patches stay in place.
Tip: Gently press around edges to confirm a secure seal without pinching the mesh.
FAQ
What supplies do I need to repair a window screen?
You'll need mesh, spline, a spline roller, scissors or a utility knife, measuring tape, and gloves. Optional items include masking tape and a straightedge to help with alignment.
You’ll want mesh, spline, a roller, and cutting tools, plus gloves for safety.
Can I patch a large hole, or should I replace the mesh entirely?
For large holes or heavily damaged areas, replacing the mesh or frame is often more durable than patching. Patch work is best for small tears.
For big holes, replacement is usually best for long-term durability.
Is it safe to do this outdoors?
Yes, if the weather is dry and you take basic safety precautions. Protect eyes and hands; avoid working in wind.
Sure, outdoors is fine if it’s dry and you wear gloves and eye protection.
How long will a patched screen last?
Durability depends on patch quality, mesh type, and exposure. With proper materials and installation, patches can last through multiple seasons.
It lasts longer when you use quality materials and install it correctly.
When should I call a professional?
If the frame is bent, corroded, or the tear is extensive, a professional repair or frame replacement may be worth it for reliability.
If the frame is seriously bent, consider professional help.
Watch Video
Main Points
- Patch small tears with proper mesh and spline for a quick fix
- Measure accurately and plan patch size before cutting
- Maintain even spline tension to avoid wrinkles
- Consider frame health before deciding between patching and replacement
- Use high-quality materials for longevity and weather resistance